THE CONSERVATION OF A PLASTIC MASK BY MARISOLW. T. Chase
5 REPAIR OF THE MASKREPAIR OF THE MASK began by checking the fit of the two pieces. It was not good. The rose petals on the proper right rose had come out of place when the break occurred, and would not allow the two pieces to fit together smoothly. These petals were slightly pared down with a scalpel so that the break would fit tightly. One mm. of petal was the maximum removed at any spot. At the end of this paring process a piece of carbon paper was used to detect areas which did not fit perfectly: these areas were also pared down with a scalpel until the two pieces of the mask fit together exactly. Both broken surfaces were cleaned and degreased with VMP naphtha. Areas of conchoidal fracture along the edge of the mask and areas of fracture in other spots where pieces had been lost were filled in with microcrystalline wax, (MultiWax 445), to establish a casting space for the Clearcast resin when it was later poured in. The break over the proper left eye occurred in the eyebrow which had been partially lost. This was also compensated by filling with microcrystalline wax. The repair on the left eyebrow can be seen in Figure 5a.
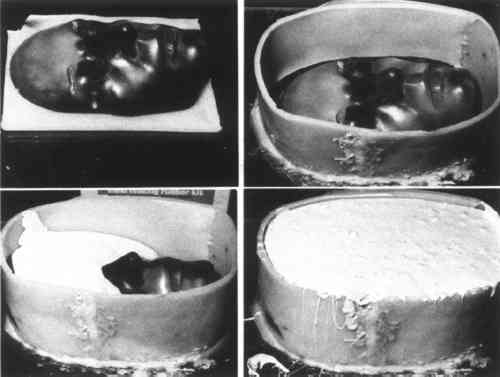
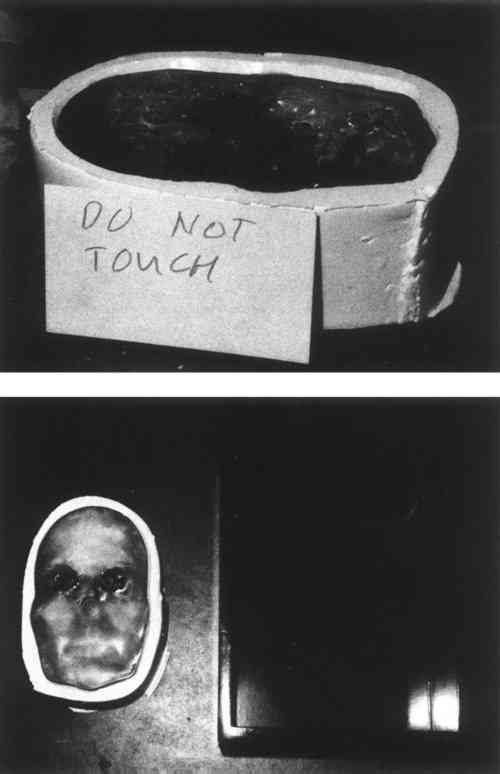
Wax was then slabbed and cut for making the enclosure to hold the mold. A wax slab was pressed onto a piece of plate glass, and the back of the mask laid onto it (Fig. 5a). A wax dam was then formed around the mask (Fig. 5b). Silicone rubber was then poured in. Three pounds of silicone rubber were used for the mold (Figs. 5c and 5d). The mold was allowed to set for four days before removal. The mask was removed from the mold; all of the wax fillings were then removed from the fractured and broken areas. VMP naphtha was used to clean these areas. The mold was carefully cleaned, and any mold flash which appeared on the break line was carefully pared down with a scalpel to flatness. The mask itself was cleaned again with VMP naphtha. It was set back in the silicone rubber mold and Clearcast resin mixed up, degassed, poured in and used to fill the cracks in exactly the same procedure employed on the test piece. The Clearcast resin was allowed to extrude upwards and over the back of the mask. Through the clear plastic of the mask some resin could be seen extruding onto some areas of the front, but we decided to leave it alone at this stage. This later proved to be a mistake; we should have protected the front and the back with some sort of masking agent (such as a silicone or a wax solution) where we did not want the resin to adhere. The repair was then allowed to set for an extended period (Fig. 6a).
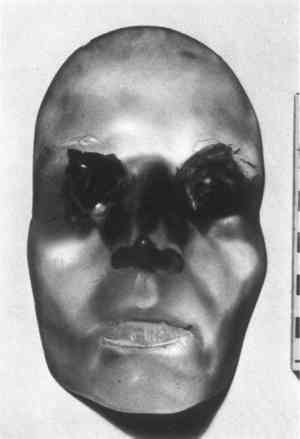
In the meantime the box for the mask was cleaned and refinished with a commercial black lacquer. A hole was drilled in the center of the previous pin to locate the mask the box when it was remounted (Fig. 6b). The mask was removed from the mold after about four months of drying (setting). Excess Clearcast was cleaned off mechanically. The joint appeared to have mended quite well. A few small air bubbles and some slight filminess can be seen as on the test piece, but, in normal light, the break is almost invisible. Figure 7 shows the mask after repair but before remounting.
|