A METHOD OF MOUNTING PARCHMENT USING HAIR SILK
MARGARET LAWSON
5 METHODS OF MOUNTING
5.1 SINGLE MOUNTS
Single mounts are used to exhibit a single bifolio. The bifolio is stitched through the pre-existing sewing holes along the spine fold to the four-ply rag backboard. A double-step or eight-ply upper window mat provides protection for the floating object, preventing any natural undulations in the page from touching the Plexiglas.
Please refer to figure 1a, Single mount (left diagram), throughout the following description.
- The object is centered and weighted in place.
- Holes are marked in the center of the sewing stations—the pre-existing sewing holes along the spine fold—with a needle and hammer. Holes for
2
Skein of hair silk
3
Hair silk in braid form
4
Pin vise and drill bits
side straps are marked close to the outside edges of the art but not touching it (fig. 5). The art is removed, and holes are drilled with a pin vise (fig. 6).
- The hair silk is threaded through a needle and knotted. The knot is taped to the middle of the backboard with self-adhesive linen tape.
- Working over a light box to match up drilled holes with sewing stations, the needle is drawn up the center hole of the mat at position no. 1 in fig. 1a and through the middle sewing station of the bifolio.
- As shown in figure 1a, the site of no. 2, the upper middle hole, the needle passes down and under the backboard (fig. 7). In proceeding, keep in mind that the hair silk should be neither loose nor under any tension as the “stitches” or straps are formed. The hair silk simply holds the object comfortably in place.
- At position no. 3, the top hole, the needle comes up to the front and passes back down at no. 2, the middle upper hole.
- The needle and thread continue under the back-board to the center hole, no. 1, where it comes back up.
- The needle and thread pass down to no. 4, and back up at no. 5, the bottom hole. Passing over the front the needle goes down one last time at no. 4 where the end of the thread is wrapped around a piece of self-adhering linen tape and taped to the back mat to hold the object gently but securely in place.
- Side straps are attached separately as single stitches on each side. The thread is taped to the back and passes up to the front bottom, figure 1a, at position A and down at position B on the left, where it is attached to the backboard with linen tape. The same procedure is followed on the right side.
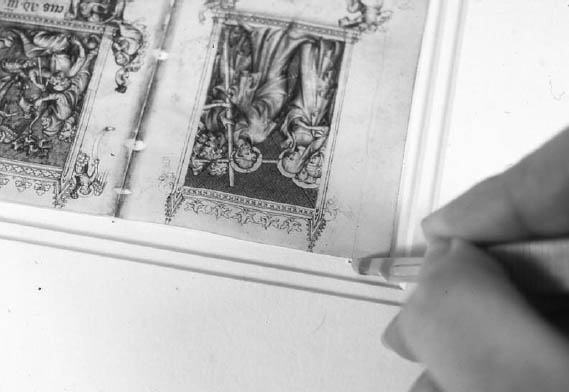
- By using a scalpel to push a few disturbed fibers at the edge of the hole into the hole (fig. 8), sewing holes can be visually minimized. All tape on the backboard is burnished to ensure it is adhered and will hold the hair silk in place.
5.2 DOUBLE-SIDED MOUNTS
Double-sided-mounts permit a bifolio to be centered and floating inside a double-sided window mat. The rag board on each side is eight-ply, with one side designated as the back mat. A series of carefully angled hair silk loops originating from the midtop and
Fig. 5.
Marking holes with a needle and hammer
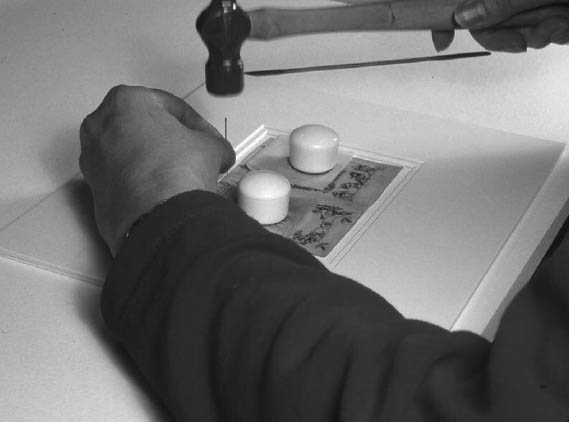 |
Fig. 6.
Drilling holes with pin vise
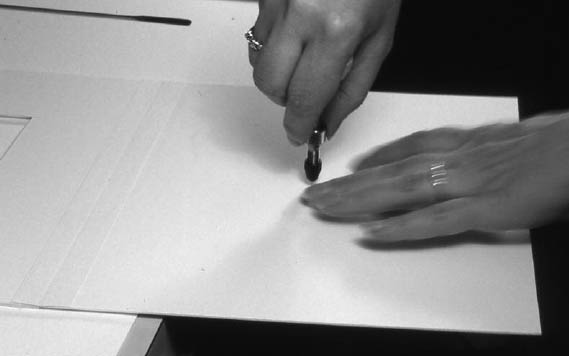 |
Fig. 7.
Passing needle down upper hole (see fig. 1a, Single mount, no. 2)
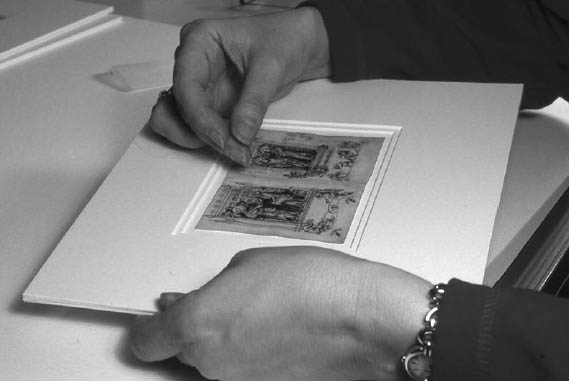 |
Fig. 8.
Scalpel blade pushing fibers into drilled hole
 |
midbottom of the mat, through the top and bottom sewing holes in the vellum, balance the leaf inside the mat board, effectively floating it in air. Vertical threads are secured from the top of the mat to the bottom on either side, both above and below the object, preventing the edges of the page from flapping loosely or drifting too far backward or forward. All taping of the hair silk is done on the back mat.
Please refer to figure 1b, Double-sided mount (center diagram), throughout the following description.
- For double-sided mounts, the bifolio is centered in the mat window on a small piece of glassine to keep the object in plane with the mat during the initial stages of taping and adjusting the hair silk threads. The glassine can be removed midway during the mounting process as the object becomes secured. Glassine was selected as a support because it is translucent, permitting verification that the object remains centered on the mat below. The slick surface allows for easy removal of the support when it is no longer needed.
- The double-sided mount utilizes the kettle stations at the midtop (head) and midbottom (tail) of the bifolio or manuscript page. (These holes allowed for the binder to link one quire or signature to another in the process of sewing the book.)The knotted end of the hair silk is taped near the midtop center of the back window mat, a little to the left. The threaded needle is passed through the top kettle station of the object and pulled slightly to the right of the midtop, forming a V-shaped stitch that can be attached with tape near but not on top of the first side of the V-shaped taped thread. The same procedure is followed midbottom.
- Thread tension is readjusted as needed by gently increasing or decreasing the V-shaped angle of the thread at the top and bottom and retaping so the bifolio floats precisely in the desired position within the mat window. It may be necessary to jiggle the arrangement several times and add a second and third thread before it balances perfectly and feels absolutely secure.
- One hair silk thread is taped on the back mat as a strap under the left side, and one thread is taped on the right back mat as a strap on the right underside of the bifolio.
- Similarly one thread is passed over on the left and one on the right topside of the bifolio and taped to the back mat so that the vellum pages are supported recto and verso, allowing for some natural movement of the page but keeping the edges from flapping loosely. All taping is carried out on the back window mat. When all the elements are perfectly balanced, the tape is burnished to be certain the tape adhesion to the mat board is strong and the hair silk is held securely.
5.3 NESTED MOUNTS
Nested mounts allow two separate bifolios to be shown together as they would appear in the book. Nested mounts use the same basic mat as the single mounts, but two bifolios are stitched together, through pre-existing sewing holes along the spine fold, to the backboard. The top bifolio is folded over to show the appropriate facing page, and holes are drilled in the backboard for the side straps that pass over the outer edges of the leaves. One strap passes over the single side of one-half of the bottom bifolio, and the other strap covers the folded-over upper bifolio plus the other half of the bottom page (fig. 9).
Please refer to figure 1c, Nested mount (right diagram), throughout the following description.
- The nested mount is accomplished in the same manner as single mounts, except the side holes are drilled after the two bifolios have been stitched to the back mount at the spine fold and the top page has been folded over. This procedure is followed because the size and shape of the pages vary slightly.
- Following final taping and burnishing of the tape on the back, the outside holes in the backboard can be diminished in appearance as mentioned previously—by using a scalpel to tweeze a few paper fibers back into the hole.
|