THE TREATMENT OF CHINESE ANCESTOR PORTRAITS: AN INTRODUCTION TO CHINESE PAINTING CONSERVATION TECHNIQUESVALERIE LEE, XIANGMEI GU, & YUAN-LI HOU
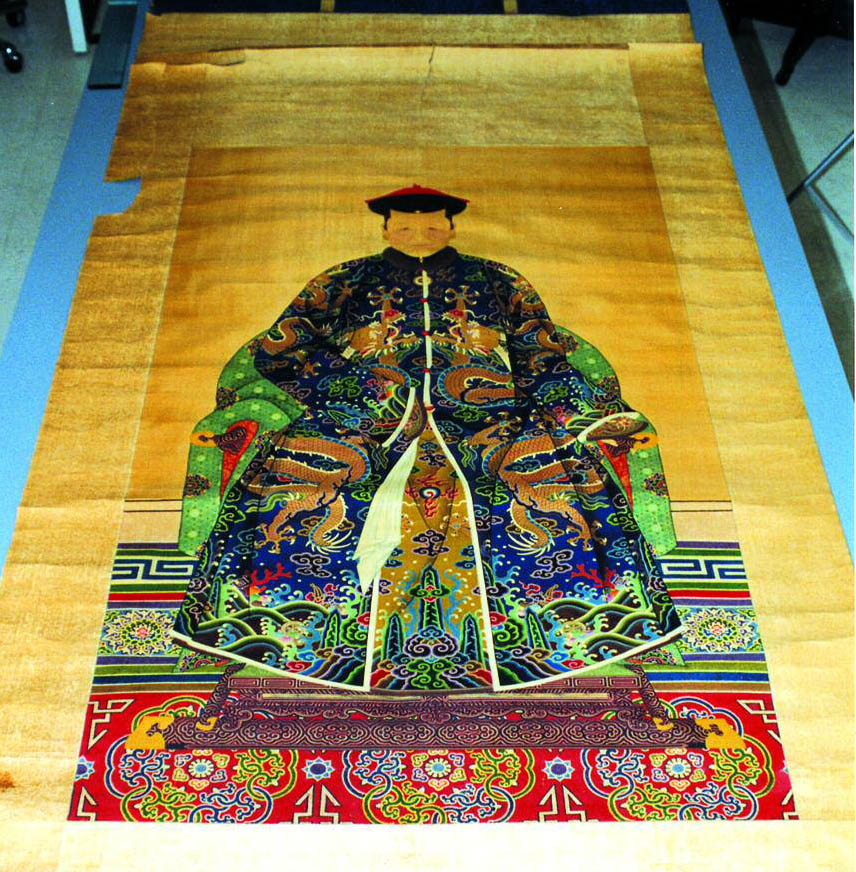
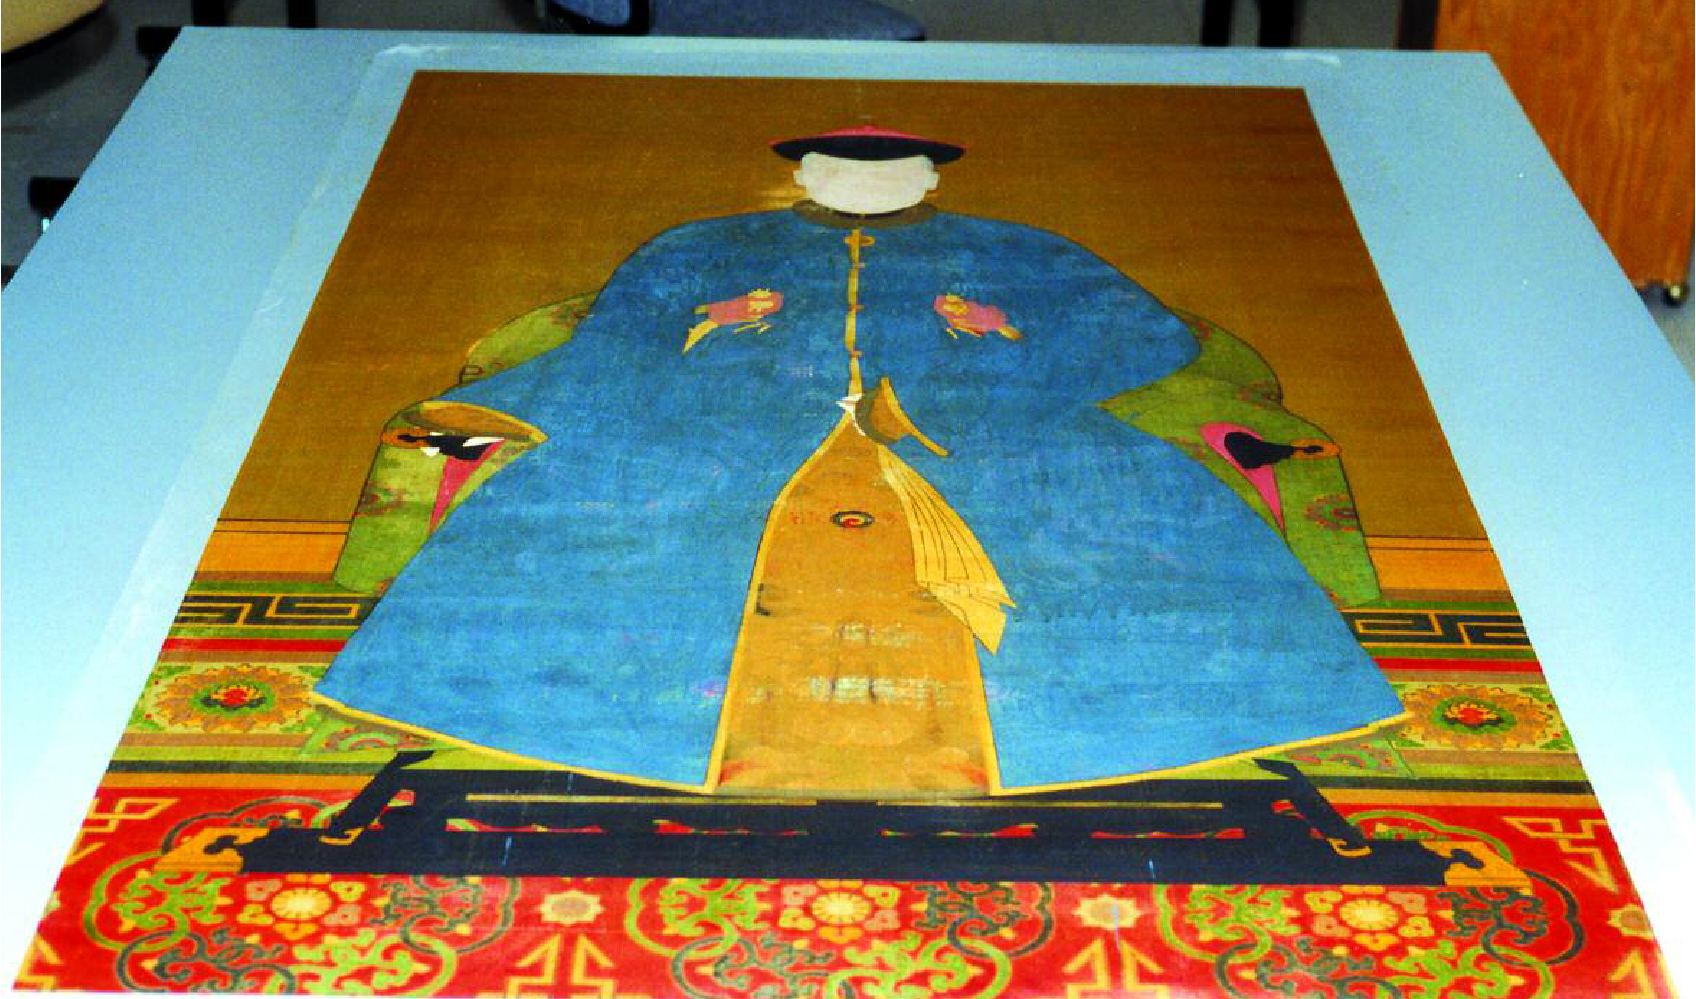
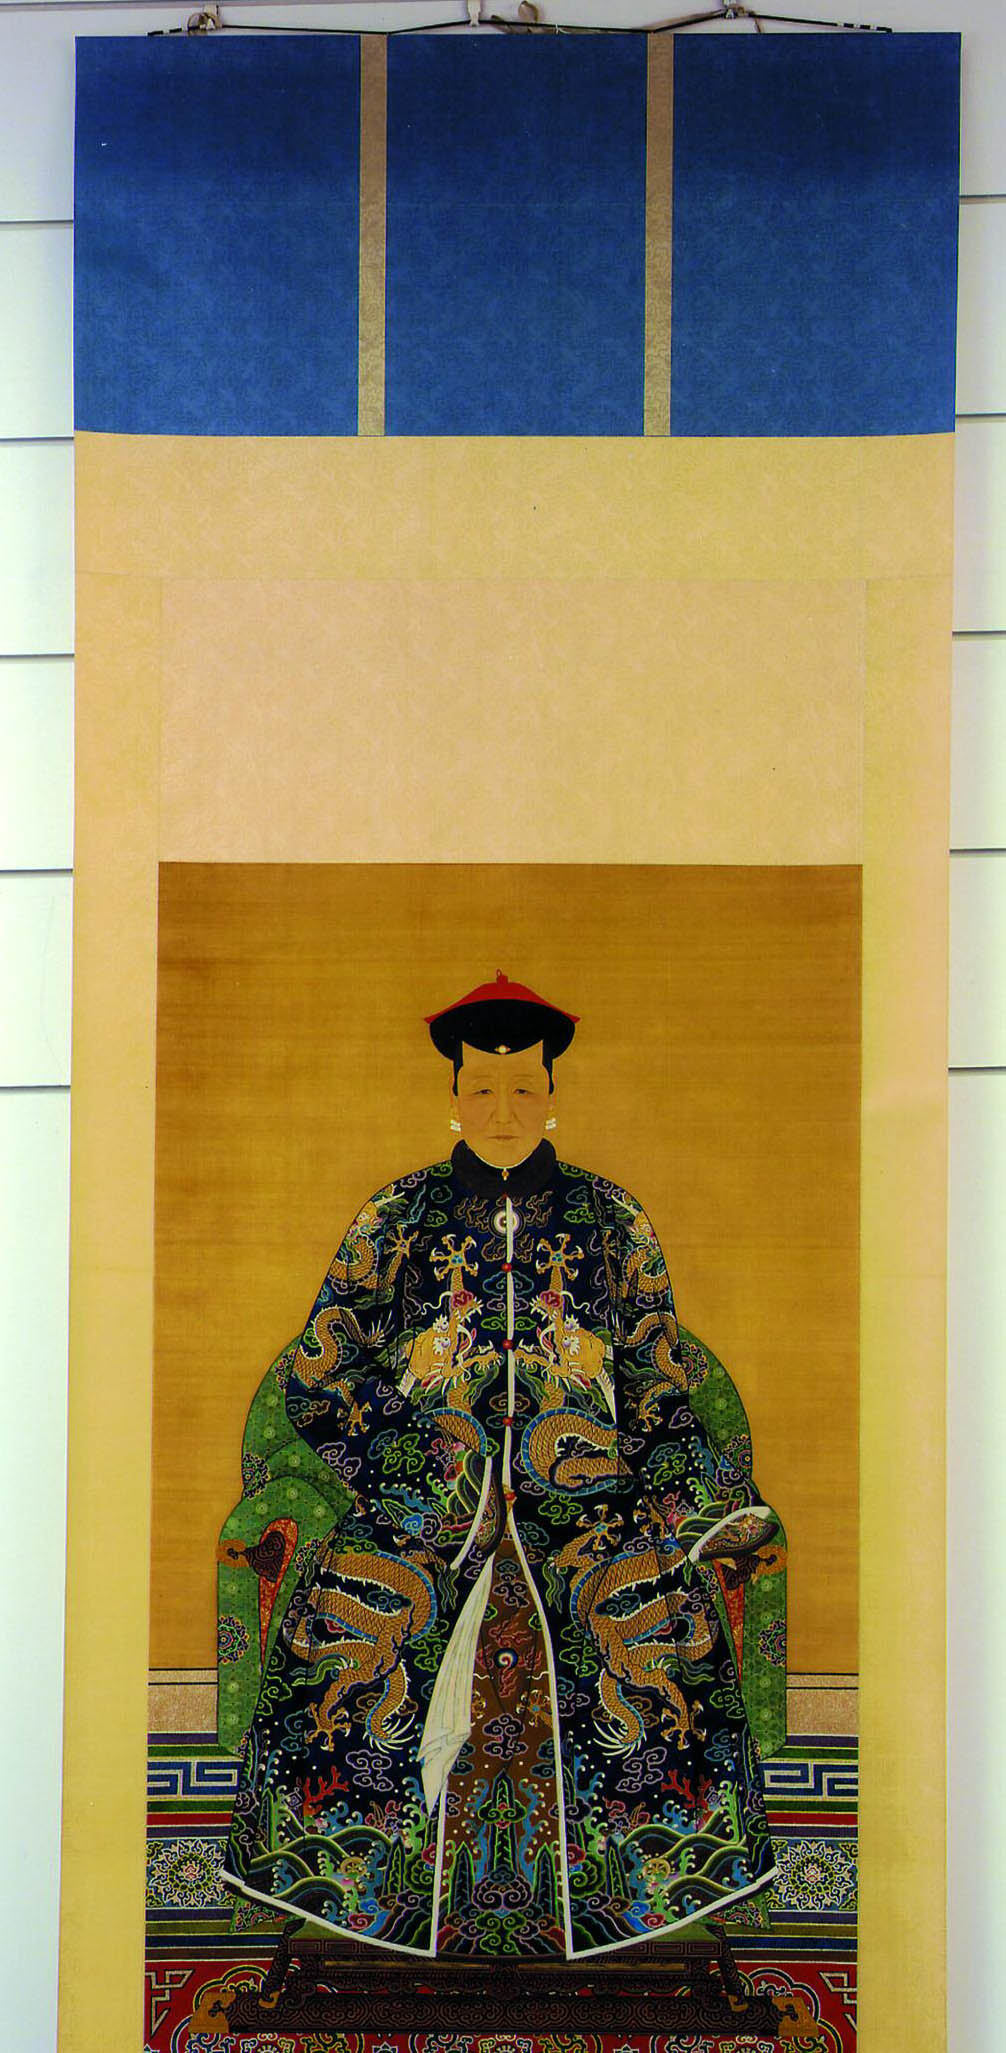
3 EXAMPLE OF A REMOUNTING3.1 CONDITION BEFORE TREATMENTThe portrait in figure 6 (see page 452) represents Lirongbao's wife, Emperor Qianlong's mother-in-law. This emperor ruled between 1736 and 1795, but it is uncertain that the portrait is from this time. It
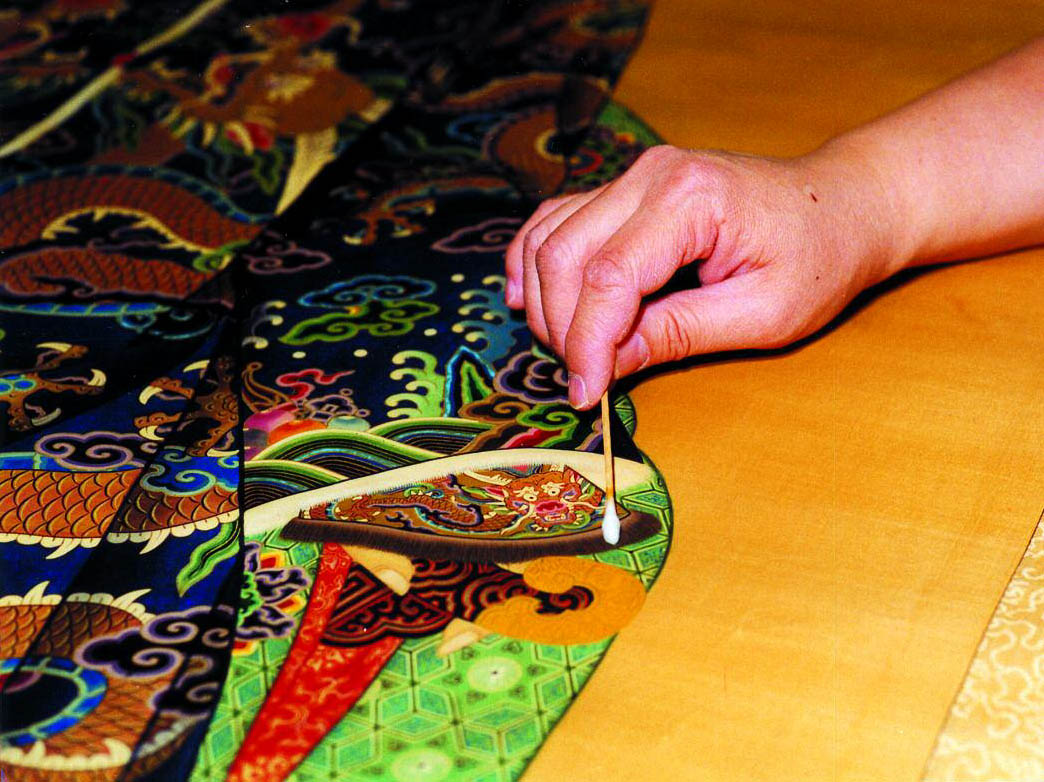
3.2 TREATMENT OPTIONSBefore we began the conservation process, treatment options were discussed with the curator of the collection. Though it is our goal to preserve, whenever possible, original scrolls, in this case it was necessary to remount the painting. This particular scroll was too weak to support the painting. Keeping it, even with some repairs, ultimately could have led to more damages to the painting. Original silk borders could not be reused as they were too physically deteriorated. Since the existing scroll was harmonious with the painting, we decided to replicate its style, including the scroll dimensions and colors of silk borders. 3.3 PREPARATION OF THE PAINTINGSolubility of the pigments was first tested by gently rolling a slightly dampened cotton swab over their surface, gradually exposing the pigments to moisture for a prolonged period of time. All colors proved to be sensitive under moisture and therefore needed to be fixed because a large amount of water would be introduced during the backing paper removal and mounting process. However, the painting was dusty, and we were concerned that the dust would be trapped in the pigments by the fixative. Therefore, we carefully rolled a slightly dampened cotton swab over their surface, keeping the contact minimum, and were successful at removing the dirt without any danger to the color (fig. 7, see page 453).
Although animal glue is traditionally used as a fixative by Chinese painting conservators, we felt that isinglass would prove to be a better option since it had a lower viscosity and a greater tack, therefore requiring less use (Petukhova and Bonadies 1993). It also possessed a less yellowish color than animal glue. A 1% (dry weight to water) concentration of isinglass was prepared. This concentration had desirable working properties, as it did not saturate the pigment. Traditionally, a fixative would be applied with a Chinese inpainting brush (see fig. 5). However, we felt that an application with an airbrush would reduce the size of the drops, therefore permitting better penetration and an even distribution through the paint surface. Every pigment was tested, and no evident color shift developed. The 1% warm isinglass solution was then applied with an airbrush by working in areas approximately 20 cm � 20 cm throughout the entire painting. Once the painting had dried for a period of one day, the pigments were tested for water sensitivity with a dampened cotton swab, as described earlier. The pigments were still sensitive to water. Isinglass was applied a second time over the entire painting and left to dry for another 24 hours. A third test did not show any water solubility. The old silk borders were cut off, and samples were preserved for the records. 3.4 PREPARATION OF THE SILK BORDERSSilks for the borders were selected to closely resemble the original scroll. One piece of silk was chosen for the two decorative strips or jing yan that would be pasted on the upper middle border of the scroll (see fig. 1). The type of silk used for the strips was similar to the upper border, yet its color was similar to the middle border. Another piece of silk was selected to be used as a cover when the scroll was rolled closed (see fig. 1). The silks were backed with one layer of mian liao paper to enable them to be joined to the painting later. Initially, backing papers were chosen and squared. Silks were cut to the appropriate
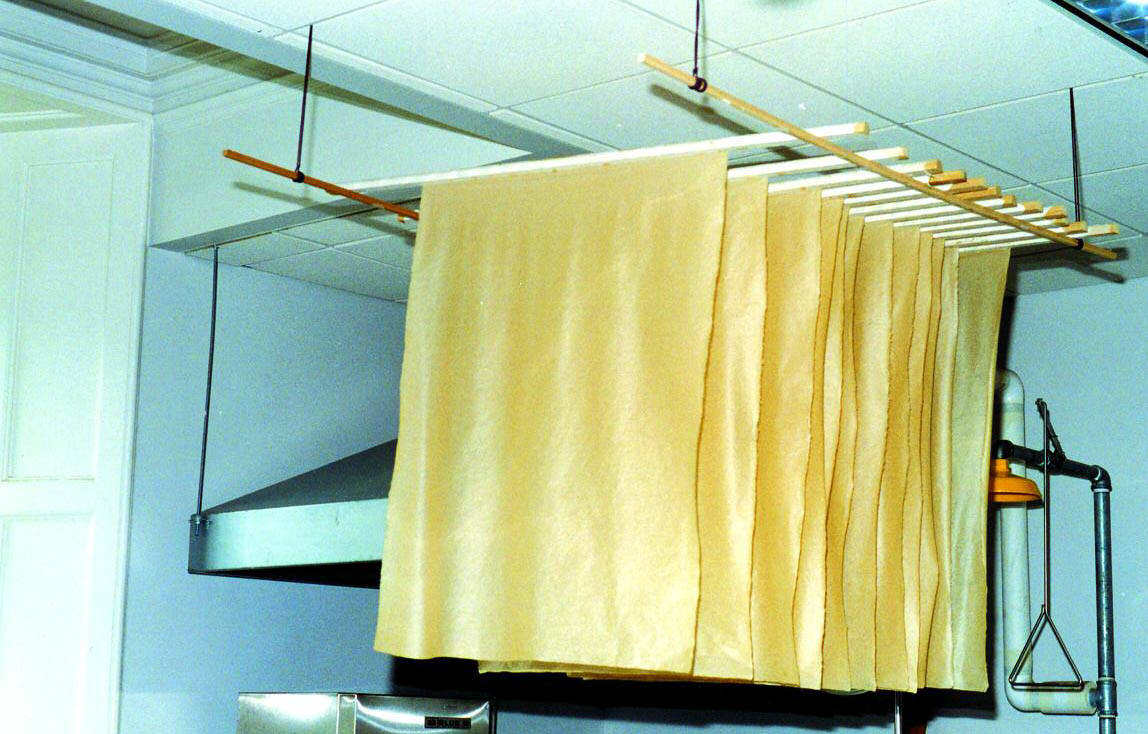
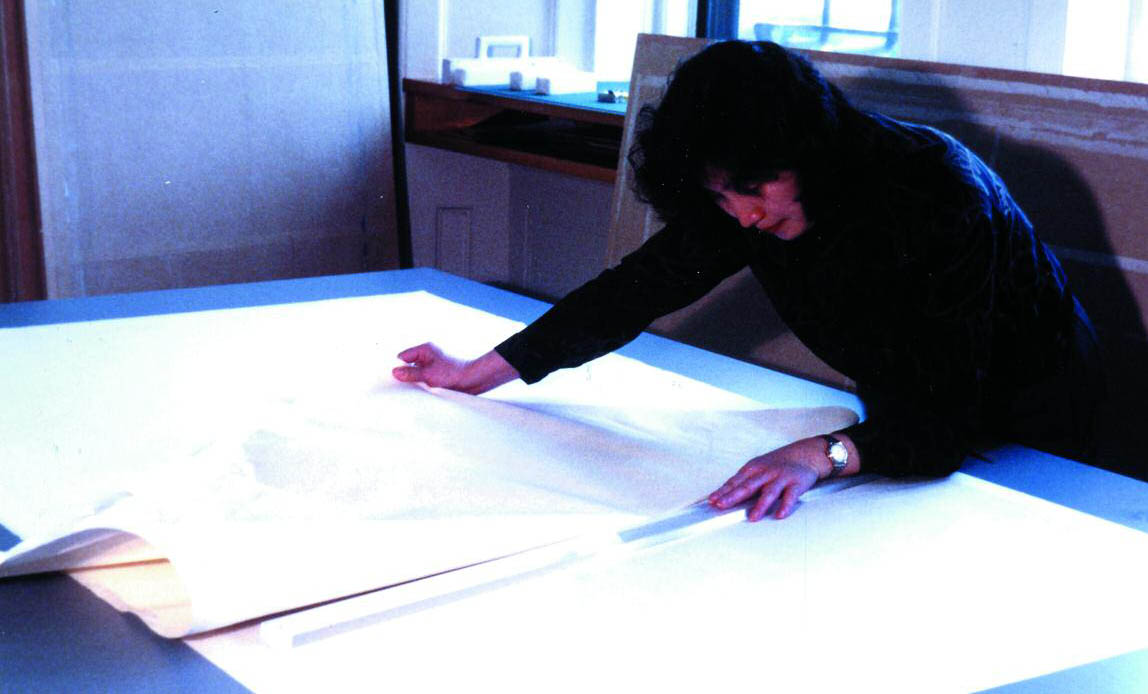
To make the color more compatible with the painting, the silks were toned with pigments bound with animal glue that were purchased in China. They were in the shape of small solid pans, which were then dissolved in warm water and diluted to the desired concentration to tone the silk. The pigments used were indigo, earth, gamboge, and traditional Chinese ink sticks. The first pigment mixture was tested on pieces of backed silk, and the tone was adjusted appropriately until the desired tone was achieved. The color was sieved through rayon paper to remove large particles of pigment. The silk was put paper side up on the table, and the pigment mixture was applied with a water brush. The silk was then turned over and flattened with the same brush without applying more of the pigment mixture. More pigment was added locally as necessary to areas that did not seem to be homogeneous. The silk was then stapled to a wooden stick and hung to air-dry. The following day, the silks were misted with water and placed facedown on the table, and 3% methyl cellulose (dry weight to water) was applied to their outer edges. They were then attached faceup on drying boards and left there until the painting was ready to receive them. 3.5 TONING THE PAPER FOR THE FIRST BACKINGThe ancestor portraits were painted on an open-weave silk support, enabling the color of the first backing paper to be visible from the front of the painting and therefore strongly influence the appearance of the painting. The original first backing as well as the other subsidiary linings of the painting were very brownish in color and gave the unpleasant impression that the painting was yellow. From experience, we knew that a lighter-toned first backing would allow the painting to look more fresh. We chose to use Japanese mino paper for the first backing because it has longer fibers and therefore is stronger than Chinese paper. Silk can tear easily on a drying board because it tends to expand dramatically with moisture and shrink subsequently as it dries. This process is particularly dangerous for large-scale paintings, as reactions to moisture are more difficult to control. However, we chose to use mian liao papers for the second and final backings to uphold the tradition of Chinese hanging scrolls. We tested several pigment mixtures on pieces of mino paper to arrive at the desired tone. Sheets of mino paper were then rolled around a wooden rod. The pigment mixture was brushed with a water brush directly onto the table, and the first paper was laid down. As the paper absorbed moisture and began to expand and undulate, it was gently lifted from the table and brushed flat with the smoothing brush. More pigment mixture was applied with the water brush to the paper, and a second sheet of paper was gradually unrolled atop it, using the left hand, and brushed down with the right hand. This step required good coordination of the hands, as the paper could easily break if pulled too strongly by the left hand or if the angle between the two sheets was too high. The second sheet was then lifted and repositioned so that it was accurately aligned with the first sheet. It, too, was then brushed flat. The remaining sheets were toned using the same process. Because the papers were toned on top of each other, the pigment mixture was distributed evenly. Once all the papers were toned, they were attached one by one with methyl cellulose to wooden sticks on one side and hung to air-dry (fig. 9, see page 453).
3.6 REMOVING THE OLD BACKINGA piece of rayon paper 20 cm wider and longer than the painting was brushed flat onto the table using
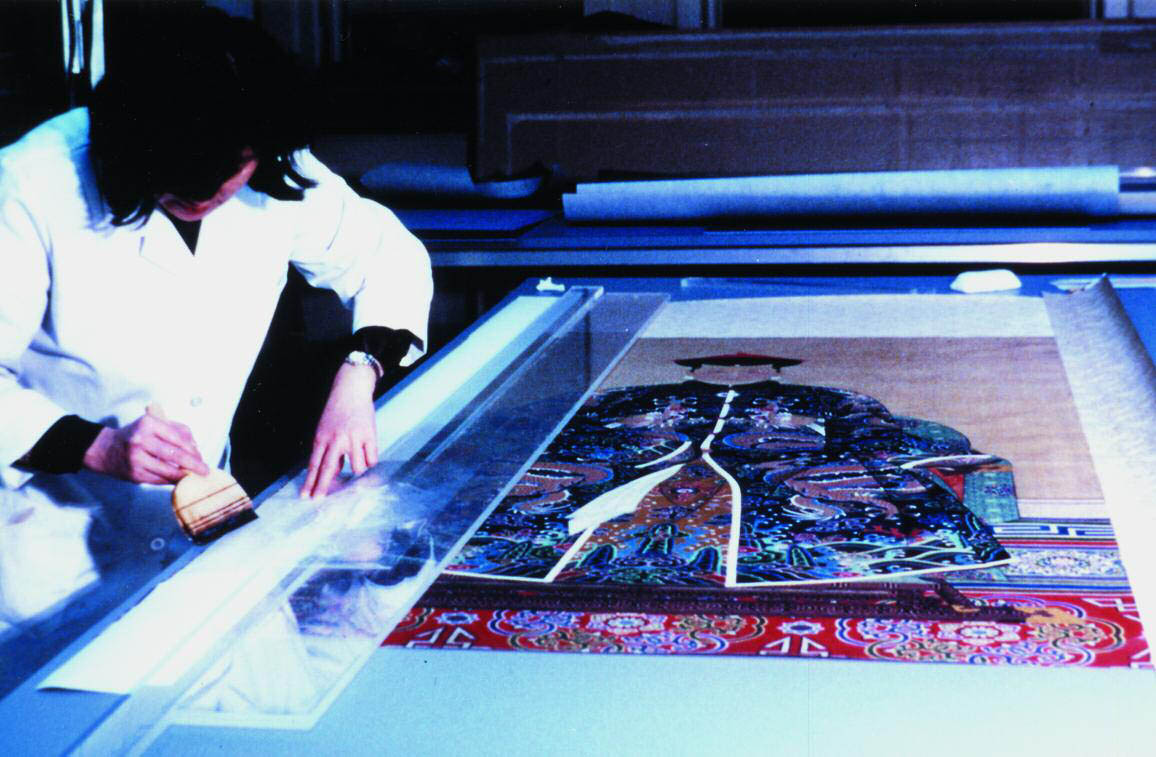
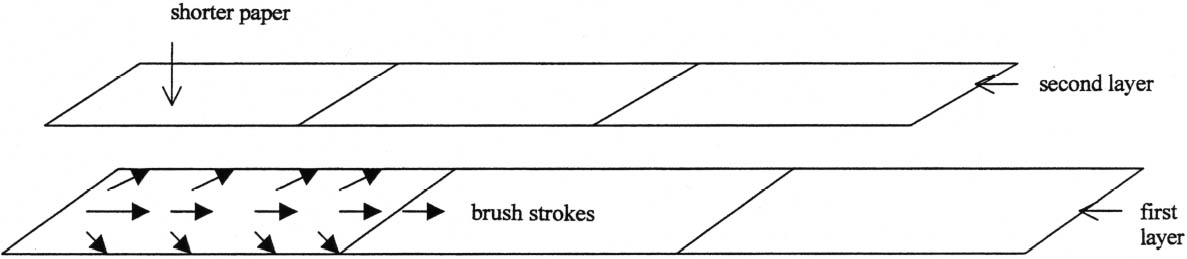
3.7 APPLYING THE FIRST AND SECOND BACKINGPieces of previously toned mino paper were chosen and squared with feather-cut edges. Because they were shorter than the painting in width, smaller sides of each sheet were joined along their feather-cut edges with thin paste to form a roll of paper. Sheets were cut from the roll so that they were 10 cm wider than the painting. Because the mino paper sheets were quite large, a slightly bigger sheet of rayon paper was cut to handle them safely. One sheet of mino paper at a time was placed on the rayon paper, and a thick consistency paste was applied to it. Excess moisture was removed from the mino paper by placing the rayon paper with the mino paper on top of two layers of dry Chinese paper. The mino paper and the carrier were then lifted up and turned over above the painting and aligned. One edge of the paste-coated mino paper was placed down and aligned so that it extended from the sides of the painting by 5 cm, and the remaining backing was gradually brushed in contact with the painting using a smoothing brush. Additional backing papers were applied in the same manner down the length of the painting to form a complete layer. The overlap of the joins between the backing papers was made as minimal as possible so they would not be seen from the painting's face. The backing paper was then brushed more aggressively overall, using a sheet of paper impregnated with paulownia as a protection, to ensure good contact with the painting. The painting was then separated from the table for a brief moment to allow some air to circulate and left to dry on the table for one day. Thin mian liao papers, 3 mm wide, were cut with straight edges and used to reinforce the painting's tears and creases. The painting was placed facedown on the table, misted with water, and brushed flat. Strips were coated with medium consistency paste, adhered over the center of the crease, and pounded with the smoothing brush. They were left to dry for one day. A second backing of a traditional mian liao paper, 10 cm wider than the painting, was applied. The painting was placed facedown on the table, misted with water, and brushed flat on the table. The smooth sides of the papers were pasted, one at a time, with thin consistency paste on a piece of rayon paper, and the backing was applied as described above for the first backing. To compensate for the thickness of the painting and to strengthen the outer edges, 5 cm wide strips of mian liao paper were adhered with thin consistency paste to the outer edges of the backing papers. The strips also overlapped the painting by 3 mm (see fig. 2). The painting was separated from the table and left to dry on the table for one day. 3.8 TEMPORARY BACKINGThe painting needed to be quite flat in order to attach the silk borders. But restrained drying on a drying board is a particularly dangerous step for silk paintings due to their great capacity for expansion and contraction, which can cause tears during the drying period. For this reason, a temporary backing was attached to the painting in order to provide extra strength during the drying process. The temporary backing was prepared by pasting two layers of jing pi paper together with a thin consistency paste and then
3.9 ATTACHING THE SILK BORDERSThe thicknesses of the backed silk borders and the backed painting were examined to ensure that they were equal. The outer edges of the backing were trimmed 5 mm so that they would lie straight, and the silk borders were trimmed according to the scroll measurements determined previously. The painting was placed faceup on the table, and thick consistency paste was applied to a 3 mm wide area along its outer edges. The inscription and the middle border were then attached to it. The outer edges of the inscription and middle border were then pasted as described earlier (fig. 12, see page 454), and the upper and lower borders were attached to them.
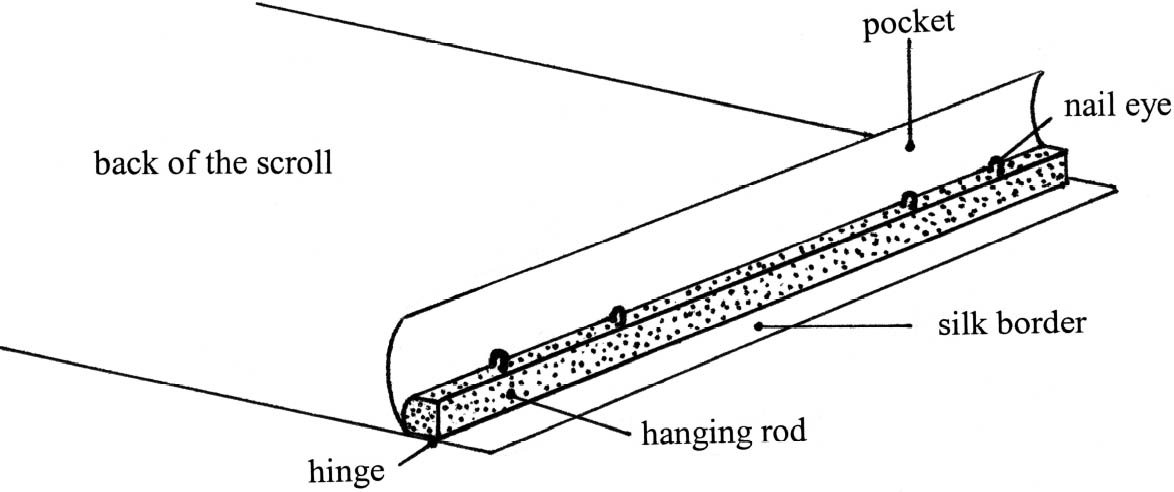
After attaching the silk borders to the painting, the outer edges of the scroll were folded inward to provide a clean look and reinforce the scroll. The scroll was loosely rolled, and a needle was inserted 3 mm from the outer edges of the backing, through the several rolled layers, to mark the measurement along the length of the scroll. This efficient method enables us to make repeated markings along the length of the painting. The scroll was placed facedown on the table, and a ruler was positioned along the needle holes. A line was impressed into the backing paper by running the needle at an angle along the ruler to create a crease. Medium consistency paste was applied with a Japanese joining brush along the newly formed crease, and the outside edges were folded over by brushing them toward the scroll with a smoothing brush. At this stage, pockets were created for the attachment of the hanging rod and roller to the scroll. Two strips of mian liao paper were cut slightly wider than the mounting and longer in length than the diameter of the rods. The strips were pasted with thick consistency paste along one width's edge and attached to the verso of the scroll, one 5 cm from the top edge and the other 8 cm from the bottom edge. 3.10 FINAL BACKING PAPERA final backing, consisting of two layers of three mian liao papers each, was applied to support the mounting assembly and the painting (fig. 13). The first layer was prepared by squaring three sheets of mian liao and cutting them 10 cm wider than the scroll. The three sheets were placed on the table and misted with water. Thin consistency paste was evenly applied all over one sheet with the water brush, carefully avoiding creasing the paper. A second sheet was misted with water and joined 3 mm onto the first one. The join
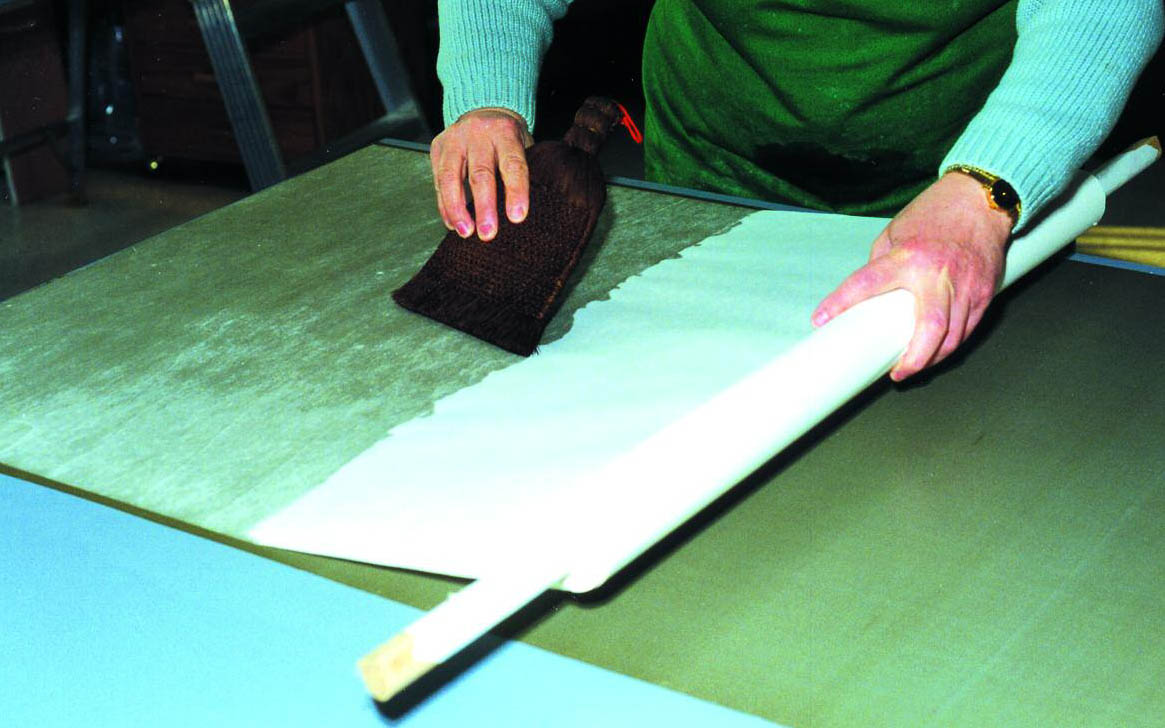
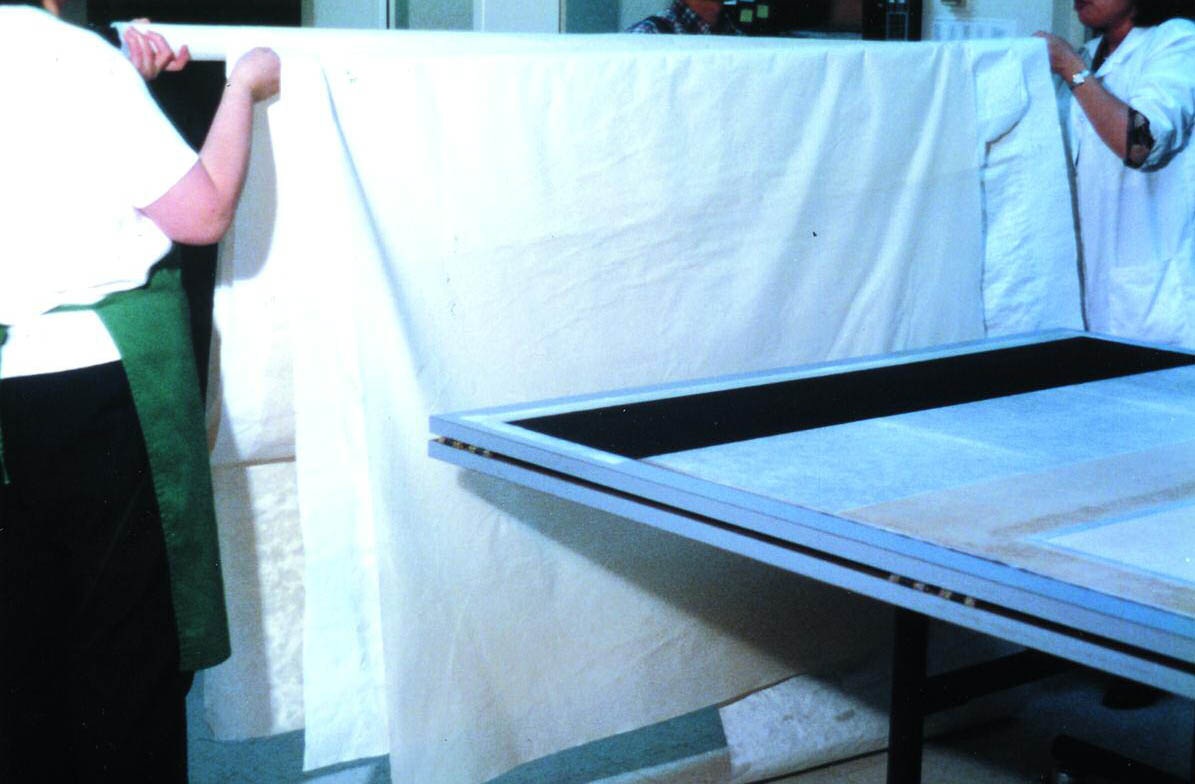
The scroll was placed facedown on the table and was relaxed by lightly misting water over all of it. A wetted ball of paper was rolled along the joins of the borders to ensure that they were thoroughly relaxed. Another piece of backed silk, 30 cm long and 10 cm wider than the scroll, was attached with thin consistency paste to the top of the verso of the mount to be used as a cover when the scroll was rolled closed. On another table, the backing paper was misted with water and lightly brushed flat, and thin consistency paste was generously applied with a water brush. The excess moisture was removed by placing sheets of dry Chinese paper under the backing. Because the backing paper was very large (350 cm by 150 cm), it was carried along with the drying paper on two wooden sticks, adhesive side facing up (fig. 14, see page 455). The pasted side of the backing paper was placed in contact with the scroll, and the drying paper was then removed. The top edge of the backing paper was aligned along the bottom edge of the silk cover, overlapping by 3 mm, and then placed down onto the rest of the scroll and brushed with a smoothing brush. The brushing of the backing was essential in the mounting process. The backing had to be well attached to avoid future detachment and formation of creases. The consistency and amount of paste were also critical: if it was too thick, the scroll would become stiff, and if it was too thin, the backing would not attach. The scroll was lifted from the table and brushed a second time. It was then turned faceup, and two strips of silk called jing yan were pasted with medium consistency paste onto its upper border. The scroll was turned one last time on the table, and a piece of paper on which the title of the painting would traditionally have been written was pasted with medium consistency paste and attached to the upper-right edge of the cover (see fig. 1). Two rein-forcing pieces of backed silk or da gan were pasted vertically along each lower edge of the scroll to help with the weight of the roller (see fig. 1). The pockets were held down in place temporarily with spots of medium consistency paste to prevent them from distorting. The scroll was brushed strongly overall with the smoothing brush, separated for a brief moment from the table, and left to dry overnight on the table.
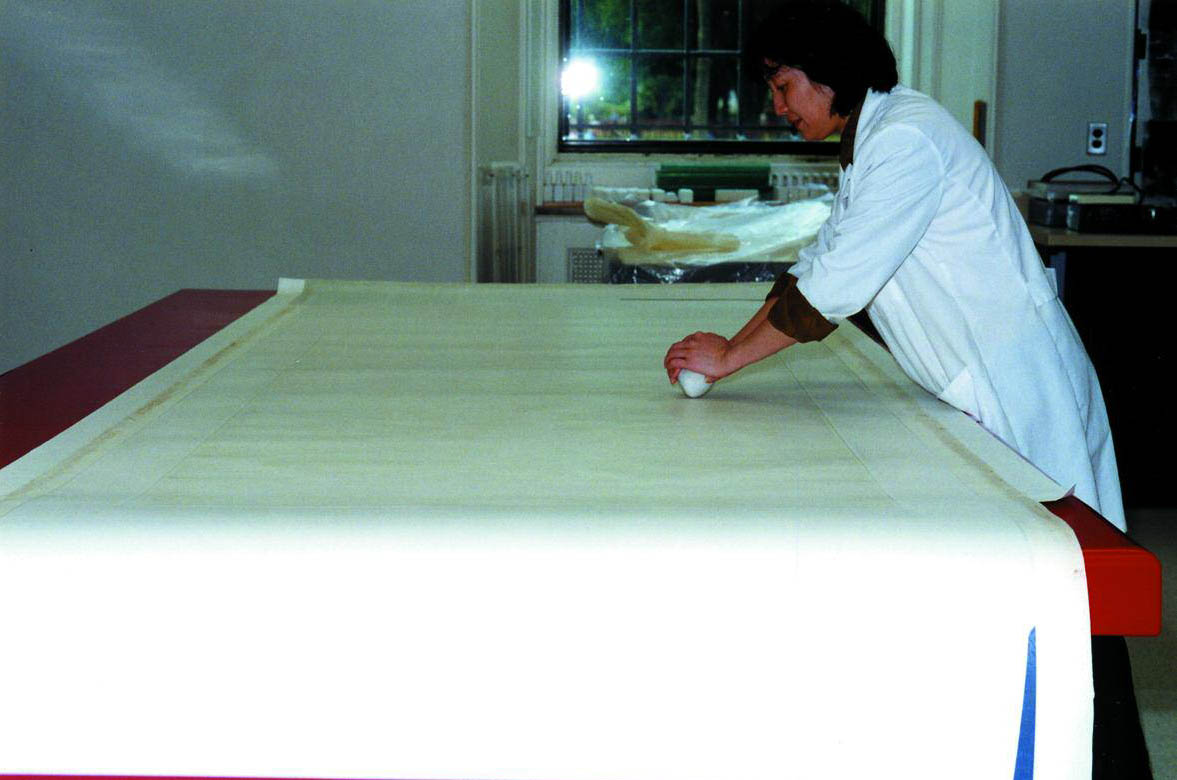
The following day, the scroll was rehumidified and flattened with a smoothing brush. The 5 cm wide 3.11 FINAL STEPSThe back of the scroll was then rubbed overall with a stone to enable the scroll to be rolled easily and to minimize abrasion to the surface of the painting as the scroll is rolled (fig. 15, see page 455). A package consisting of three layers of xuan paper adhered together with wheat starch paste was placed on the table, and the painting was placed upon it. The backing was lightly rubbed overall with paraffin wax to facilitate the rubbing action of the stone. The stone was then pushed back and forth across the width of the scroll to obtain a smooth and evenly polished surface. Caution was taken throughout this entire process to avoid pigment loss through the application of pressure. The outside edges of the backings were folded 1 mm inside the scroll to provide a clean look and cut along the fold with the horseshoe knife.
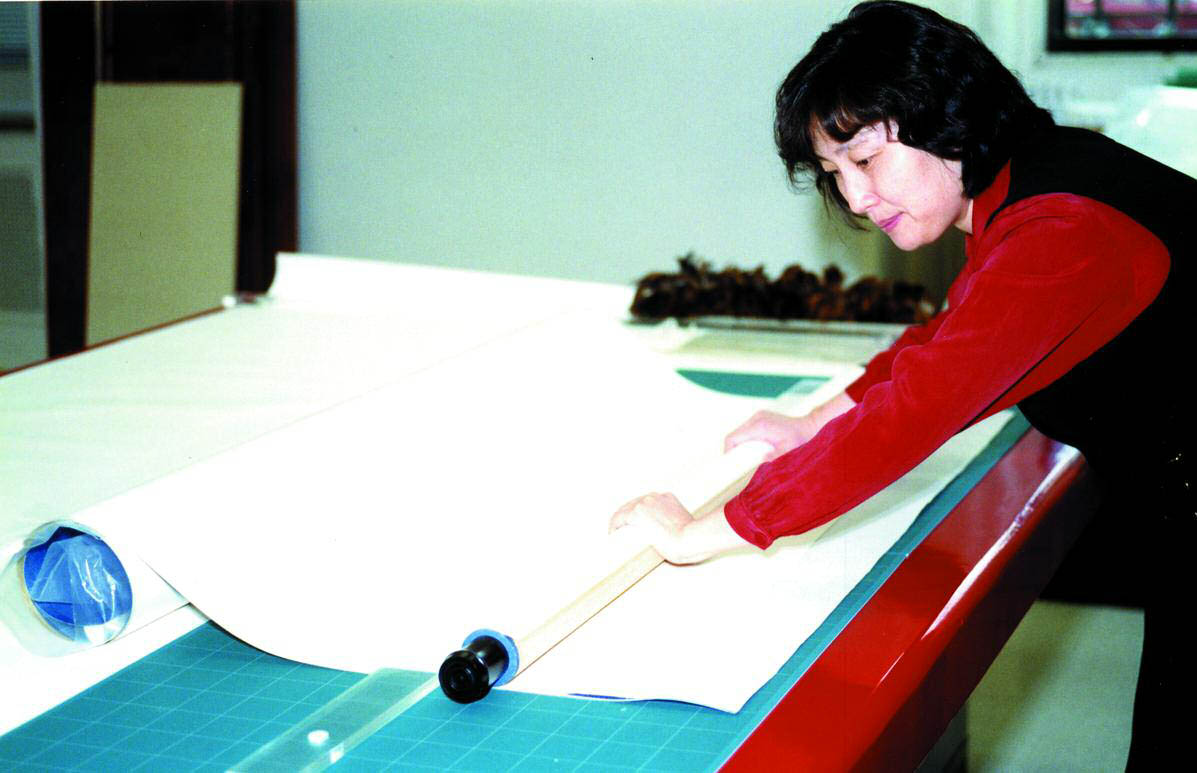
To complete the scroll, wooden rods were attached to the top and bottom of the scroll. The quality of the wood was important because, when stored, the mounted painting would be rolled around the rods. If the wood was highly resinous, the resin could migrate through the scroll and into the painting, causing stains. Also the wood could not be too dense because too much weight at the bottom could cause the scroll to tear. Therefore, we chose to custom-make rods from paulownia wood because they were light weight and not very resinous. The roller, which was 5 cm in diameter, was cut at one end, leaving a central core 1 cm wide to be fashioned later into an end peg. The peg was shaped with a knife to fit into the hole of the knob. Knobs, previously bought in China, were selected to closely match the original ones that were in too poor a condition to be reused. Chinese knobs are traditionally around 5 mm smaller in diameter than the roller. The scroll was placed facedown on the table, and the pocket was opened with a bamboo spatula. The roller was then placed in the pocket, and the position of the silk border was marked on the roller with a needle. The other end of the rod was fashioned as previously described. To prevent the roller from being exposed at the point where it joins the knobs, both ends were covered with the same backed silk used for the lower border. The knobs were attached to the peg. The pocket was folded back, and a strip of Mylar was placed underneath it to protect the scroll. A 2 cm wide area of thick consistency paste was applied to the bottom edge of the pocket. The roller, fitted with knobs, was placed along the hinge, extending onto the pocket. It was critical to position the roller perfectly parallel to the hinge so that it could function properly. It was then rolled back to the paste line, attaching the pocket to the roller (fig. 16, see page 455). At that point, a line of thick consistency paste was applied along the hinge and along the bottom edge of the silk border. The roller was rolled to the hinge, secured in place with one hand, and the entire scroll was turned over so it was faceup. Because the scroll was wide, two conservators were needed for this step. The silk border was then attached to the roller and left to air-dry. Conservators of Chinese paintings believe that this step is one of the most important in the mounting process because it is difficult to remove the roller after it has been attached and because it must be perfectly parallel to the scroll to ensure that the painting is not damaged when rolled.
A semicylindrical piece of paulownia 2 cm in diameter was used for the hanging rod. Four hanging scroll nail eyes were screwed along the hanging rod to later receive the hanger braid. The length of the hanging rod was calculated in the same manner as the roller, and both ends were covered with the same backed silk used for the cover of the scroll. The scroll
|