OBSOLETE FILL MATERIALS FOUND ON CERAMICSSTEPHEN KOOB
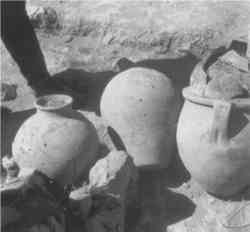
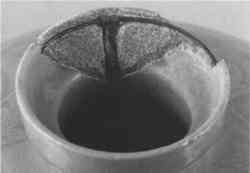
ABSTRACT—Fills on ceramics have a long history, associated either with covering up an adhesive line or replacing a large loss. Numerous materials have been employed in loss compensation, from thickened adhesives, pastes, and putties to substituted fragments from other vessels, manufactured ceramic replacements, and cast resins and waxes. Many of the early materials and methods of filling losses that have given way to more efficient, predictable, and reversible techniques can now be classified as “obsolete.” Even so, the ceramics conservator will encounter these materials in re-treatment for centuries to come. TITRE—Mat�riaux de remplissage obsoletes trouves sur des ceramiques. R�SUM�—Les produits de restauration des c�ramiques ont une longue histoire, associ�s soit � la dissimulation d'une fissure recoll�e soit au comblement d'un trou. Un grand nombre de mat�riaux ont �t� utilis�s pour r�parer les pertes, tels que des adh�sifs �paissis, des colles et des mastics, des fragments de substitutions venant d'autres c�ramiques des pi�ces de rechange faites � la main ainsi que des r�sines et des cires moul�es. La plupart des m�thodes et des mat�riaux anciens ont c�d� leur place � des techniques plus efficaces, plus s�res et r�versibles les rendant “obsol�tes.” Malgr� cela, la restaurateur de c�ramiques rencontrera ces mat�riaux lors des retraitments dans les si�cles � venir. TITULO—Materiales desusado para reponer faltantes encontrado en cer�micas. RESUMEN—Los rellenos en cer�micas tienen una historia extensa, asoci� o cubriendo una raya adhesiva o substituye una p�rdida grande. Se hab�an empleado materiales numerosos con compensaci�n de la p�rdida, de espes� adhesivos, masillas de la y de las pegamento, a sustituy� trozos de otro vasijas, fabric� reemplazos cer�micos, y resinas y ceras molderon. Muchos de los materiales antiguos y m�todos empastando las p�rdidas hab�an dado direcci�n a m�s eficaz, esperable, y t�cnicas reversibles y se puede clasificar ahora como “desusado.” Suponiendo que as� fuera, el conservador de los cer�micas tropezar� con estos materiales durante re-tratamiento por siglos a�n venir. 1 INTRODUCTIONCeramics, by their very nature, usually break when dropped, thrown, or struck with sharp impact. Surely, as soon as humans discovered that firing clay was stronger than sun-baking, the first breakages must have occurred. It was perhaps quite a surprise how the vessel (or artifact) broke and could not easily be made whole again. Still, it is reasonable to assume that very early attempts were made, and pottery was considered valuable enough to repair as early as around 5000 B.C. (Williams 1988). Early pottery restoration was never thought of as an especially worthwhile or respected task. In Ecclesiaticus, chapter 22, of the Old Testament, Apocrypha, we are told “He that teacheth a fool is like one that glueth potsherds together” (quoted in Skeist 1977, 4). In 1837, the profession of “China and Earthenware Mender and Rivetter” required an apprenticeship fee and capital of �5–20, while the fees for a cabinetmaker and upholsterer were quoted as �30–70 and �150–500, respectively (Lanmon 1969). Only after the founding of organized conservation were prominence and acknowledgment given to a field that requires more than patience and a good pair of hands (Hodges 1975). 2 HISTORY OF FILLS ON CERAMICS: USE, MISUSE, OBSOLESCENCEThere has always been a need to fill ceramics, as they rarely break without some loss, either of small chips from the break edges or a larger piece that may have “disintegrated” or been simply lost. Early repairs were carried out either to make the ceramic usable again or for its sentimental value, attractive appearance, or religious significance. The idea of filling minor losses, cracks, or blemishes was probably given little thought. Clamps, dowels, and rivets were some of the earliest repairs, as evidenced by their survival on Greek and Roman pottery (Noble 1965; Snow 1986). They continued to be used well into the 20th century, as evidenced by their recommendation for use on American and English china in the 1960s and 1970s (Klein 1962; Larney 1975). Pitch or pine resins were certainly used alone (Charters et al. 1993) or in combination with clamps or ties, particularly if the vessel was meant to be reused (fig. 1).
As ceramics began to be viewed as objects of greater value and appreciation, so did the desire and need to restore them to their original appearance, preferably with no evidence of previous damage. Fill materials, in the sense of fine putties or bulked adhesives, have not been found on ancient repairs. Lime mortars and clay putties were certainly known and used in antiquity, but it is not clear whether they were ever used in ceramics repairs. This type of loss compensation developed only in the 19th century with the increased demand for ancient ceramics. The antiquarian art market fostered a desire for complete, restored vases, and by the mid-19th century major restoration workshops were well established and advertising in Philadelphia, New York (Lanmon 1969), and European cities
Little documentation exists for the recommendation and use of fill materials for ceramics prior to the 20th century, at which point ceramics restoration begins to develop as a serious discipline (Buys and Oakley 1993). Along with this evolution, the increased number of ceramics in museums and private collections created an even greater need for ceramics restoration workshops. Apprentices were trained, and the increased popularity of ceramics restoration in the 1960s resulted in numerous “how-to” manuals—far too many to be listed here—that were full of recipes. These books reflect not only the development of new methods and techniques used in the restoration of ceramics but also the introduction of new synthetic adhesives and fill materials, virtually unknown several decades earlier. Many of the fill materials described in this article have now been completely abandoned and can be termed “obsolete.” They have been replaced by new and improved materials, with increased stability, ease of application, and reversibility. This development has also been accelerated by better communication, education, and training in conservation methods and materials as well as reforms in restoration ethics and aesthetics (see Buys and Oakley 1993 for a further discussion of codes of practice and the Charter of Venice). 3 IDENTIFICATION OF MATERIALS AND TECHNIQUESIdentifying repairs on ceramics has always been challenging, for both the collector and the conservator. Early recommendations for testing restorations included tapping with the edge of a coin; one source suggested that “the test of smell is also a useful one” (quoted in Litchfield 1951, 20). Unfortunately, as with most early conservation treatments, the lack of written records has left the objects conservator with the task of identifying the materials that were used, either by empirical testing or now, with the aid of sophisticated analytical techniques. Visual observation under natural light and/or ultraviolet light (long-wave and short-wave), as well as microscopic examination, has long been recognized as the first steps in identification (Rorimer 1931; Noble 1965). These methods have limitations, however, and need to be supplemented with chemical spot tests (Feigl 1946), solvent solubility, and, if available, organic and inorganic analysis. A good repair may sound the same, have a similar color, and be virtually invisible—exactly as the restorer planned. Many of the adhesive and putty mixtures were colored to match the ceramic and show little relationship to the color or texture of the original raw materials. Moreover, in most instances a final application of paint or surface coating completely hid the repair. Examination under ultraviolet light (long-wave or short-wave) may detect only the presence of a repair, or the fact that the surface has been repainted, sometimes with little or no fill underneath. Most inorganic pigments do not fluoresce (de la Rie 1982), however, and a resin bulked with pigment will have much less fluorescence, if any, than might be expected. Identification of repairs by smell is certainly a limited technique. Many fill mixtures were “home-made trade secrets,” whose recipes were guarded carefully even if they were sold by workshops “to the amateur, hobbyist, collector, and housewife” (Klein 1962, xi). Although the Klein workshop was famous for its self-proclaimed “Klein method” (Klein 1962), the adhesives and fill materials that it used and sold to the public have yet to be accurately identified. An adhesive, by its very nature, is a fill material. It bonds fragments together and fills in small Many of the materials and techniques used on ceramics were certainly borrowed from other disciplines, including sculpture, painting, and architectural finishing. As noted above, however, the field of ceramics restoration displays historical trends as well as individual resourcefulness. The two main functions of fills on ceramics are to compensate small and large losses. Small losses and cracks can be filled with little need for structural support, assuming that fragments have been properly assembled with a suitable adhesive (not always the case, as experience has shown). Large losses require fill materials that can fill the area and contribute strength and structural support to the whole. 4 CATALOGThe examples in this article are predominantly from the author's archives and the collections of the Freer Gallery of Art, supplemented by examples from numerous publications on ceramics restoration. The references are all in English, or from English translations; most of the “how-to” manuals are from American workshops. The catalog is arranged in roughly chronological order (see table 1). It is difficult to know how early some of the techniques and materials were developed and at what point they ceased to be used. General comments on identification and appearance are included but should be considered only as guidelines. The ceramics conservator can quickly develop an ability to recognize certain types of ceramics restorations, but should also be aware that this is a field where innovation and resourcefulness abounded. Of all the TABLE 1. PROPOSED CHRONOLOGY OF FILL MATERIAL USE UV fluorescence is noted for the relevant material and is given under long-wave examination. Short-wave examinations revealed no different specific appearances, only a duller, lighter fluorescence. The solvents offered for solubilities are the most common and are not a comprehensive list. Bitumen—Bitumen was used more than 6,500 years ago to repair ceramics (Williams 1988) and probably as late as the 19th century A.D. The term encompasses various naturally occurring mixtures of hydrocarbons, of indeterminate compositions, boiled down to a tarlike material. The sources can vary from oil residues (tar or asphalt pits) to pine or other tree resins. In the ancient Near East the prime source was the Dead Sea (Lucas 1989). Dark brown-black and shiny in appearance, bitumen becomes extremely brittle with age, breaking with sharp conchoidal fractures. Although it was not very attractive, the liberal application of excess adhesive served the dual purpose of joining and filling and can therefore be considered as the first fill material. Thickened pine resins were commonly used to repair South American and Southwest Native American pottery. Birch bark tar was used to repair a Roman jar in Britain (Charters et al. 1993) and also probably produced a waterproof seal.
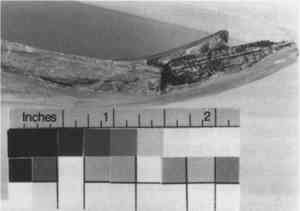
Animal hide or skin glues—Probably in use as early as the pine resins, and extremely popular throughout the 19th century, animal protein glues remained in use into the early 20th century. These glues originated from mammal or fish sources that are rich in collagen, such as skins, internal membranes, bones, and hooves. They are also the adhesive base for numerous “glue putties,” which are used as a combination of adhesive and fill material (fig. 4).
Originally a clear yellow-brown, animal glues age to a darker color. They are often used in excess on ceramics, so that the excess itself fills the losses along a break line. To stiffen the glue and to reduce its considerable shrinkage on drying, the glue is often bulked with fillers and pigments. When set and dry, the fill material is quite strong, but it can be carved or sanded as necessary. Fish glue with chalk, brick dust, or fire-clay dust was also recommended for filling small gaps between joined fragments (Rathgen 1905). The materials used to bulk animal glues included whiting (calcium carbonate), zinc
Small amounts of linseed oil and turpentine (Rathgen 1905) were added to provide glue putties with better workability, prolonged setting times, and durability. They are no longer used because of their poor stability and tendency to migrate out of the putty and stain the ceramic. The major disadvantages to this fill material (with or without additives) include the shrinkage of the glue, embrittlement over time, and extreme water sensitivity. These properties generally result in the filler cracking and eventually breaking up (see fig. 6).
Urushi (lacquer)—This is true lacquer, originating from the resin sap of the Asian tree Rhus vernicifera. It has a long tradition of restoration use, primarily in Japan. It was used as early as 2500 B.C. for the repair of cracked earthenware, and its use continues into the 20th century (Nakasato 1988). Urushi has a clear yellow-brown appearance as a resin. In use, it was often mixed with pigments, and on ceramic repairs urushi was often coated with powdered gold (later burnished), or maki-e (pictorial) designs (fig. 7). No attempt was made to blend the fill in with the ceramic; in fact, the contrast presented by the original and the repair was esteemed.
Urushi requires a very high humidity and a long time (24 hours) to set. It is irreversible and extremely toxic to work with. While aesthetically challenging for Western tastes, when coated with gold it is protected from oxidation and light and thus very stable. Other lacquer types found in China and Burma are less stable and have not been found as repairs. True urushi would allow the ceramic to be reused, a feature important in Japanese culture. By the late 20th century, with the advent of synthetic resin adhesives, urushi almost disappeared from use as a ceramic fill material. However, it still has some traditional use, and is recently making a comeback (see section 6, Conclusions).
Clamps, Rivets, Solder, Bolts, Metal Pins, and Ferrules—Metal and metalworking techniques have been used since antiquity, both to join broken fragments and to fill the holes created by the drilling required for their attachment. Various types of metalwork, such as nails, screws, bolts and dowels, or pins were used to anchor fills to the ceramic, particularly when additional structural support was considered necessary (St.-Gaudens and Jackson 1953; Parsons and Curl 1963). These were usually inserted into a drilled hole and cemented in using a plaster or mortar rather than pressure-fit. Metal armatures (see figs. 8 and 9) were in common use by the early 19th century. These included “wire supports, made to fit the individual piece in a neat and inconspicuous way” (quoted in Burns 1941, 161–62). They were usually made of copper or brass and often were anchored to holes drilled on the interior surfaces or break edges. Solder was probably first used as a joining agent and a fill material in the late 19th century. Pewter and tin solder were recommended for filling losses on the edge of china or porcelain after first grinding grooves or dovetails into the ceramic body to anchor the metal fill (Klein 1962; Yates 1953). Pewter pellets could simply be melted into position using a heavy-duty soldering iron without the use of any flux, but flux was necessary when two different metals were soldered together (Klein 1962). For large losses, the soldered dovetails served a dual purpose—as a fill and as an anchor for copper screening. The metal screening was tinned (coated with pure hot tin) to prevent corrosion of the copper (Klein 1962). Putties or synthetic glaze mixtures were then applied over the soldered fills or screening to imitate the ceramic surface.
In general, metal dowels, pins, and armatures are not necessary for most ceramics restoration. They necessitate damage to the original and often result in additional weakness when done improperly.
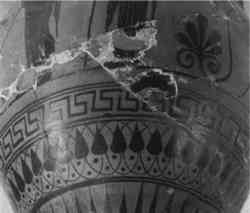
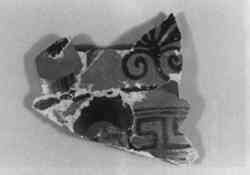
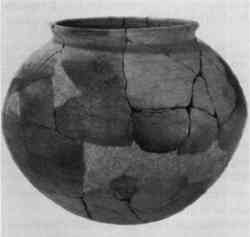
Substituted or “Alien” Fragments—From at least the 6th century B.C., and well into the 20th century, fragments or entire sections from another vessel were chosen to replace missing pieces and to fill losses (Khazanova 1978; Elston 1990a). In antiquity, substituted fragments on Greek vases were attached by mechanical means (clamps or staples) (Elston 1990a). On more recent repairs, attempts were made to fit in a fragment that was a good match, one with similar surface color or decoration (figs. 10–12), while in other cases the fragment only served as a support or fill and was disguised with surface fill or paint. The inserted fragments and those surrounding the loss were often cut or filed down, causing irretrievable damage to both original ceramic and fill. Whole sections of ceramics were “replaced” in this manner (Koob 1988), including handles, bases, rims, or losses to the body (fig. 13).
This practice was well-documented as noted These types of fills generally are not discovered until all the retouching and overpaint on the restored area is removed, or a very careful x-radiograph is examined, and still they may be undetected if the fragments were chosen from a vessel with nearly identical thickness and radio-opacity. X-ray fluorescence and x-radiography are useful nondestructive analytical techniques should the restorer have used two very different (but visually identical) ceramics, e.g., a lead glaze spout on an alkaline glazed body. Examinations to this extent were certainly not encouraged when a restored ceramic was offered for sale, and many composite restorations have gone unnoticed and undetected.
Natural Waxes—Natural waxes such as beeswax have been in use at least since Roman times (Braude 1943) and were certainly in use well into the 20th century (Yates 1953). Carnauba wax was often added to beeswax to form harder and more durable fills. It has been found as fills on Greek vases that were restored in the late 19th and early 20th centuries. Waxes were generally pigmented to match the ceramic or glaze color (fig 14).
When pigmented and mixed with a resin such as gum elemi (for better adhesion), these wax fill mixtures made a very good imitation of a glazed surface. However, their poor aging properties and tendency to pick up dirt and grime or discolor have generally eliminated their use. Waxes were also recommended for strengthening and sealing fills (Lucas 1924). Appearances under ultraviolet light vary considerably, depending on mixtures.
Paints and Sruface Coatings—These were an integral part of loss compensation and often substituted for fills or compensated for inadequate fill appearances. They were used with much the same chronology as waxes, and certainly included thinned wax or natural resins as binders. Paints were used to hide (and fill) in losses along break lines and to fill and cover minor scratches and other surface imperfections such as spalls or firing defects. The most common paints and coatings were shellac (fig. 15) or gum based, with finely ground pigments as the colorants. Heavily pigmented paints using natural earth colors were very popular because they were hard to detect under UV light. By 1980, wax, shellac, and gum binders for paints had virtually disappeared from use, replaced by more stable media.
Natural waxes were also used alone to coat fills in an attempt to more closely imitate a ceramic surface sheen or glaze. The success with which waxes are able to produce a translucent or glazelike appearance still make them popular today, but most uses of natural waxes have been eliminated and replaced by more stable synthetic waxes (G�nsicke and Hirx 1997).
Clay—Clay may have been used from antiquity to the 20th century to cover repairs or surface damage. It is commonly found completely covering the interior of vessels to hide repairs and was applied because it generally does not fluoresce on its own. Unfired clay is not very stable, particularly in high humidity. Animal glue and shellac were
Lime Plaster, Cement—These materials were in common use from perhaps the 5th millennium B.C., but it is not known when they began to be used on ceramics for repairs. They were very popular from the late 18th century until the late 20th century. Lime plaster was often used to “anchor” pins and dowels and as a fill material. It requires a long time to set (12–24 hours), during which time the ceramic cannot be moved. Cement has been used to reinforce and “fill up” large storage vessels, particularly those on display in colonnades or outdoor exhibits of archaeological museums. These materials are extremely detrimental to the ceramic because of the migration of salts and the stress created by the weight. They are almost impossible to remove without considerable damage.
Shellac—In common use as an adhesive and coating varnish from the late 16th century, well into the 20th century, this natural resin (secreted by an insect) was and is available in numerous grades, the most common being “orange flake.” Resin was dissolved in warm alcohol and boiled down to a thick syrup for use as an adhesive or a base for pigmented paint and putty (fig. 15). Shellac became a favorite adhesive for complex pottery assemblies because of its thermoplasticity. This quality allowed a restorer to heat up a misaligned join and move the fragments into correct alignment. Unfortunately, the heating was generally done using an open flame (alcohol lamp or Bunsen burner), and the resin often burned, causing both irreparable damage to the ceramic and the insolubility of the resin. The disadvantages also include its very dark brown appearance, brittleness, structural failure, and difficulty in removal (Koob 1979; 1984). Shellac was also bulked out like the animal glues for use as a fill material (fig. 16). Shellac and mastic (pine resin from Pistacia lentiscus) were mixed together to form a putty for repairing china (Braude 1943).
The problem of embrittlement is serious, as most shellac and animal glue restorations from the mid- to late-19th century have now reached the end of their physical stability. Stress caused by handling, shock, and abrupt changes in temperature or humidity can cause collapse and additional damage. With the advent of modern synthetic thermoplastic resins, shellac adhesive and shellac putties have almost completely disappeared from use on ceramics.
Glassy Fluxes—These were low-melting ceramic glazes or fluxes used to “fuse” broken fragments or substituted fragments together, in use from the 16th (possibly earlier) to 20th century. The application of fluxes or glazes was extremely risky because of the danger of breaking the original ceramic or ceramic fragments during the refiring procedure, as well as of damaging the original surface decoration, such as glazes and colored slips (Lanmon 1969; Marshall 1996). If done carefully, the flux melted at a temperature lower than the original ceramic and not only joined the broken fragments together but filled any losses along the break line. Low-melting glazes were also used to fill small losses, such as chips missing from the rim. The ceramic could be reused. Visually, there is always a color difference along the break edge. Pooling or surface buildup of the new glaze or flux was also common and necessitated grinding away of the excess, followed by polishing. The ceramic appeared whole under ultraviolet light.
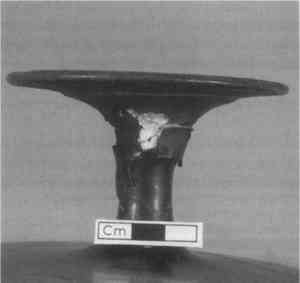
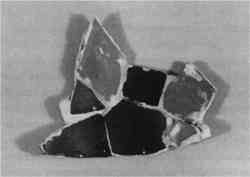
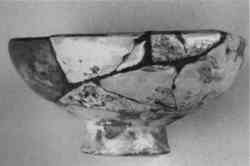
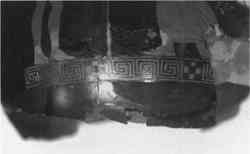
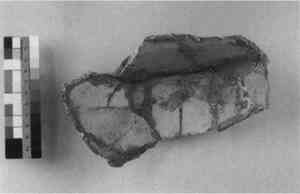
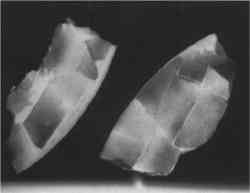
Wood—As early as 1760, elaborately turned wooden bases for goblets, or handles for teapots, were made to replace losses and “affixed” (Lanmon 1969). Wooden pins or dowels were also used to connect replacement fragments or fills to the original ceramic body. Sawdust was mixed with animal glue or other resin, for both small and large fills (Buys and Oakley 1993). Wood fills have also been encountered in the form of blocks or chunks joined together by adhesive and puttied over (figs. 17, 18). After the initial discovery, the fills were examined by x-radiography to identify the construction technique (fig. 19).
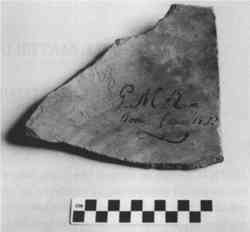
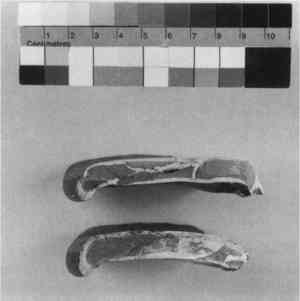
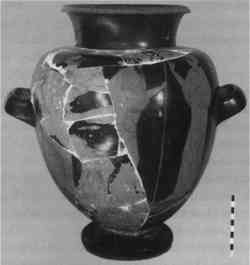
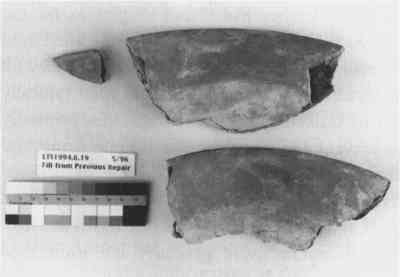
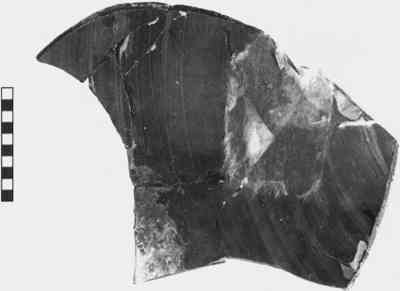
Manufactured Ceramic Fragments—From the 18th century (or earlier) to the 20th century, fired clay fragments were specifically manufactured to fill a loss. A suitable clay was chosen (e.g., earthenware for earthenware, white china clay for china) and the loss was filled with the wet clay, already formed to the appropriate thickness. The clay was probably rolled out as a slab, allowed to These restorations are often difficult to discern in a simple examination or under ultraviolet light, as they are fired clay and their appearance is frequently very close to the original. Closer inspection reveals the absence of finishing marks (no wheel or turntable lines, no surface treatment such as slips or engobes), and a uniform thickness that is different from the ceramic into which it has been inserted. The edges are usually cut sharply or trimmed to accommodate the application of a thick adhesive or putty. The earliest documented restoration incorporating this technique was 1837, but it is likely this technique was used much earlier. During the dismantling of a previous restoration, a fragment of the vessel was found to have been signed on the underside (interior) in ink with initials and the phrase “in Roma l'anno 1837” (see fig. 2). The fragment must have been signed during the restoration, as the vessel has too small a mouth and neck to get one's hand in. The main disadvantage to this practice was the fact that the ceramic replacement part was subject to shrinkage, cracking, or distortion and after being joined to the original, still required touch-up and inpainting.
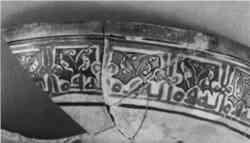
Manufactured Ceramic Replacement Fragments with Fired Decoration—This restoration concept, in use from the early 19th century to the mid-20th century, is similar to the fabricated body fragments described above but taken further, to produce a close or identical copy of the original (fig. 20). The initial manufacturing steps were the same as above, with the addition of surface decoration, done with slips or glazes. The fragments were again fired as fragments to minimize shrinkage, distortion, and changes in surface color. Multiple firings may have been required, for the clay and the glaze(s).
Without doubt, this method required enormous skill, knowledge of the original, and patience, especially in the reproduction of polychrome glazes. Manufactured fragments were adhered in place along with the original fragments. Minor flaws and gaps were filled and retouched. The results were often surprisingly good and this technique was certainly done with deceit in mind. The repair can be easily distinguished from the original once overpaint and adhesive are removed, however, because of the following flaws:
This technique has been found on numerous types of ceramics, including Greek vases (Snow 1986), European 18th-century ceramics (Buys and Oakley 1993), and Islamic pottery (see fig. 20).
Sodium Silicate—Sodium silicate was recommended for use from the early 19th century to the mid-20th century. Also known as “water-glass,” this material was produced by melting purified silica sand with soda ash or sodium sulfate, then dissolving the resulting glass mixture in water (Skeist 1977). It was readily available as a ground powder or in solution of various specific gravities. Recommendations for use included mixing it into a paste with whiting, pigments, ground glass, or flint (St.-Gaudens and Jackson 1953; Hiscox 1948). This compound is basically a water-soluble glass produced by mixing excess alkali with silica. It behaves similarly to a severely crizzled glass in that repeated exposure to high humidity will rapidly leach out the soluble alkali and degrade the glass. Limitations also include the fact that the sodium silicate paste and ceramic original need to be heated for application.
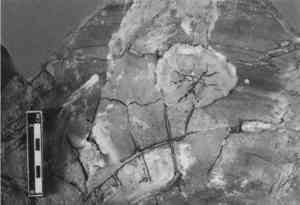
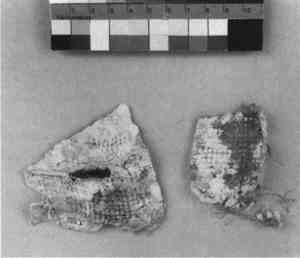
Paper, Papier-m�ch�, Other Cellulosic Materials—In use from the mid-19th century to early 20th century, shredded paper was boiled with glue, whiting, linseed oil, and turpentine to make a “stone cement” for filling large gaps on ceramics (Rathgen 1905). Newspaper, envelopes, and other paper materials were used as crude molding or backing material and have often been found left on the inside of a vessel attached to putties or cast fills. The date of the newspaper or stamped envelope often provides information as to the date of the restoration. Cotton bandages were recommended for use as reinforcements on the inside of the ceramic “when a heavy pot is reconstructed from a great many pieces” (Plenderleith 1934, 25–26). The bandages were soaked in shellac, glue and plaster, or wax mixtures (fig. 21).
Gutta-percha—A natural rubber latex, gutta-percha was used from the late 19th to the early 20th century both as a bonding and fill material (Braude 1943; Yates 1953). This material is extremely viscous and difficult to work with, is dark in color (but can also be bleached), and ages poorly, with significant shrinkage and embrittlement. Rubber “varnish” was also suggested as a binding agent for a colored fill (Andr� 1976). The aging properties of this material are known to be poor (Horie 1987).
Cellulose Nitrate—This extremely popular synthetic resin has been in conservation use since the late 19th century (Horie 1987). When bulked with sawdust, it was popularly known as “Plastic Wood” (St.-Gaudens and Jackson 1953). The color of the fill depended on the color of the sawdust used and any added pigment. This resin was also recommended as a strengthening agent (or consolidant) for fills (Lucas
Cellulose Acetate—This is a close relative to cellulose nitrate and was used slightly later (1920 to 1980) and much less frequently. It is more brittle than cellulose nitrate but became popular because of its lower inflammability. It was recommended as a strengthening agent for fills (Lucas 1924). It oxidizes at room temperature, becomes brittle, and has poor water resistance.
Polyester Resins—In use from the early to the late 20th century, these synthetic resins were recommended for fills on both ceramics and glass (Parsons and Curl 1963; Andr� 1976). They were sometimes strengthened or backed with fiberglass (fig. 22). Polyester resins shrink and are very exothermic during setting, tend to be very brittle, and are difficult to remove without loss of ceramic surface. Other forms of polyester resin include proprietary “car body fillers,” which were recommended under this category as suitable for filling porcelain (Williams 1983). Objections and drawbacks include the unknown compositions, accelerators for setting, considerable shrinkage, and color. Polyester resins are catalyzed by a peroxide initiator but also have added accelerators (for fast, controlled setting) which cause yellowing and anaerobic surface setting (Horie 1987; Skeist 1977).
The excessive strength of the polyester resins makes them inappropriate for use on ceramics and they are also susceptible to yellowing, oxidation, and hydrolysis (Horie 1987).
Poly (Vinyl Acetate) Putties—In the early to mid-20th century, vinyl acetate resin (grade unknown) mixed with clay was suggested as a plastic putty. This mixture “becomes extremely hard and strong after it sets” (Burns 1941, 161). White glues are proprietary emulsion adhesives The dispersions in water have emulsifiers and plasticizers that cause yellowing and cross-linking (Horie 1987). They also have very low glass transition temperatures and tend to attract dirt and grime.
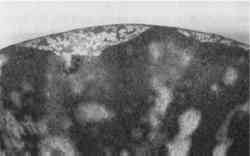
AJK/BJK Dough—In use as a fill material from 1960 to 1980, this consisted of a mixture of Alvar (polyvinyl acetal), jute, and kaolin in solvents, to be used as a putty (UNESCO 1968). It could also be rolled out and cut into small strips to be used dry. Since Alvar is thermoplastic, the dry strips could be warmed and shaped to fit the size and contours of a loss. After cooling, the shaped strips were stuck in place with an adhesive to form a support grid upon which more AJK Dough putty could be added to complete the fill. Because of the high proportion of solvents in the dough mixture, shrinkage was generally a serious problem, and it was necessary to apply thin layers one at a time. The filled area could then be worked to a final surface using solvents or mechanical means, often with an agreeable appearance, without any added coloring or inpainting (fig. 23).
In 1980, Alvar ceased to be manufactured and was replaced by Butvar (polyvinyl butyral), made up to form BJK Dough. The properties and uses of the material remained the same. The idea of creating a stable and reversible backing or lattice-support that was thermoplastic remained popular. The BJK strips were stuck in place using an adhesive, and, instead of completing the fill with more BJK Dough, acrylic or other putties were generally used. Although stocks of this dough still remain in numerous laboratories, its use has virtually ended and it has been replaced by other materials such as Hexcelite (Brown 1989).
5 MATERIALS STILL IN USESome of the materials (not mentioned above) that are still in use for fills on ceramics include plaster of paris, epoxy, or acrylic resins bulked out with fillers such as microballons and fumed silica, as well as proprietary putty fillers such as Polyfilla and Dap. It is difficult to predict how long these restoration materials will continue to be in use. As research and new applications develop (Tennent et al. 1992), new materials with predictable and stable properties are discovered, and “old favorite” traditional materials slowly move to the endangered species list or disappear into the realm of the obsolete. New advances in polymer science and ceramic technology may yet provide us with a ceramic composite that has all the properties of a good casting and molding resin with the stability and reversibility of Class A resins (Feller 1975). 6 CONCLUSIONSAlmost all the fill materials described in this article are no longer in use and should be considered obsolete. Most of the natural resins and waxes have poor or limited aging characteristics, and they discolor, becoming brittle and cracking, before deteriorating further. Other materials such as wood, gutta-percha, and metal (fittings or solder) are both physically incompatible and visually obtrusive. Moreover, they have often resulted in damage to ceramics in application or in attempts at removal. Interestingly, one of the older techniques mentioned above has recently become fashionable again and may yet have a future. This is the recurring use of urushi, which has both a long history and excellent stability under good storage conditions. It is the subject of renewed interest in conservation studios in Japan and is currently taught there as a ceramics restoration technique. Collectors in the United States have also expressed an interest in having broken Japanese ceramics restored in this traditional manner. Unfortunately, the technique is difficult (and toxic) to work with and has an aesthetic appearance that is neither suited for everyone's taste (see fig. 7) nor appropriate for all ceramics. The making of fired ceramic restorations has also recently been recommended as a “new” method for ceramic fills (Andreyeva 1995; Hogan et al. 1996), but, in this author's opinion, the technique should remain on the obsolete list. It requires a multistep process, involving casting and molding the original, making a template and throwing the clay on a wheel, firing the replacement pieces (or vessel), and then modifying the newly made vessel or ceramic fragments to fit. Creating a good fit (and join) is difficult owing to the substantial shrinkage, cracking, or distortion of the new clay upon drying (Hogan et al. 1996); after joining the old and the new, the irregularities must be filled. It is also difficult to justify the fabrication of a reconstruction that is more than 75% modern to insert a few fragments. A modern ceramic reproduction displayed alongside the original fragments would be more appropriate. Since there are other materials and methods available (Elston 1990b; Koob 1987) this technique seems to be both unnecessary and extremely time consuming. Certainly some of the finer manufactured ceramic imitations and restorations done in the 19th century are worthy of preservation. They are a testament to the aesthetic and ethical approaches of the period. Suggestions that they be left on restored vessels, or possibly reused in treatment, are still subjects of much debate (Pavlukhina 1995). Tracing the development of ceramic restoration styles and the workshops with which they were associated could enlighten this debate. It has already been noted how different ceramics collections reflect the time at which they were restored as well as the influences of aesthetic taste and appreciation (Bousquet and Devambez 1950). Loss compensation on ceramics is still an active topic of debate in the conservation field, particularly as to the extent of restoration. Not all broken or reconstructed ceramics require loss compensation, and the decision to fill losses should be determined on the basis of the eventual disposition of the ceramic, whether it be for museum or private display, study and publication, or archaeological storage. Other deciding factors include the current trends in aesthetics and restoration philosophy (Podany 1995). It is logical to limit the amount of intervention that a ceramic endures and the types of materials that are used in its conservation (Koob 1991). Of paramount importance is preserving the integrity of the ceramic object through the use of predictable, dependable, easily usable, and reversible fill materials. The combination of materials and their potential differences in aging and interaction pose further problems for the stability of a ceramic. Even today, a restored ceramic may have so many different synthetic materials attached to it (Barov 1988) that it is difficult to predict when one will deteriorate or interact with another. Fortunately, the experienced ceramics conservator now has an arsenal of solvents and techniques to aid in the removal of all of these resins, putties, and fills. Retreatment requires both the ability to identify the material and understand its chemistry well enough to remove it. Technical analysis and research by conservation scientists and polymer chemists have greatly aided the ceramics conservator in this area, so that these obsolete fill materials can be safely removed without risking damage to the ceramic (or to the conservator). Once the ceramic is returned to its fragmented state, the next step is to put the pieces back together. The restoration challenge begins again. ACKNOWLEDGEMENTSI thank Dr. Chris Maines, conservation scientist in the Scientific Research Department, National Gallery of Art, for the identifications of unknown resins. I also thank Julie Lauffenberger, conservator at the Walters Art Gallery, and Sidney Williston, head conservator at Mario's Conservation Services, for assistance in tracking down early references, and Hiroko Kariya, project conservator at the Brooklyn Museum, for the treatment and photographs of the bowl in figures 17–19. REFERENCESAndr�, J. -M.1976. The restorer's handbook of ceramics and glass. New York: Van Nostrand Reinhold. Andreyeva, L.1995. On the possibility of using burnt ceramic masses for the restoration of damaged ceramics. The ceramics cultural heritage, proceedings of the international symposium, Ceramics Heritage of the 8th CIMTEC-World Ceramics Congress and Forum on New Materials, Florence, Italy. Faenza, Italy: Techna. 739–46. Barov, Z.1988. The reconstruction of a Greek vase: The Kyknos Krater. Studies in Conservation33:165–77. Bousquet, J., and P.Devambez. 1950. New methods in restoring ancient vases in the Louvre. Museum3(2):177–79. Braude, F.1943. Adhesives. Brooklyn, N.Y.: Chemical Publishing Co. Brown, J. B.1989. Hexcelite: a replacement for AJK/BJK dough. Conservation News, United Kingdom Institute for Conservation newsletter40:11–12. Burns, N. F.1941. Field manual for museums. Washington, D.C.: U.S. Government Printing Office. Buys, S., and V.Oakley. 1993. Conservation of ceramics. London: Butterworths, Heinemann. Charters, S., R. P.Evershed, and L. J.Goad. 1993. Identification of an adhesive used to repair a Roman jar. Archaeometry35(1):91–101. de laRie, R.1982. Fluorescence of paint and varnish layers, (Part 1)Studies in Conservation27:1–7 de laRie, R.1986. Ultraviolet radiation fluorescence of paint and varnish layers. Scientific examination of easel paintings, PACT13:91–108. Elston, M.1990a. Ancient repairs of Greek vases in the J. Paul Getty Museum. J. Paul Getty Museum Journal18:53–68. Elston, M.1990b. Technical and aesthetic considerations in the conservation of ancient ceramic and terracotta objects in the J. Paul Getty Museum: Five case studies. Studies in Conservation35:69–80. Feigl, F.1946. Qualitative analysis by spot tests, inorganic and organic applications. 3d ed.New York: Elsevier Publishing Co. Feller, R. L.1975. Speeding up photochemical deterioration. Bulletin Institut Royal du Patrimonie Artistique15:135–50.
G�nsicke, S., and J. W.Hirx. 1997. A translucent wax-resin fill material for the compensation of losses in objects. Journal of the American Institute for Conservation36:17–29. Hiscox, G. D., ed.1948. Henley's twentieth book of formulas, processes and trade secrets. New York: N. W. Henley Publishing Co. Hodges, H. W. M.1975. Problems and ethics of the restoration of pottery. In Conservation in archaeology and the applied arts: Contributions to the 1975 Stockholm Congress, London: IIC. 37–38. Hogan, L., L.Butler, J.Cooper, K.Elliott, D.Ling, J.Quinton, M.Sank, S.Stirling, W.Walker, and F.Ward. 1996. Reconstructing major missing areas of ceramics vessels using clay. ICOM Committee for Conservation preprints, 11th Triennial Meeting, Edinburgh, Scotland. Paris: ICOM. 2: 833–38. Horie, C. V.1987. Materials for conservation: Organic consolidants, adhesives and coatings. Oxford: Butterworth-Heinemann. Khazanova, I. A.1978. Some problems concerning the repeated restoration of antique painted vases. ICOM Committee for Conservation preprints, 5th Triennial Meeting, Zagreb. Paris: ICOM. 1–6. Klein, W. K.1962. Restoring china and glass: The Klein method. New York: Harper & Row. Koob, S. P. 1979. The removal of aged shellac adhesive from ceramics. Studies in Conservation24:134–35. Koob, S. P.1984. The continued use of shellac as an adhesive: Why? Adhesives and consolidants: preprints of the contributions to the Paris congress. London: IIC. 103. Koob, S. P.1987. Detachable plaster restorations for archaeological ceramics. Recent advances in the conservation and analysis of artifacts. Jubilee Conservation Conference, London: Summer Schools Press. 63–65. Koob, S. P.1988. The conservation and restoration of red-figure stamnos No. 48-30-3. Expedition30(2): 29–30. Koob, S. P.1991. The use of Acryloid B-72 in the treatment of archaeological ceramics: Minimal intervention. Materials issues in art and archaeology, II, Materials Research Society Symposium Proceedings 185, ed.P.Vandiver et al. Pittsburgh: Materials Research Society. 591–96. Lanmon, D. P.1969. Putting the pieces together: Ceramics and glass repairing in the eighteenth and nineteenth centuries. Delaware antiques show catalogue. 95–102. Larney, J.1975. Restoring ceramics. New York: Watson-Guptill Publications. Litchfield, F.1951. Pottery and porcelain: A guide to collectors. New York: M. Barrows and Co. Lucas, A.1924. Antiques: Their restoration and preservation. London: Edward Arnold & Co. Lucas, A.1989. Ancient Egyptian materials and industries. 4th ed., rev. by J. R.Harris. London: Histories & Mysteries of Man, Ltd. Marshall, A.1996. Personal communication. Hillwood Museum, 4155 Linnean Ave., NW, Washington, D.C. 20008. Nakasato, T.1988. Urushi as restoration material. The conservation of far Eastern art: Abstracts of the contributions to the Kyoto congress. London: IIC. 49. Noble, J. V.1965. The techniques of painted Attic pottery. New York: Watson-Guptill Publications. Parsons, C. S. M., and F. H.Curl. 1963. China mending and restoration. London: Faber and Faber.
Pavlukhina, N.1995. Restoration of the antique vases from the collection Marquis of Campana in the Hermitage Museum (historical pages and actual problems). The ceramics cultural heritage. Proceedings of the international symposium, Ceramics Heritage of the 8th CIMTEC-World Ceramics Congress and Forum on New Materials, Florence, Italy. Faenza, Italy: Techna. 731–38. Plenderleith, H. J.1934. The preservation of antiquities. London:Museums Association. Podany, J.1995. Faked, flayed, or fractured? Development of loss compensation approaches for antiquities at the J. Paul Getty Museum. In Loss compensation: Technical and philosophical issues, AIC Objects Specialty Group postprints, vol. 2. Washington, D.C.:AIC. 38–56. Rathgen, F.1905. The preservation of antiquities. Cambridge: Cambridge University Press. Rorimer, J.1931. Ultra-violet rays and their use in the examination of works of art. New York: Metropolitan Museum of Art. St.-Gaudens., P., and A. R.Jackson. 1953. How to mend china and bric-a-brac as a hobby…as a business. Boston: Charles T. Branford Co. Skeist, I.1977. Handbook of adhesives. 2d ed.New York: Van Nostrand Reinhold Co. Snow, C. E.1986. The Affecter amphora: A case study in the history of Greek vase restoration. Journal of the Walters Art Gallery44:2–7. Tennent, N. H., T.Baird, J.Kerr, and M.Slager. 1992. The conservation and technical examination of some Spanish lustre ceramics. In Conservation of the Iberian and Latin American cultural heritage: Preprints of the contributions to the Madrid congress, eds.H. W.Hodges, J. S.Mills and P.Smith. London: IIC. 158–64. UNESCO. 1968. The conservation of cultural property. Belgium: United Nations. Williams, N.1983. Porcelain repair and restoration. London: British Museum Publications Ltd. Williams, N.1988. Ancient methods of repairing pottery and porcelain. In Early advances in conservation, ed.V.Daniels. British Museum Occasional Paper 65. London: British Museum. 147–50. Yates, R. F.1953. How to restore china, bric-a-brac and small antiques. New York: Gramercy Publishing Co. AUTHOR INFORMATIONSTEPHEN P. KOOB received an M.A. (1976) in Classical Archaeology from Indiana University and a B.Sc. (1980) in Archaeological Conservation and Materials Science from the Institute of Archaeology, University of London. He spent five years as conservator of the Agora Excavations with the American School of Classical Studies in Athens, Greece. In 1986 he started as conservator, specializing in ceramics and glass, at the Freer Gallery of Art and Arthur M. Sackler Gallery, Smithsonian Institution. He has also done extensive private work, re-treating Greek vases for the Walters Art Gallery, the University of Pennsylvania Museum, Princeton Art Museum and The Yale University Art Gallery. Address: Department of Conservation and Scientific Research, Freer Gallery of Art, Smithsonian Institution, Washington, D.C. 20560.
 Section Index Section Index |
