A TRANSLUCENT WAX-RESIN FILL MATERIAL FOR THE COMPENSATION OF LOSSES IN OBJECTS
SUSANNE G�NSICKE, & JOHN W. HIRX
4 USE OF THE WAX-RESIN FOR TREATMENTS
4.1 PREPARATION OF THE MATERIAL
The following formula has been used for numerous treatments in several conservation laboratories: 9 parts PVAC AYAC, 3 parts A-C 540, 1 part A-C 580, and 0.5% by weight Irganox 1076 or 1035.
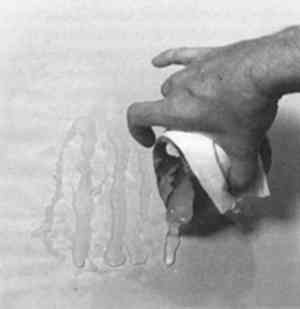
Starting with the PVAC, these materials are melted together on a hot plate or wax pot, or in a well-controlled oven, at the lowest possible temperature. When the PVAC is melted, the antioxidant and thermal inhibitor Irganox is added. The EAA resins are slowly stirred into the hot melt. The components are not completely miscible; rather, they are slightly incompatible. Discoloration and separation can occur if the temperature is too high or if the mixture is not stirred enough. Separation is easily recognizable, for the PVAC floats in translucent bubbles on the surface of the mixture; stirring will reverse this situation. If no pigments or fillers are added, the mix becomes a translucent, light grayish white, somewhat glassy material. Dry pigments can be added as needed (fig. 2). If the treatment requires the use of small strips of cold wax- resin, the melted mass can be poured into strips on Mylar or glass and allowed to cool (fig. 3).
Fig. 2.
Dry pigments can be used to obtain any desired color and opacity.
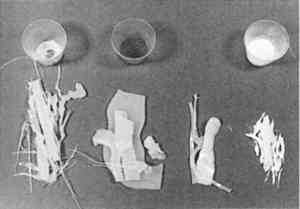 |
Fig. 3.
The melted fill material is poured onto Mylar, where it hardens to form thin strips.
 |
4.2 EXAMPLES OF TREATMENT APPLICATION AND EVALUATION OF EXISTING FILLS
The break edges to which the fill is to be applied must be coated with a primer, which consists of a brushable solution of PVAC AYAA, 10–30% in organic solvents, wt./vol. This PVAC primer will soften as the warm wax-resin is applied to the object and will form a bond with the fill; without the primer the wax-resin fill will not adhere well to the object. In some cases, due to the shape of the break edges, the fill will be locked further into the area of loss. Generally, the less physical the grip, for example in shallow losses or narrow gaps along break edges, the more thorough the primer coating needs to be and the warmer the fill needs to be when introduced.
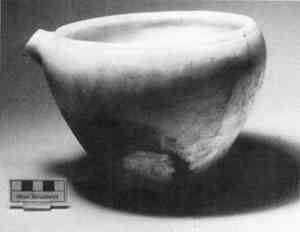
The wax-resin can be manipulated in a number of different ways. Many types of losses can be filled using sticks of wax-resin softened with a hot-air gun (fig. 4) or a heated spatula, pressing the material into the primed area to be filled. Slight warming of the object, if at all possible, prevents cold joint. For example, an Egyptian Old Kingdom spouted jar (fig. 5) at the Museum of Fine Arts, Boston, carved from Egyptian alabaster (i.e., calcite), was broken in two pieces and had a loss at one side that was to be filled. After cleaning the fragments and mending the jar, sticks and sheets of the fill material, colored to match the base color of the jar, were melted against the primed break edges. As the material cooled slowly, more layers were added and the fill was smoothed with a heated spatula. The manipulation of the warm material, which has a toffeelike, slightly stringy consistency, is somewhat messy. Therefore it was easiest to overfill and continue final shaping mechanically. The wax-resin was sanded, buffed, and polished with a cotton cloth and Novus Plastic Polish 2 to match the surface luster of the original stone (fig. 6). A high gloss can be obtained by polishing a fill that has been made scratch free by sanding with increasingly fine sandpapers. As full compensation of the loss was required, acrylic emulsion paint was used to continue a dark stain and some superficial white spots from the original surface (fig. 7).
Fig. 4.
Hardened wax-resin sticks can be softened with a hot-air gun.
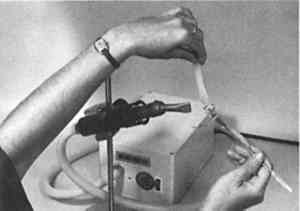 |
Fig. 5.
Spouted jar, Egyptian, Old Kingdom Dynasty 3 or 4 (2700–2500 B.C.), Egyptian alabaster, 16.1 cm h and 20 cm d. Museum of Fine Arts, Boston, acc. no. 72.557. Before treatment
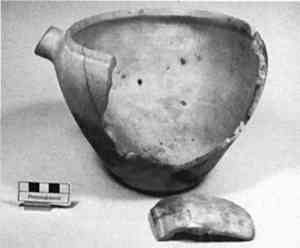 |
Fig. 6.
Spouted jar. Wax-resin fill in jar prior to inpainting
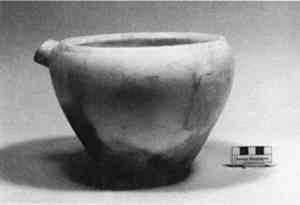 |
Fig. 7.
Spouted jar. After polishing and inpainting of the fill
 |
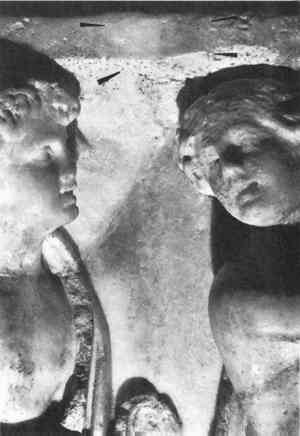
A second example for working the warm fill material into an area of loss is a Roman marble sarcophagus (fig. 8) at LACMA, which had numerous gaps (fig. 9) along old break edges that needed to be filled in 1982. The wax-resin was applied to the primed stone edges in numerous areas with a heat spatula. The fills have been monitored since and have shown no signs of yellowing or cold flow, even in vertical sites or at an overhang such as the underside of the rim (fig. 10).
Fig. 8.
Sarcophagus, Roman, 195–200 A.D., marble, 66.04 cm h, 215.90 cm w, and 71.12 cm d. Los Angeles County Museum of Art, acc. no. 50.37.11. Overall view after treatment, 1984
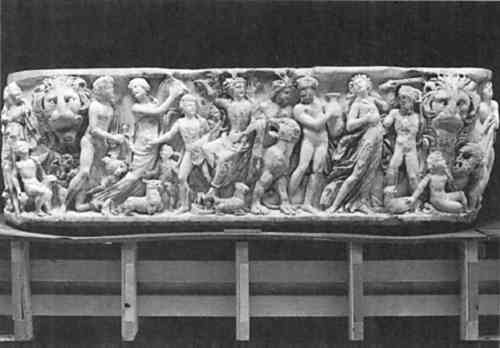 |
Fig. 9.
Detail, sarcophagus, showing area of loss before the 1982 treatment, where the wax-resin was applied on a vertical surface as well as an overhang
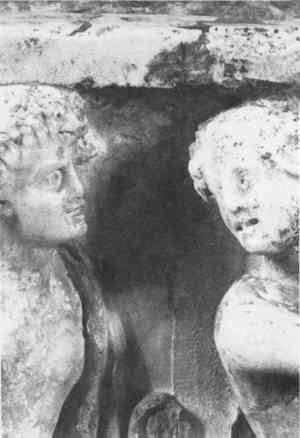 |
Fig. 10.
Detail, sarcophagus, same view as fig. 9, showing the loss filled with wax-resin and photographed in 1995
 |
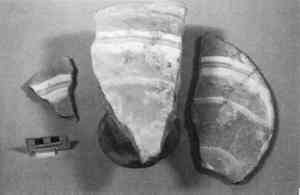
Sometimes a loss is so large that it requires separate construction and attachment with an adhesive different from the primer. Larger losses can be cast, as was done on an Egyptian Old Kingdom offering table (fig. 11), in preparation for a special exhibition on funerary art, Mummies and Magic, at the Museum of Fine Arts, Boston, in 1988. This object was carved from a single piece of calcite, which was characterized by bands of different colors, ranging from white to amber, and from opaque to translucent. The offering table was to be displayed elevated on an ancient ceramic stand, where light shining through the half-inch thick veined top was to display the quality of the stone.
Fig. 11.
Offering table, Egyptian, Old Kingdom Dynasty 3 (2700–2600 B.C.), calcite, 10.2 cm h and 30.5 cm d. Museum of Fine Arts, Boston, acc. no. 11.2394. Before treatment
 |
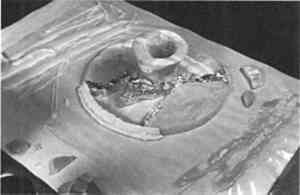
The top of the offering table was broken into four pieces; one-third of it was lost and needed to be replaced. Plaster and other opaque materials would not fulfill the requirements for this display, and an alternative to polyester and epoxy was sought. A large amount of the wax-resin was prepared and colored to match the ochre base color of the stone. The fill was initially cast as a thick monochrome piece within the break area but was separated from the stone by aluminum foil (fig. 12). It was further molded with a hot spatula. To recreate the opaque white veining of the stone, grooves were carved into the ochre fill section, continuing the original bands. These were then filled with matching white opaque wax-resin, applied with a hot spatula.
Fig. 12.
Offering table, during filling
 |
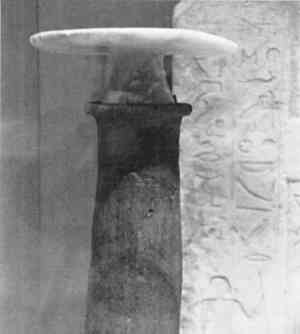
These bands were slightly overfilled, and the cooled surface was then shaped with sharp tools and sandpaper. Given the large size and weight of the fill section, a bond formed by PVAC alone did not seem practicable. The fill, therefore, was adhered to the reconstructed stone table fragments with a two component epoxy resin (Epo-Tek 301–2) after the break edges had been coated with R�hm and Haas Acryloid B-72 (fig. 13). The object has been on display in the Museum of Fine Arts since 1988. While the color has not changed visibly, the fill has sagged noticeably (fig. 14). This example certainly reveals the limitations of this material. If the treatment were to be repeated, perhaps it might benefit from a laminated fill incorporating a translucent core of another, more rigid, material or dowels, to which the wax-resin would be applied.
Fig. 13.
Offering table, after treatment in 1988. Note the fill on the left side of the table
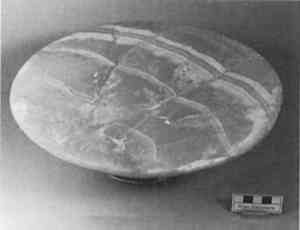 |
Fig. 14.
Offering table, shown on its pottery stand and photographed in the museum gallery in August 1995. Note the sagging right side of the table
 |
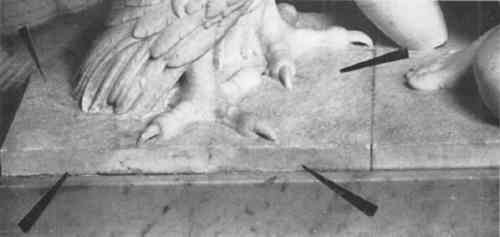
Another limitation of the material is that the wax-resin cannot mask underlying dark materials. This problem was encountered during the treatment of a group of 19th-century white marble sculptures recently acquired by the Chrysler Museum, Norfolk, Virginia. Many of the sculptures had been previously restored. Large losses had been compensated with plaster and/or polyester resins cast in place. The polyester used to fill the losses had aged to a dark greenish yellow color. Because it was cast onto the object, the resin migrated into and catalyzed within the stone, resulting in an irreversible interior dark band. Since the polyester fills could not be removed, they were mechanically pared down and recoated with the wax-resin to simulate more closely the appearance of the stone. The sculpture Ganymede and the Eagle by Bertel Thorwaldsen (fig. 15) had broad plaster compensations about the base of the eagle's feet that had crystallized in the stone, causing the break edges to become sugary and friable (fig. 16). The plaster fills were removed and replaced with removable subsurface fills of Pliacre Epoxy Putty, which is gray in color, to minimize the amount of the wax-resin that had to be applied. The Pliacre fills were surfaced with the wax-resin (figs. 17, 18).
Fig. 15.
Bertel Thorwaldsen, Ganymede and the Eagle, 1817, white marble, 82.23 cm h, 106.05 cm w, and 41.28 cm d. Chrysler Museum, Norfolk, gift of James H. Ricau and Museum Purchase, acc. no. 86.525. Before treatment
 |
Fig. 16.
Detail, Ganymede and the Eagle, showing losses and stains at break edges before treatment
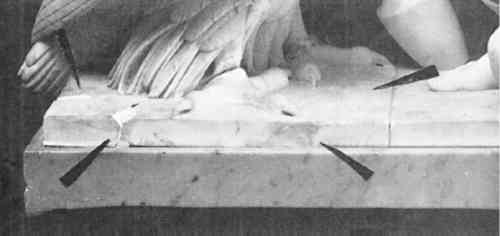 |
Fig. 17.
Ganymede and the Eagle. After treatment
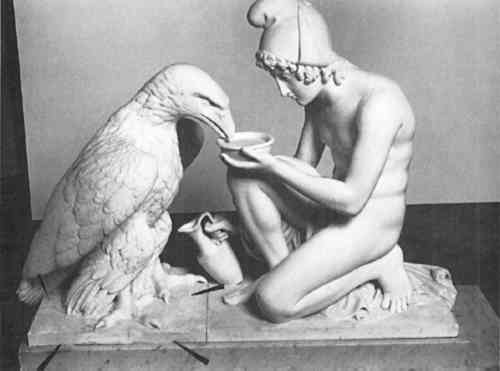 |
Fig. 18.
Detail, Ganymede and the Eagle, showing fills at break edges after treatment
 |
In both instances where a dark underlying core existed, such as the old polyester fills or the detachable Pliacre Epoxy Putty subsurface fills, the darker core material will remain visible as a shadow inside, even if covered with a thick layer of wax-resin. This problem can be somewhat alleviated by using a white epoxy putty, such as Milliput Superfine Epoxy Putty, under the wax.
Using the methods described above, any number of natural stones can be closely imitated. Differently colored and opaque patterns can be alternated to achieve effects of depth or to imitate granular or speckled stones.
|


