EMBEDDING PAINT CROSS-SECTION SAMPLES IN POLYESTER RESINS: PROBLEMS AND SOLUTIONSMICHELE DERRICK, LUIZ SOUZA, TANYA KIESLICH, HENRY FLORSHEIM, & DUSAN STULIK
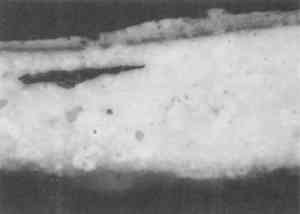
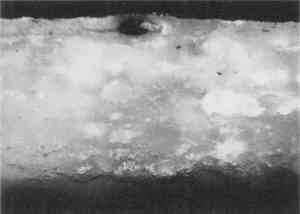
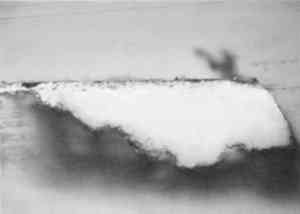
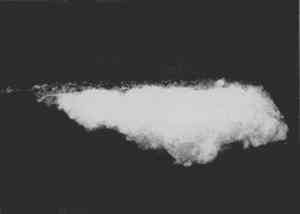
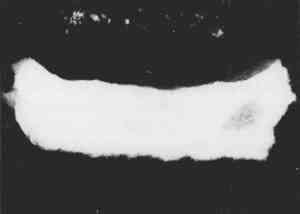
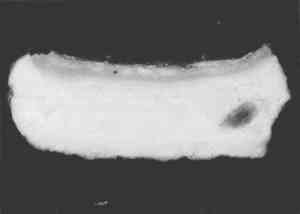
3 EMBEDDING PAINT CROSS SECTIONS WITH POLYESTER RESIN3.1 PROCEDURETo embed a typical paint sample in polyester media (brands noted in table 1), six drops of catalyst (methyl ethyl ketone ether) are mixed thoroughly with 10 ml of liquid polyester/ styrene resin. The transparent resin is initially light blue in color. It turns yellow when the catalyst is well mixed and quickly becomes colorless as the reaction proceeds (Ward's Natural Science 1990). Excess catalyst will speed up the curing process but will also make the final mount more brittle and difficult to microtome. A mold is initially half-filled with the well-mixed embedding medium and cured at room temperature for 3–6 hours. A representative portion of the sample containing all the layers is transferred to the hardened base layer in the mold with forceps or a probe and positioned in the desired orientation. A label is placed on the opposite end of the mold; then both the label and the sample are covered slowly with freshly prepared polyester embedding medium. The embedment is cured and nontacky within 24 hours. When microtoming the sample for infrared microanalysis, the best results are obtained by allowing the embedment to set 36–48 hours before slicing. The medium continues to cure slowly over time (Demmler 1980). After one month, the microtoming becomes noticeably more difficult, and the samples tend to crumble. The bottom and top halves of the block should be prepared within a few days of each other to prevent a hardness differential between halves that interferes with microtoming. Initially, plastic peel-away molds (1 in. cube, fig. 1) were used for embedding. However, because the presence of excess medium stresses the sample during microtoming, most of the plastic around the sample has to be trimmed away to reduce the contact area with the microtome blade. A razor blade or diamond saw is used to trim away all but a supporting cone of plastic with at most 1 mm of embedding media surrounding the sample at the cutting surface. Since trimming can be very time consuming, a switch was made to Pelco silicone rubber embedding molds (7�15�3 mm, (fig. 1). These molds produce small embedments with trapezoidal tips that do not require much trimming. These small embedments, while good for microtoming, are difficult to hold in a level position for polishing samples. 3.2 INFILTRATIONThe penetration of the liquid embedding resin into the interior of a paint sample can occur when there are voids or open spaces in If several samples of a porous material are to be embedded for analytical studies of the media, it is prudent to test only one sample initially to see if infiltration occurs and, more important, whether it obstructs analysis of the sample. Depending on the type of analysis is to be done, it is possible that infiltration of the media will not cause a problem, but the analyst must recognize that the resin may be in the sample and take that into account in any interpretation. Infrared spectroscopy is more sensitive to the presence of the infiltrated resin than visual or microscopic examination and thus, when IR is used, it may be important to prevent the resin from infiltrating. Visual examination of a paint cross section can often detect infiltration of the embedding resin due to the discoloration or darkening of the sample. This infiltration is particularly noticeable for white paints and grounds. Samples that visually appear very white and opaque before embedding can take on a darker, transparent appearance after resin penetration. Due to the presence of embedding resin inside and outside the sample, there is less contrast at the sample edges, and the edges may seem poorly defined. For example, two small portions of a sample from a polychrome sculpture were embedded separately, one in a thickened acrylic medium and one in polyester (figs. 2, 3). The photomicrographs show that the sample in the polyester medium experienced penetration of the resin, while the sample embedded in the acrylic did not. The acrylic embedded sample
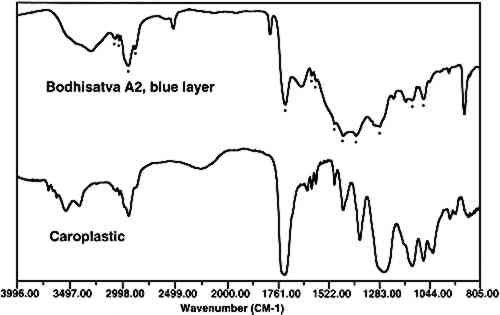
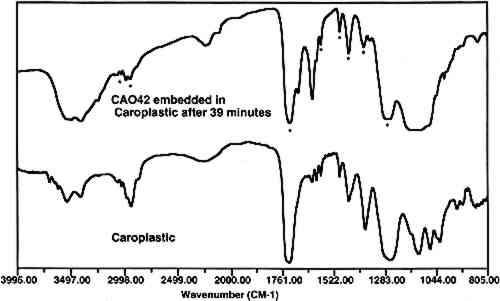
Infiltration of the embedding resin into the sample is readily and conclusively recognizable when infrared microspectroscopy is used to analyze the sample. An infrared spectrum of a cross section will contain absorption bands for each component in the analysis area. Thus, if a paint sample is infiltrated, the spectrum will show absorption bands that correspond to the polyester, the binder, and the pigment. Since the polyester resin absorbs strongly in the infrared region, and since the binder is likely to be in a low concentration, it may be difficult or impossible to identify the binder due to the large absorption bands overlapping and hiding the smaller ones. Spectral subtraction may or may not be successful in removing the absorption bands due to the resin. Figure 4 shows an infrared spectrum of an area of an infiltrated paint cross section along with a reference spectrum of a polyester resin (Caroplastic). Infrared spectroscopy confirms infiltration of the resin by the presence of the polyester absorption bands in the spectrum for the sample.
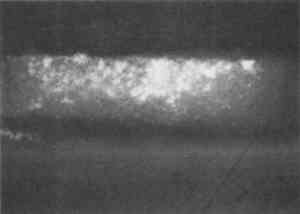
Resin-infiltrated samples do not uniformly retain fluorescent or nonfluorescent stains even though the binder is uniformly distributed throughout a layer. This characteristic is due to the coating of the paint particles by embedding resin, which inhibits the stain from reaching the sample and results in a blotchy appearance. Figures 5 and 6 illustrate that the infiltration problem occurs with low binder content samples. In a test sample prepared with a 40 wt% glue/gypsum concentration, no indications for penetration of the polyester embedding resin were found. The paint cross section stained uniformly and brightly with fluorescein isothiocyanate (FITC) under fluorescent light (fig. 6). A corresponding sample prepared with 5 wt% glue/gypsum was clearly infiltrated with the polyester resin. Figure 5 shows its uneven staining pattern with FITC.
Based on infrared analysis of a sequence of mixtures, it was found that samples with concentrations of 20 wt% or less of glue in gypsum experience infiltration to varying degrees. This finding verified that penetration occurs in low binder content samples. The specific binder-to-pigment ratio at which infiltration occurs depends on the type of binder and pigment present in the sample. 3.3 CURE TIMEAfter the polyester prepolymer is mixed with the catalyst, it has a fluidity similar to corn syrup. The resin flows readily around the sample, and any bubbles migrate to the surface. However, since this fluidity may also enhance the penetration of the resin into the sample, a test was done to permit the mixed resin to cure partially before pouring the second half of the mold. After 41 minutes cure time, the polyester was so thick that it did not form a uniform layer over the sample. However, infrared analysis of a paint sample coated with the polyester after 39 minutes of curing showed that the paint sample was infiltrated with the embedding material (fig. 7). Thus, it is not practical to use cure time to prevent the infiltration of the resin.
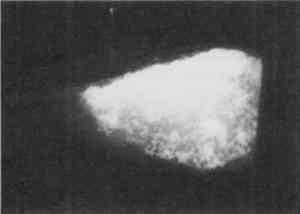
3.4 BARRIER METHODSSince polyester resins are the embedding media of choice, several barrier methods were investigated to encapsulate the samples and prevent the polyester from infiltrating. These methods use a noninterfering material to surround the sample with a thin, impenetrable layer prior to embedding the sample in the polyester, thus keeping the good qualities of the polyester without allowing it to touch the sample. The barrier methods tried for treatment of the samples before embedding in the polyester resin are shown in table 2. Only the last two of these methods were effective at preventing the TABLE 2 BARRIER METHODS TESTED TO PREVENT THE INFILTRATION OF POLYESTER RESIN INTO THE SAMPLES Figures 8 and 9 show photomicrographs of an unstained and FITC-stained paint cross section that had been coated in wax prior to embedding. The sample microtomed easily but the wax did not prevent the infiltration of the resin. In practice, the resin dissolved the wax and created a halo image around the sample.
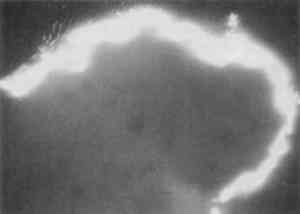
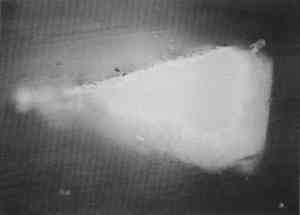
Shrink-wrap was tested for encapsulating samples. However, the high temperatures required to shrink the material are not recommended for sample preparation; in a few attempts, the samples could not be prepared without bubbles being trapped inside the plastic. The presence of bubbles keeps the sample from being held uniformly and makes microtoming difficult. The next test used a sputter coater to coat samples with greater than a 5-nm-thick layer of gold. Several samples of two types (plaster and paint facsimile with glue ground) were prepared by this method. The results were inconsistent within sample type; some were infiltrated by the polyester, and some were not. It appeared that the smoothness and lack of crevices in the sample were important for success, since complete coating of all surfaces is necessary to keep out the polyester. Additionally, careful handling of the sample after coating was required, because, in some cases, a small portion of the fragile coating would attach to the forceps and come off the sample. Figures 10 and 11 show photomicrographs of an unstained and FITC-stained paint cross section of a sputter-coated sample that experienced resin infiltration.
Completely sealing samples in an aluminum foil sandwich with crimped edges was also tried. This method was extremely time-consuming and resulted in an opaque, difficult-to-position sample. Resin infiltration with this method was inconsistent, and thus it is not recommended. Several conservation treatments for papers and painting relinings use nonpenetrating gel-like solutions such as methyl cellulose (Baker 1984), acrylic dispersions thickened with toluene (Keyser 1981; Mehra 1984), and acrylic dispersions thickened with fumed silica (Byrne 1984). Some of these methods were tested for encapsulating the samples and found successful. Many other thixotropic, quick-drying solutions may also work in the same manner. Of the gels tested, the cellulose ether (Klucel G) film dissolved in the polyester resin. The toluene-thickened acrylic (Rhoplex AC-33) was found to retain toluene, resulting in a pliable film that Mixtures of 1, 3, and 10 wt% of Cab-O-Sil (coated fumed silica) in Rhoplex AC-33 produced semiclear films that dried in less than 2 hours. Approximately 3 wt% of Cab-O-Sil in the acrylic emulsion was optimum; however, since the mixture thickens with time, it is best to judge it by its consistency. The consistency should be very viscous, that is, greater than that of honey but less than that of butter. It should be gel-like but should flow enough to seal at the points where the solution meets itself. It is better to have the consistency slightly too thin than too thick. If the mixture is too viscous, it will be hard to get a uniform, thin layer around the sample, and it will not adhere to itself, resulting in coverage gaps. Tests were done using both pure fumed silica and Cab-O-Sil. Both materials work well for thickening the acrylic dispersion, but they behave differently because pure fumed silica is hygroscopic while the Cab-O-Sil has been coated to make it nonhygroscopic. Thus, Cab-O-Sil is not quite as effective at thickening the solution, is harder to mix with the acrylic and takes longer to dry. The optimum mix for pure fumed silica with Rhoplex AC-33 acrylic is approximately 1 wt%. A five-step procedure was used to encapsulate the samples (fig. 12). The first step was to prepare polymerized polyester resin in the bottom half of the mold. A small, thin, contiguous area of the acrylic/silica gel solution was painted at the tip of the mold, and the sample was positioned on it in the desired orientation (typically with the top paint layer down and horizontal to
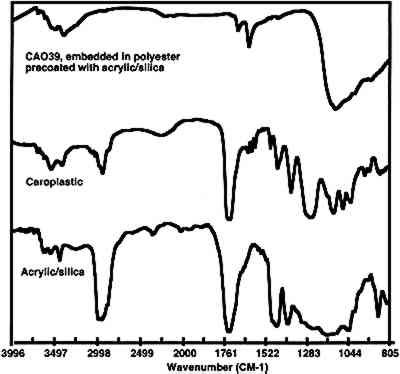
Two points should be kept in mind for success in using this method. First, the acrylic/silica encapsulation layer should not have any bubbles. To minimize bubbles during mixing, it is best to prepare only a small amount of the gel at a time. Second, the amount of acrylic/silica used to encapsulate should be kept at the very minimum needed to surround the sample completely, since thick (1mm) areas of the mixture can result in microtoming problems. Figure 13 shows a photomicrograph of a paint cross section from a polychrome sculpture that was encapsulated in the acrylic/silica mixture and then embedded in polyester resin. The sample exhibits no visual signs of infiltration, and the glue-containing ground layer of the sample stained uniformly with FITC. Figure 14 shows a photomicrograph of the FITC-stained sample. The staining, though faint due to the low concentration of binder in the sample, does produce a uniform color for the glue ground layer portion of the sample. The variations in the intensity of the fluorescence on the bottom and middle layers of this sample are actually due to different concentrations of protein in the gesso sottile (bottom) layer and the gesso grosso (middle) layer of the sample (Souza and Derrick 1994). Figure 15 shows the infrared spectrum obtained from a thin section of the embedded sample. Infrared analysis confirmed that the ground layer of the sample did not experience infiltration of the polyester or of the acrylic media. Thus, the encapsulation of the sample was successful.
|