FILLS FOR BRIDGING STRUCTURAL GAPS IN WOODEN OBJECTSPAUL S. STORCH
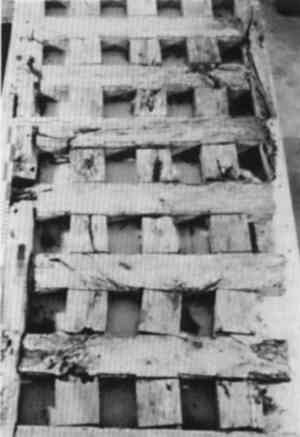
2 TREATMENT METHODfigure 1 shows the object that required the structural fills. It is one of a pair of doors that constitute a large gate structure. Attributed to Spanish Colonial period manufacture in south central Texas during the late 18th or early 19th century, the doors were recovered from a historic farmstead south of San Antonio in 1986.
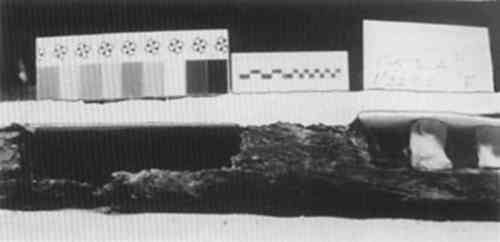
The door designated gate A (fig. 1) sustained advanced decay, especially on the right side, as it had been stored outdoors with the right side resting on the soil surface. The construction method is tongue and groove, with the side and crossbeam tongues held together with wooden pegs. Several of the edges of the grooves had broken off, exposing 2–3 in of the tongue of the spacer block. Since the goal of the conservation treatment of the doors was to stabilize them for display in a vertical frame, restoring structural integrity to the grooves was necessary to prevent the spacer blocks from pushing out when the doors were set upright. Bridging the gaps required several steps. Since the wood in the gap margins was decayed and friable, consolidation was carried out with a 5% g/l solution of Butvar B-98, a polyvinyl butyral resin, in denatured ethanol and butanol (Barclay 1981; Wang and Schniewind 1985; Sakuno and Schniewind 1990). Two to three coats were applied until the areas were satisfactorily consolidated. Next, a flat support surface consisting of a piece of four-ply mat board covered with silicone release paper was positioned in the gap areas supported by adjustable plasticene pylons (fig. 2). RTV 738 was then applied onto the support, keying the silicone into the wood. The top surfaces of the beam adjacent to the gap were protected from any overlap of the silicone with masking tape.
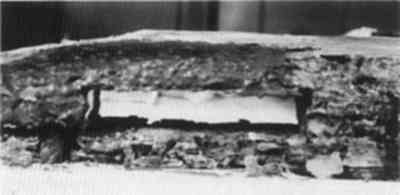
When the fill had dried enough to support its own weight, the board support was removed to allow the fill to cure on all sides. The progress of curing was monitored by inserting a thin metal rod into the center of the fill to test for the presence of uncured resin. When the rod can be removed without resin sticking to it, then the cure is complete. The RTV cures best at a relative humidity of 50% and will form a surface skin after 2–3 hours at this RH, according to the Dow Corning product data. For the thickest fill, which was approximately 1.5 in thick, the cure time was about one week under the conditions in the lab. figure 3 shows the bridge fill prior to final finishing. One coating of self-leveling RTV 734 colored with dry earth pigments has been added. The surface was built up another ⅛ in to a texture that blended with the surrounding wood.
Dry pigments were then rubbed into the surface to give a matte appearance. figure 4 shows a completed bridge fill on one of the crossbeams. It now supports the weight of two spacer blocks when held in the upright position. The reverse surface of the beam was also treated in this manner. |