HOT MELTING CUTTING OF STABILTEXFonda G. Thomsen
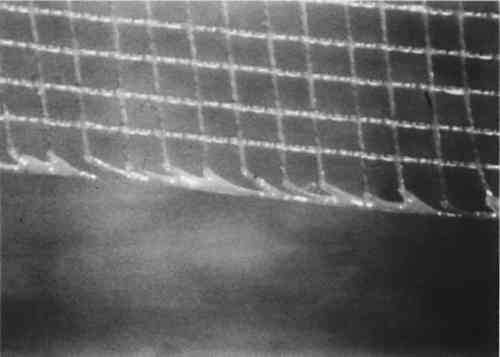
ABSTRACT—Stabiltex, a plain woven multifilament polyester fabric, has found widespread use in conservation, especially with textiles. The biggest drawback in its use has been the fraying of the cut edges and the limited fabric width—one meter. Using an electric wax pen, techniques were developed to overcome these problems. 1 INTRODUCTIONSilk crepeline has been used for many years by textile conservators but its fragility and sensitivity to light were limiting factors. When Stabiltex, a plainwoven multifilament polyester fabric came on the market, it was a more durable, strong, and sheer fabric; however, its limitations soon became apparent. The “slickness” of the fabric made it difficult to handle. The soft plain weave, with no sizing, resulted in heavy fraying of cut edges. The fiber's resistence to taking a bend without heat setting made folding over an edge difficult. The availability of seven colors made it a desirable fabric to cover or “sandwich” textiles such as flags. The one meter width was too narrow for many of the flags and the cut edge had to be turned under leaving a strong colored edge. 2 EXPERIMENTGiven the relatively low melting point of polyester resin (500 F) and its tendancy to flow when melted, a search was started for a way to melt and seal the edge of the Stablitex fabric to avoid the fraying of cut edges. With the assistance of our metals conservator, a hot wire pen was manufactured and connected to a rheostat. This worked well in “cutting” the fabric. The rheostat allowed for the adjustment of the temperature of the pen tip to get the desired degree of melt. The desired degree of melt was determined by studying the melted edge under the microscope. Too much heat caused a carbonization of the fibers with almost no flow. The temperature was lowered until there was jsut enough heat to melt the fibers and create a flow of the polyester. This melt bound the woven plies together, giving an edge that wouldn't unravel. The actual temperature at which this melt took place was not quantified because it is variable depending upon the heat transfer properties of the surrounding surfaces. It seems reasonable that it was just above the 500 degree melting point of the material. Having accomplished a suitable sealed edge, work was done to expand the application of the basic technique. Taking a variety of objects, treatments were explored to determine if Stabiltex could be incorporated to provide a more satisfactory treatment. The hot melt technique was then adapted to try to meet that need. It soon became apparent that the hot melt cutting tool was very useful for a variety of techniques. A search was conducted for commercially available equipment that would do the job. A wax carving tool that had five different shaped tips and a variable temperature in a suitable range was purchased. It performed as well as the home-made model. 3 WORKING TECHNIQUES AND RESULTS3.1 Hot Melt CuttingUsing a metal straight edge, the fabric can be “hot melt” cut, on a glass surface, to give a clean straight edge that does not unravel (Fig. 1). The temperature of the blade should be adjusted to give a melt and not a “burn.” This can be verified by examination under the microscope. By placing a thin strip of glass on the historic object and cutting the Stabiltex free hand, a curved or wavy line can be followed to get an exact match.
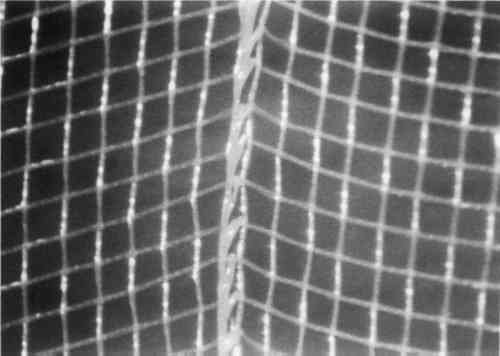
3.2 EncapsulationA piece of fabric or ribbon can be encapsulated between two layers of Stablitex without sewing. The fabric is placed between the two layers of Stablitex. Using a half round metal ruler to keep a downward pressure on the Stabiltex, the two layers of Stabiltex are hot melt cut together (Fig. 2). This allows them to join, thereby encapsulating the fabric. The key to success is the curved metal ruler. There must be a downward pressure on the two Stabiltex layers at the melt site to get them to fuse. The same result can be accomplished by holding a thin metal straight edge perpendicular to the Stabiltex layers, but this was cumbersome for extensive use. To obtain the best results, the temperature of the tip and the speed at which you cut must be carefully adjusted. This is a skill which must be developed by trial and error.
3.3 SeamingTwo layers of Stabiltex can be joined to make a wider fabric. The two edges of the fabric are stacked. Using the curved ruler and downward pressure at the desired seam location, the two layers are hot melt cut together producing a fused seam. The edge should be given a few minutes to cool before the fabrics are opened and the seam stressed (Fig. 3).
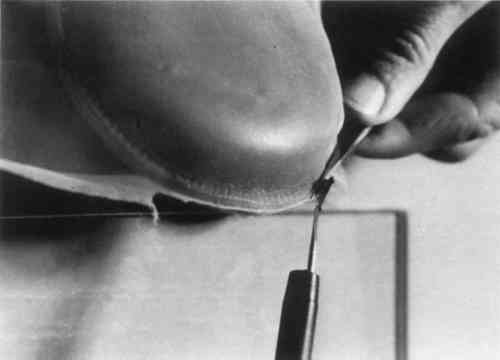
This technique can be used to cover three dimensional objects with Stabiltex. The Stabiltex is wrapped around the object. Where a seam is desired, the two selvage edges of the Stabiltex are held firmly together with a pair of long nosed fine tweezers. The hot knife is then run along the top edge of the tweezers, cutting away the excess fabric and producing a hot melt seam (Fig. 4).
3.4 OverlayAn applique, embroidery or beadwork may have a weak ground that you want to sandwich, but than should not cover the decorative work. By laying a thin piece of glass over the historic object, then the placing the Satbiltex on top, the areas of design can be hot melted out. This levaes the decrated areas open when the Stabiltex is placed over the textile for sandwiching (Fig. 5).
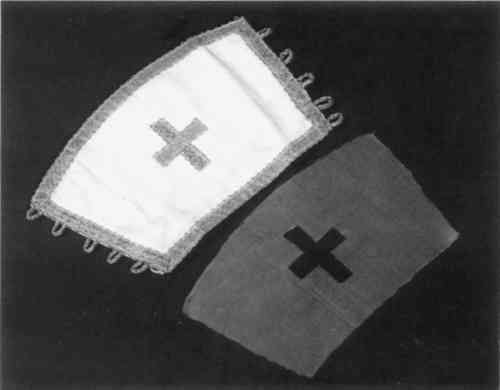
3.5 Butt SeamsA large United States national flag was covered with alternating layers of red and white Stabiltex. A different color of Stabiltex was needed over the heading. This would require butt seaming the Stabiltex in place. This would have been difficult to do without leaving the seam allowance on the surface. To avoid this, another technique was worked out. Cotton threads, the length of the heading, were soaked in a thermoplastic adhesive. The coated threads were placed along the desired seam line of each fabric. The seam allowance of each edge was rolled around the thread to the underside, then heat set with a tacking iron. The two edges were joined with a ladder stitch, making sure stitches went around the encased thread, giving a smooth strong seam. The seam allowances were now underneath and the seam was strong and smooth (Fig. 6).
3.6 Silk CrepelineSilk crepeline is still in widespread use in spite of its fragility because of its receptivity to dying. In some situations, the Stabiltex does not have a suitable color to produce the desired effect. Silk crepeline suffers from some of the same shortcomings as the Stabiltex. The edges fray and the plain weave distorts readily. Therefore, an attempt was made to apply some of the Stabiltex techniques to silk crepeline. Silk does not have as wide a temperature range in the liquid state polyethylene. When heated, the silk would quickly char rather than melt and flow. By carefully controlling the temperature setting, a melted clean edge was finally obtained. The melted edge is more desirable than a cut edge because it doesn't fray as readily, but it is not as stable as the edge obtained on the Stabiltex. Overlay and butt seaming techniques were very successful with the silk. There was not, however, enough fiber melt to achieve seaming or encapsulation. 4 CONCLUSIONSThe ability to hot melt the Stabiltex has broadened applications for use of the fabric and improved treatments. Minor adaptations of the above techniques are continuing to be made. CAUTION: When the polyester is hot melted, fumes are released. Inquiries were made to the manufacturer as to the hazards of these fumes. The manufacturer relayed a health consideration in the manufacturing of the fabrics, concerning a condition called Polymer Fume Fever. The employee can suffer headaches and nausea from continual exposure to high levels of the polymer fumes. The manufacturer did not feel this would be a problem in the limited exposure from the hot melt technique, but suggested the following precautions be taken:
5 MATERIALS
ACKNOWLEDGEMENTSDevelopment work done under National Park Service, Harper's Ferry Center, Harper's Ferry, W.Va. Photographs by Mike Wiltshire, National Park Service, Harper's Ferry Center.
 Section Index Section Index |