WALLPAPER CONSERVATION AT THE LONGFELLOW NATIONAL HISTORIC SITE: PARLOR AND DINING ROOMElizabeth Kaiser Schulte
3 TREATMENTTHEin situ treatment involved the following steps: 1) structural consolidation; 2) consolidation of the support; 3) cleaning; 4) compensation of the support and design; and 5) application of a protective barrier. I shall begin by describing the treatment of the dining room wallpaper. The first step after preparing condition reports and photo documentation involved structural repairs. Plaster detached from the laths was re-adhered using an acrylic latex copolymer masonry binder, “Acryl 60.”2 This was applied by means of a large syringe inserted through holes in the plaster. After application, pressure was then applied to the wall to insure contact between the plaster and the laths.3 The cracks and holes were filled with a 1:1 mixture of fine sand and lime. Damaged plaster which had caused holes or tears in the wallpaper was, of course, readily detectable. But when the crack or hole was covered by the paper, it could only be detected under close visual and tactile examination of the wall surface. When the hole or crack was concealed, it was exposed before filling, by incising the paper along pattern lines and peeling the paper back. Before consolidating the support, we carefully surface cleaned the paper by vacuuming the wall with a brush attachment through a plasticized fiberglas screen. This removed some of the dust, dirt and other accumulations that could have become lodged in the paper during consolidation. After completion of vacuuming and structural repairs, the tears and areas of cleavage were consolidated with a 1:1 mixture of wheat starch paste and methyl cellulose made up according to the packages' directions. We used proprietary products because we wanted a paste that would be easy to obtain, easy to make and, due to the quantities needed, not terribly expensive. We had tested these products prior to the start of the project.4 The adhesive's consistency was adjusted according to circumstances. Several techniques were used to consolidate the paper support. Where the paper was torn and the wall exposed, the paste was brushed directly on the wall. Pieces of plaster often accumulated in the bottom of the tears so these areas were cleaned before adhering dislodged flaps to avoid piercing the paper. When there was no area of exposed wall and blind cleavage was detected by the use of raking light and by the emission from the wall of a hollow sound when tapped, the wall was After consolidation of the paper support, the wallpaper was cleaned. The dark, uneven, discolored, resinous coating was removed with acetone and large cotton swabs6(Figs. 4 and 5). During cleaning, the over-paint was also removed.
After cleaning, the support and design were compensated. Losses in the support were repaired by inserting a paper of similar texture and thickness. The paper was first toned with watercolor to approximate the background color of the wallpaper. The outline of the loss was recorded by placing a piece of paper over the loss and tracing its contour. The tracing paper was then placed on top of the insert paper and the outline of the loss was transferred to the insert paper by perforating it with a probe. The perforations were then scored with a scalpel and feathertorn. The inserts were applied to the wall with a methyl cellulose/wheat starch paste mixture. The design motifs, which were easily reproducible due to the repeats, were penciled in and inpainted with watercolors. The background color was more accurately toned at this point (Fig. 6).
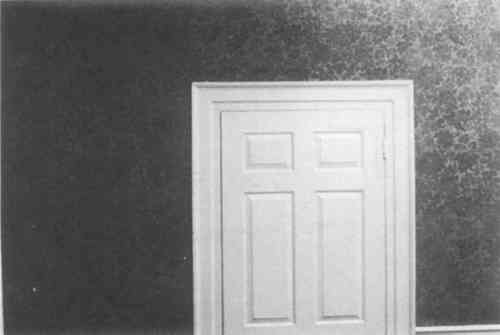
The treatment of the parlor wallpaper basically followed the same steps as that of the dining room paper. Variations did occur along each step. The first step, that of structural repairs, was a very minor one. Only holes in the plaster needed to be filled. Again this was done with the 1:1 mixture of sand and lime. After carefully vacuuming through a plasticized fiberglas screen, the mildly flaking paint layer was consolidated with a brush coat of gelatin. Testing prior to the consolidation showed that solvent cleaning could be successfully accomplished through the gelatin layer. Consolidation of the paper support followed consolidation of the paint layer. This process was complicated by the fact that the paper was multi-layered and cleavage had occurred not only between the wall and the paper, but between the layers of the papers. In some areas, the two papers were still adhered. However, when re-adhering the bottom layer to the wall, separation between the layers would occur due to the action of the moisture of the paste on the water soluble adhesive used to attach the upper paper. Because syringes were used, the moisture could not be blotted out. The consolidation sequence was such that the bottom layer was first attached to the wall and then the top layer of the paper was re-adhered to the lower layer. The syringe was the most valuable tool when dealing with the consolidation of layered papers. A methyl cellulose/wheat starch paste was used as the adhesive. The paper along the baseboards and parts of the upper molding was lifted and a strip of mulberry paper approximately six inches wide was pasted to the wall. The wallpaper was then pasted to the mulberry paper. This was done to give the paper support and to provide that the extremely fragile paper would not have to conform to the sharp angles of the molding. The mulberry paper provided a smoother transition to the baseboard molding. Large detached pieces of the wallpaper were backed with Japanese paper Following the consolidation, the paper was cleaned. A 9% solution of ammonia was used in the white areas. Acetone and a hexane/methyl ethyl ketone mixture were used on the rest of the paper. Once cleaning was completed, design and support compensation were started. Three methods were used. Small losses were inserted in a manner similar to that used in the dining room. Areas of exposed mulberry paper along the baseboards were sized with gelatin and inpainted with watercolors. Patches for large losses were inserted using aforementioned techniques and reproduction wallpaper which had previously been made from this room.8 These inserts were then toned with watercolor. As a final step, both sets of wallpaper were given a protective coating of Acryloid B-72 in toluene. Because it originally had a semi-gloss surface, the dining room was brush coated with a 12 1/2% solution. The parlor was brush coated with a 4% solution. This coating was applied to give the paper protection from dirt, airborn plaster and sawdust that would result from the continuing restoration of these two rooms and the rest of the house over the next five years. |