THE USE OF SPRAYED POLYVINYL ACETATE RESIN MIXTURES IN THE MOUNTING OF TEXTILESPaul Himmelstein, & Barbara Appelbaum
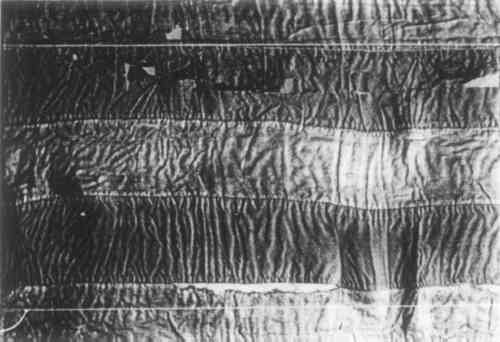
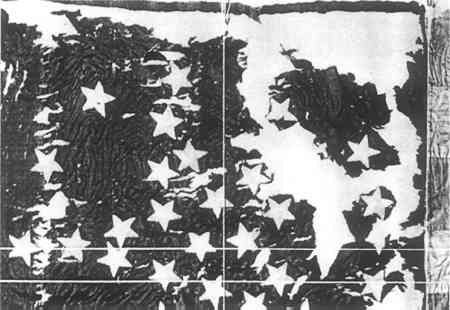
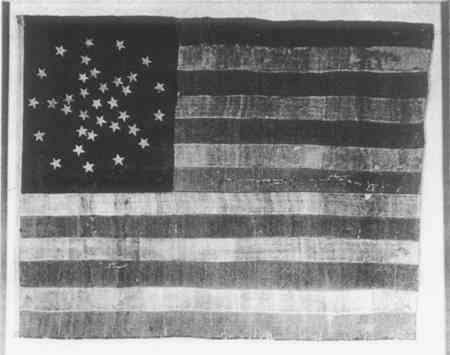
2 PROCEDUREThe general procedure described here was developed to treat a silk and cotton 34-star American flag measuring three by four feet and said to date from the 1860's. (The thirty-fourth state, Kansas, was admitted to the Union on January 1, 1861, and the thirty-fifth state, West Virginia, was admitted on June 20, 1863.) The flag was received tacked to a gold-colored cardboard laid over a piece of composition board and framed directly under glass. The silk of the stripes and field was extremely weak, brittle, and easily abraded, with many breaks. The stars were cut out of cotton and hand-sewn on either side of the field and were much stronger than the silk. There was extensive wrinkling and folding especially in the blue field, as shown in Figures 1 and 2. Because of the weakened condition of the fabrics and the smooth surface, the possibility of sewing was rejected. The flag clearly needed overall support to prevent further deterioration.
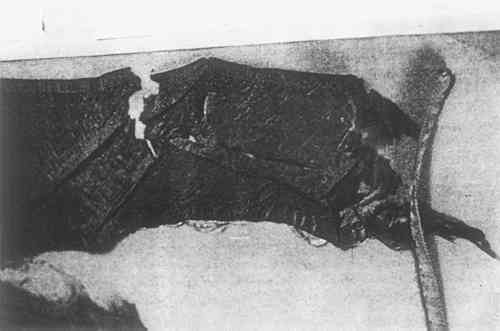
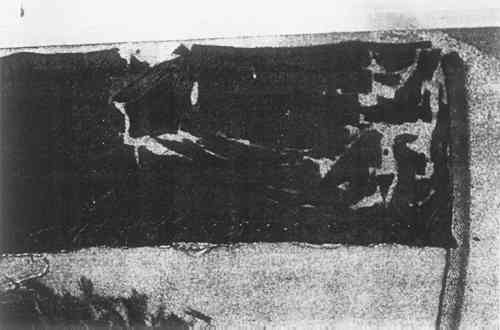
The tacks holding the flag to the cardboard were removed, and the cardboard was gently slid out from under the flag, leaving the flag on a piece of Kraft paper laid over Fome-cor. Threads to guide the blocking were stretched over the flag and secured to push-pins with rubber bands.7 The silk was blocked as follows: The fabric in the stripes was made more flexible by locally raising the humidity with a fine mist of water, and was then moved into position by careful manipulation. The red stripes were then further blocked and wrinkles taken out by ironing with a warm tacking iron through moist blotters. The white stripes, which were made from a more open-weave fabric, were too weak to withstand this procedure. The blue field was blocked as follows: One small area at a time (about two inches square or less) was relaxed with a fine water mist. Fragments were then unfolded and straightened with sable brushes and small spatulas. The area was then pressed under moist blotters and held flat with a square of Plexiglas and about one pound of weight. The blotters and weights were removed as each area was completely dry. At the same time, a support fabric was prepared by stretching a length of silk crepeline net8 taut on a strainer. It was then sprayed from one side ten times over a period of two weeks with a ten percent solution of polyvinyl acetate resins (equal amounts of AYAA and AYAC) in toluene with a few drops of diacetone alcohol added to slow evaporation, sprayed at twenty-five pounds per square inch. The pressure was enough to assure that the fibers of the net were coated without the adhesive forming a continuous film between the threads. [Since this treatment was carried out, we have changed this procedure slightly. We now dilute our 30% stock solutions (made in toluene) with ethanol and omit the diacetone alcohol. Spraying is done under the same conditions, but often no more than six times, depending on the weight of the textile.] After several days of drying, the net was removed from the strainer and taped securely to glassine laid over a solid support. After the flag was transferred to the silk net and the threads were aligned as much as possible, the flag was attached to the net by ironing each area from the front with a warm tacking iron through glassine, as shown in Figures 3 and 4. The bond produced by the first application of minimal heat was weak enough so that the fragments could be removed by sliding a spatula under the fragment, and repositioning as necessary. After all the fragments were in place, the bond was strengthened by ironing with a larger tacking iron at a slightly higher temperature. At this stage, the iron was held for a longer time in each place. (This step could be carried out on a vacuum hot table, if one is available.)
The final mounting was prepared by covering a wooden strainer with a one hundred percent cotton fabric,9 adhered with a polyvinyl acetate emulsion. The same fabric was also stretched to the thread across the back of the strainer. Fabrics chosen to match the colors of the blue field and white stripes were laid over the mounting fabric in the proper positions, with the blue over the white. The flag on its supporting silk net was laid over the colored cotton. All layers were secured to the mounting fabric by sewing along the original seams with a fine needle and soft cotton embroidery floss. The excess silk net and the edges of the background fabrics were trimmed to the edges of the flag. (The combination of the heat-seal support with sewing means that, in the future, the flag can be transferred to a new mounting without the need for retreatment of the flag.) A five-sided box made of ultra-violet filtering Plexiglas (Rohm & Haas UF-3) was fitted over the front of the strainer and secured with screws into the sides, as shown in Figure 5. Acid-free lining paper (Talas) was laid over the back of the mounting fabric as a dust filter. A piece of quarter-inch thick pegboard with strips of the mounting fabric covering the edges was secured over the back by screwing into the strainer. This protects the back of the textile while allowing some circulation of air.
|
