THE CONSERVATION OF A SHENANDOAH VALLEY FRAKTUR
Elizabeth C. Hollyday
2 REMOVAL OF THE FRAKTUR FROM THE CHEST LID
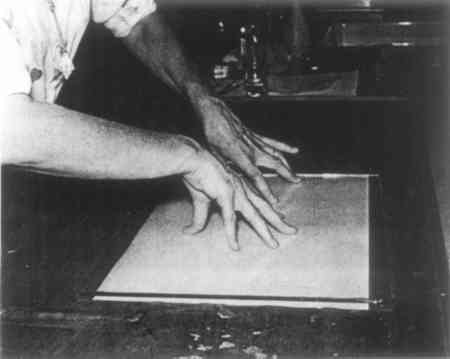
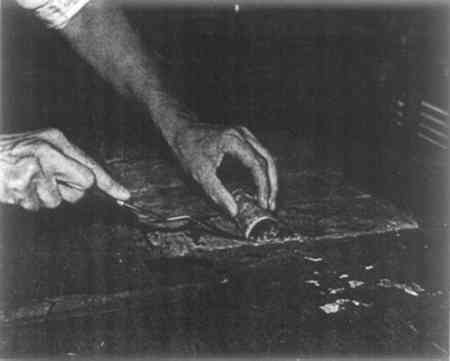
Because of the value of the blanket chest as well as of the fraktur, a procedure had to be devised to separate the two objects without damaging either. First, the lid was removed from the chest and put face down on a sheet of foam rubber on the work table. The fraktur had darkened; also, it was embrittled and disintegrating, especially at the partially separated folds, the edges, and the corners. A hard, white, granular adhesive similar to casein and insoluble in water, had been used to hold the fraktur. To facilitate removal of the fraktur from the chest, the remaining joins between the sections were cut with a scalpel, dividing the paper support into eight separate parts. The watercolors, red and blue, but especially yellow and green, had faded and were not easily soluble. Nevertheless, as a safety measure, they were protected with a single application of 20% Acryloid B72 in toluene.7 The paper support was so brittle that it was feared it might disintegrate upon being removed from the chest. Therefore, a piece of silk chiffon was placed over each section of the paper support as a facing, and brushed with 10% soluble nylon (Calaton CB) in ethyl alcohol. Soluble nylon was used because it effectively reinforces paper, does not leave a glossy surface, and does not produce any apparent change in color.8 It was not possible to remove the fraktur from the chest lid by cutting and forcing a separation with a sharp knife. Therefore, the following method was employed: a thoroughly wet blotter slightly larger than the total size of the eight sections was laid on the fraktur; next a sheet of plate glass was placed on top of the blotter to force the water through the fraktur into the adhesive as shown in Figure 3. It took five applications of watersoaked blotters over a period of about an hour before the adhesive began to swell. During this time the glass and blotters were repeatedly raised to see that no color was coming up. When the adhesive had finally swelled, a palette knife with a thin, flexible blade was used to remove both the adhesive and the paper from the lid. Because of the angle achieved by turning the palette knife upside down, both the adhesive and the paper were separated as a unit by maneuvering the instrument from different angles. Each section was taken up separately by rolling it away from the knife as shown in Figure 4. When the eight sections of fraktur with the adhesive were removed, the lid had only to be scraped carefully to remove the remnants of adhesive; there was only minor scarring of the wood.
Fig. 3.
Applying the Watersoaked Blotter and Plate Glass to the Face of the Fraktur.
 |
Fig. 4.
Fraktur Section is Rolled Away from the Palette Knife.
 |
|

