CONSERVATION OF A FANSANDRA GREENWALD VIERRA, & BETHUNE GIBSON
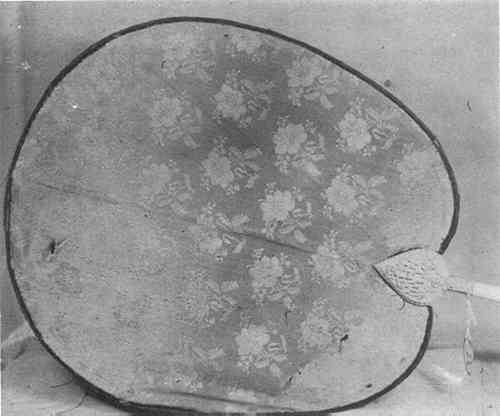
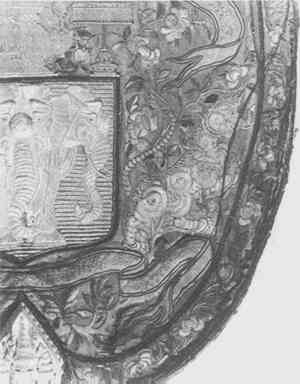
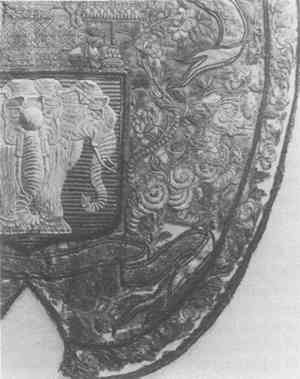
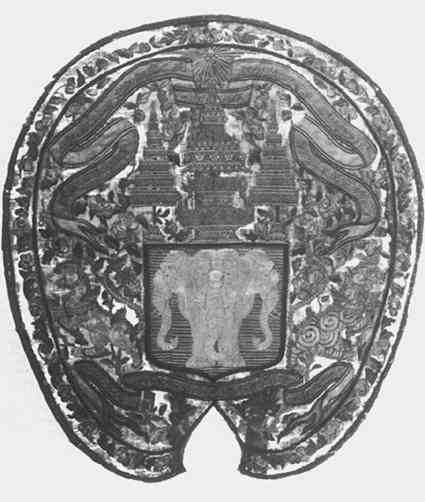
5 TREATMENTBoth sides of the fan were photographed in color and in black and white and are shown in Figures 2 and 3. A sample close-up photo made to show the amount of deterioration of the silk is shown in Figure 4. Other photographic records were made during the conservation process.
The edging braid was removed by cutting the cotton thread that secured it with a thin, sharp scalpel. In addition, the panels were found to be fastened down with a yellowish adhesive that softened slightly when tested with a cotton swab dampened with water. This, however, tended to spot the silk. Ethyl alcohol was then used, and as this easily removed the adhesive, it was assumed to be shellac or a similar natural resin. As the adhesive was dissolved, the edges of the panel were separated with a dental pick and a small spatula. When the panels were removed from the frame, the original color of the silk was revealed. As a matter of interest, the blue dye was tested by removing a few threads of the silk and applying dilute sodium hydroxide. This produced a bleaching action; after application with dilute hydrochloric acid the color returned. This indicated an acid dye. Elisabeth West Fitzhugh, of the Freer Gallery of Art, also tested a sample with the same result.3 Next, a wooden frame was constructed measuring 21-1/2″ wide by 27″ long. Pale green China silk was stretched over it and tacked to the edge, using just enough tension to support the front panel smoothly without sagging. The warp and weft threads of the old silk were aligned with the backing as closely as possible. The panel was stitched to the backing Starting at the center, each embroidery element was stitched down along its edges, using a minute stitch on the right side and a long one on the under side. The embroidery was so extensive and covered such a wide area that it was not necessary to sew into any of the fragile silk, which would not have supported stitches in any case. The background silk was almost the consistency of paper ash, breaking under any but the slightest touch. Even with the most careful handling, there was some unavoidable loss in mounting the panel on the backing. It was clear that impregnation with a consolidant was necessary. Ethulose 4004 (soluble in water and ethanol) was tentatively chosen because, in our experience, of its successful use on other fabrics, because of its reversibility (although in this case reversibility would not be possible without destructive results), and because of the mild solvents in which it could be applied. The colors of the embroidery were tested for bleeding in both water and ethanol. The oranges and yellows bled very slightly in ethanol and the green in water. Therefore, it was decided to impregnate the plain silk first and dry it; then the embroidery could probably be impregnated without danger of the embroidery colors bleeding into the silk. A solution of Ethulose 400 was made by dissolving the Ethulose in 2:3 distilled water to ethanol. Tests were made on scraps of the China silk backing for changes of color and flexibility. These were found to be quite satisfactory, and the impregnation of the silk and the embroidery was carried out as planned, on a very small area to observe the results. No bleeding occurred, so the remaining areas were treated with complete success. This process did not adhere the silk of the panel to the backing and was not intended to do so. The solution was applied with a very small artist's brush and dripped gently onto the surface. The silk absorbed the liquid immediately. When the panel was dry, it was faced with an off-white crepeline. Stitching was done with the same silk thread, and the facing was attached around the edges of the embroidery and around the edges of loss areas to prevent shifting of the old silk. This last stitching was made through the crepeline and backing only, so that the needle did not penetrate the old silk at any point. The completed panel shown in Figure 5 was then treated again with Ethulose applied to the same areas as before. The solution was the same concentration, with the addition of two drops of Carbowax 4003 to each five grams of solution for increased flexibility. This was thought advisable because when remounted, the fan would be under some tension. Allowance was therefore made for slight expansion and contraction due to humidity changes in an uncontrolled storage climate. Due to the thickness of the embroidery, the crepeline did not lie directly on the surface of the old silk, therefore, the Ethulose solution could be dripped through the crepeline, which was then blotted dry with lab tissues. When dry, the panel was removed from the wooden frame and the silk backing was trimmed, leaving a 1.3 cm margin that was folded under and tacked down with silk thread. The completed treatment of the embroidered panel is shown in Figure 6.
5.1 Back PanelThe panel of pink brocade was placed on a white blotter and the heavy deposits of resin along the edge were removed with ethanol and cotton swabs. Since this panel appeared to be much stronger than the embroidered one, it was possible to secure it between two pieces of nylon screen and wash it with distilled water and Orvus.4 It was rinsed in three changes of distilled water and suspended on the screen for air-drying. Following this it was attached to a backing of the same China silk and sewn down with the same silk thread, working from the center outward. No impregnation or facing of this panel was considered necessary. 5.2 BraidThe braid was in such delicate condition that it was necessary to support it with a double backing of crepeline before it could be used to rebind the fan panels to the rim of the frame. The crepeline was attached with Beva 3715, by melting it with a tacking iron set at medium heat. 5.3 FrameThe brass frame was covered with a layer of thin corrosion products. Three spokes needed to be straightened; one had been cut originally to an incorrect length for its position in the frame, causing it to bend. For some reason this had not been noticed when the fan was being assembled. The brass was cleaned with Noxon metal cleaner on cotton swabs and thoroughly rinsed with distilled water. Noxon is not normally used to clean copper alloys because of the possibility of undesirable reactions of the copper with the ammonia in the cleaner. However, in this case the metal was perfectly smooth and there was so much polishing following the removal of the corrosion products that it seemed reasonable to assume that the ammonia would be completely removed before any damage could occur. Cleaning was followed by rubbing with steel wool, grade 0000. A felt-tipped accessory wheel on the flexible high-speed machine accomplished the final polishing. The frame was then coated with Acryloid B-726 in acetone and dried. It may be noted that the metal was restored to a high polish, as the original glossy surface was evident beneath the corrosion products in some areas. The bent spokes were straightened with a screwdriver; the over-long one was recut and resoldered to the rim. 5.4 Ivory HandleThis was in good condition, except for two hairline cracks along the shaft. The grime was removed with spirit soap and small cotton swabs, and the entire handle was rinsed with ethanol. |
