Undercover: Two-Layered Inserts for Chromo Papers
Mary Studt, Amy Fernandez, and Irene BrückleAbstract
The article presents a method of fabricating inserts for "Chromo" paper, a type of coated paper widely used during the 19th- century to print chromolithographs. the aim is to match both the appearance of the original base-paper and coating layer by using two separate layers of insert paper. The procedure facilitates matching the colors and textures of the original paper and attachment of the insert to the original.
Introduction
The development of industrial paper coating in the 19th-century was an advancement in mechanized papermaking and a benefit to the commercial printing trades. Coatings allowed for the use of inexpensive, low-quality wood pulp, while still producing papers of refined texture and color1. Coated papers offered the printing industry a support with reduced hygroexpansivity, thereby allowing printers to maintain accurate registration during numerous applications of colored inks2.
Heightened interest in chromolithographs throughout the 19th-century increased the commercial significance of coated papers. in America, industrial paper coating began in the early 19th-century and was improved through the introduction of on-machine coating in the 1850s3. Brush and later roll coating systems were employed and often papers were subsequently calendered to prepare them for printing. Materials used in coatings included fillers such as chalk, clay, talc, neutral and colored pigments. the first commonly-used binder was gelatin, which was largely replaced by casein in the 1890s. Starch came into use as a coating binder around 1900. During the 20th-century, the selection of coating materials has broadened further to include soya protein and a variety of synthetic polymers, pigments and fillers4.

Fig. 1. Marriage Certificate, chromolithograph, printed in metallic and colored inks on coated paper stock.
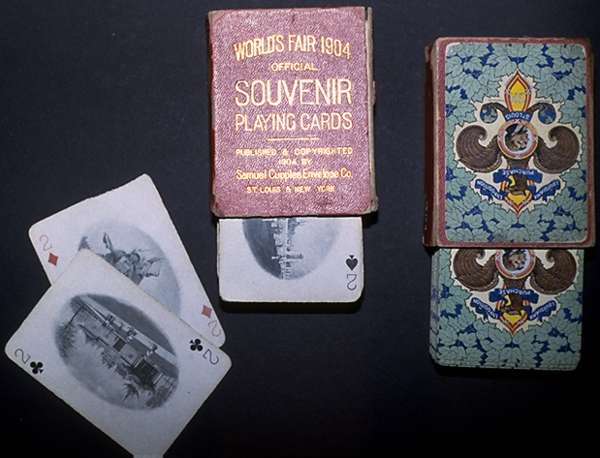
Fig. 2. World's Fair Souvenir Playing Cards, printed on coated paper stock. the case is made with a textured, coated paper meant to imitate leather.
Among coated paper grades are those coated on one side and printed by chromolithography to produce fancy certificates and collectible pictures. (see figure 1 & 2) Such papers were marketed under the names "Chromo", "Chromolitho" and "Chromotype" paper5. As early as the 1840s, lithographic trade cards were printed in Germany on such papers. From the 1870s on, specialized manufacturers, such as the Leipzig firm Nojork, produced Chromo papers and distributed them internationally6. Examples can be found among pictures imported from Europe to the United States and those produced in America.

Fig. 3. Trade card, chromolithograph (verso), printed on Chromo paper. the surface and interior of the paper has darkened significantly with age.
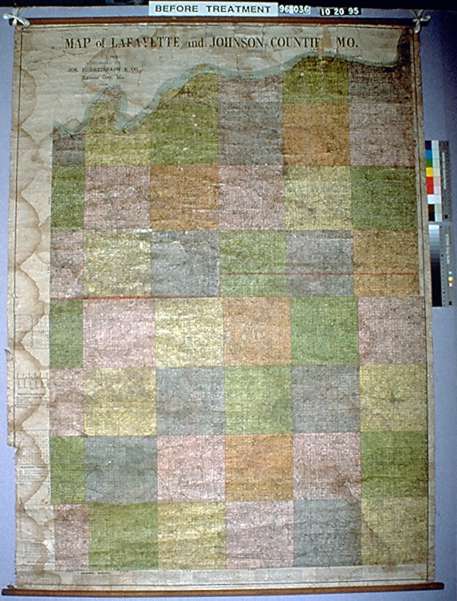
Fig. 4. Map of Lafayette and Johnson Counties, chromolithograph, printed on coated paper. Contact with water has brought about extreme staining in the coating layer.

Fig. 5. Trade card, chromolithograph (recto), printed on Chromo paper. the coating has remained white and printing inks have remained vibrant despite the degraded base paper. Note the fractured corners which lack overlaps for attachment of fills.
Chromo papers degrade somewhat differently from uncoated papers of similar stock. the coating layer frequently retains its brightness and color, though the lignin-containing paper base is prone to darkening with age.(see figure 3) the paper base of Chromo papers has even been known to become discolored on newly made papers7. Chromo papers tend to form tidelines when exposed to water due to the presence of a degraded base paper and its close contact to the absorbent coating material. When water is applied to Chromo papers, the coating acts as a poultice to remove the readily soluble degradation products from the paper base. the degradation products accumulate along tidelines visible primarily in the coating layer.(see figure 4) Damage commonly results from the brittleness of both the coating and paper base. Flaking, tented creases, fractures and losses are common problems.(see figure 5) Though the water-sensitive nature of the papers usually limits treatment to include only tear repairs, local consolidation of the coating layer and filling losses with inserts.
Matching the appearance of the darkened, thick paper substrate and the light-colored, thin coating layer may present difficulties when using only one layer of insert paper. Matching the insert papers with the color and texture of the original, and attaching the insert to the loss edge are facilitated by the use of two separate layers of paper to construct the insert.
Insert Preparation
Paper Base Layer
The Japanese etching paper K-148 works well to form the paper base layer. K-14 is unsized, porous, thick and neutral in tone. the paper thickness can be altered by splitting, sanding or peeling away discrete layers of paper using strips of pressure-sensitive tape. Before thinning K-14, take into account that later sizing and burnishing will significantly compress the paper base thickness.
Tone the paper base layer with watercolor or dilute acrylic emulsion paints to match the original paper color (see PCC 26.3.49). the unsized paper takes on tone evenly, but tends to accumulate pigment along any creases in the paper. Therefore, wet handling should be performed with a support such as a sheet of Mylar and generally kept to a minimum. Tone small pieces by immersion in a bath. Large pieces are easiest to tone by spray application of watercolor or acrylic wash. Suspend large pieces during drying to avoid puddling of the pigment.
After drying, the toned paper base layer can be sized and burnished to give a compact smooth surface similar to Western, machine-made papers. Immerse the paper or brush apply a dilute solution of either gelatin, wheat starch paste or methyl cellulose.
Cut the insert slightly larger than the loss to the original paper base. the insert can be cut using a light box, or by using a Mylar template to outline the area of loss (see PCC 26.4.2.E). A shield of thick Mylar placed between the original paper and the insert paper protects the original while cutting the insert. Cut the insert paper so that it slightly overlaps the original.
Bevel the insert edge as necessary to fit into the region of loss.
Coated Tissue Layer
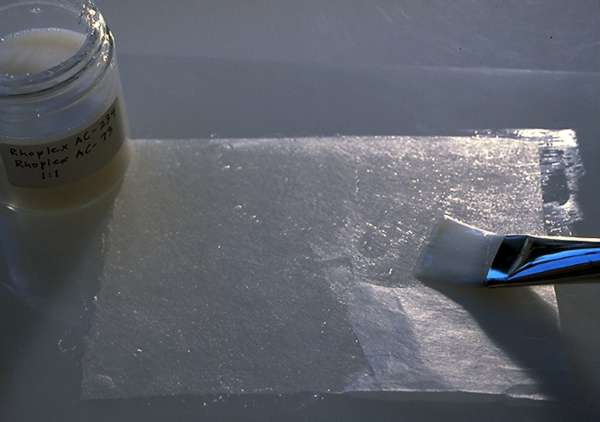
Fig. 6. Coated Tissue Layer. Apply a Rhoplex mixture of AC-234 and AC-73 to a thin Japanese tissue such as RK-1. Brush out the adhesive to remove bubbles and thick streaks of adhesive.
Apply a 1:1 mixture of the acrylic dispersions Rhoplex AC-73 and Rhoplex AC-23410 to a thin sheet of smooth Japanese tissue (e.g. RK-111), supported on a sheet of silicone-release Mylar. Brush out the adhesive to remove bubbles and streaks. the tissue should have a homogenous thickness, texture and translucency. Rhoplex AC-234 increases the translucency of the tissue, while Rhoplex AC-73 is added to reduce the tackiness of the adhesive once dry. the adhesive mixture sizes the tissue so that a coating can be applied without disrupting the fibers, and fills in the fiber network to give a base for application of the smooth coating layer. Allow the tissue to dry against the silicone-release Mylar. (see figure 6)

Fig. 7. Diagram: Coated paper insert for area of loss with tapered edge.
Peel the tissue from the silicone-release Mylar. Place a thick Mylar shield between the tissue and the original. Using the glossy side as the recto, cut an insert for the area of loss to the coating. Cut the insert so that it slightly overlaps the original. the combined thickness of the insert base paper and the Rhoplex-sized tissue should be slightly thinner than that of the original coated paper to accommodate the later application of adhesive and coating. (see figure 7)
Either the shiny or matte side of the sized tissue can be coated, depending on the degree of surface gloss needed to match the original coating. A moderate to low gloss surface can be produced with dilute acrylic paint applications by coating the tissue on the glossy side. A higher gloss surface can be produced by coating the tissue from the matte side with acrylic paint applications. the tissue's translucency allows the coating color to show through the glossy, recto side of the tissue. Choose which side will be coated and support the tissue insert with the side to be coated facing upwards on a sheet of Mylar.
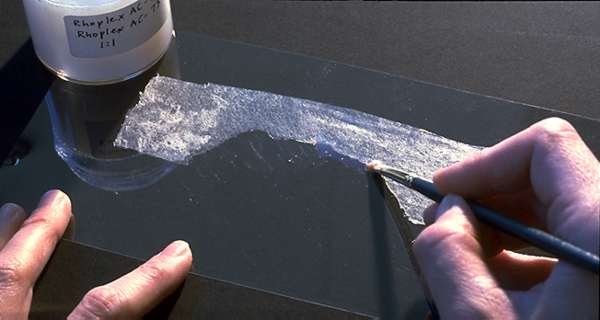
Fig. 8. After cutting the insert, the Rhoplex-sized tissue is adhered to a sheet of Mylar in preparation for coating. Apply a very small amount of the Rhoplex mixture along the edge of the insert to prevent migration of the liquid coating between the Mylar and the insert surface.
To avoid migration of the liquid coating between the edges of the tissue and the Mylar, a small amount of the Rhoplex mixture can be applied along the edges of the insert. the insert is then allowed to dry attached to the Mylar. (see figure 8)
Prepare the tinted coating. Acrylic paints12 are easy to apply and form an insoluble, opaque coating layer. When acrylic paints cannot give an accurate color match (e.g. when a white pigment besides titanium white is necessary), the coating can be made using a variety of fillers and pigments combined with nonaqueous or aqueous media. Chalk, gypsum, kaolin and finely ground dry pigments can be mixed with matte or glossy acrylic media13, B-7214, or other resins. the need to disperse pigments and fillers before adding them to a medium and the lower covering power of many neutral fillers, makes their use time-consuming. To produce a smooth, even coating, dry pigments need to be dispersed in an appropriate solvent before adding them to an aqueous or nonaqueous binder15.
Apply the tinted coating in stages to the Rhoplex-sized tissue insert. Allow the coating to dry fully between stages. the coating layer should be opaque to avoid unexpected shifts in tonality when the insert is adhered to the toned paper base.
Thin the slightly-overlapping edges of the coated tissue insert until only a very thin layer is left to overlap the original.
Attachment of the Insert

Fig. 9. Adhere the layers in segments to avoid excessive expansion of the insert papers while using aqueous adhesives. the first two segments of this large insert have been previously adhered. the final segment is adhered in this photograph.
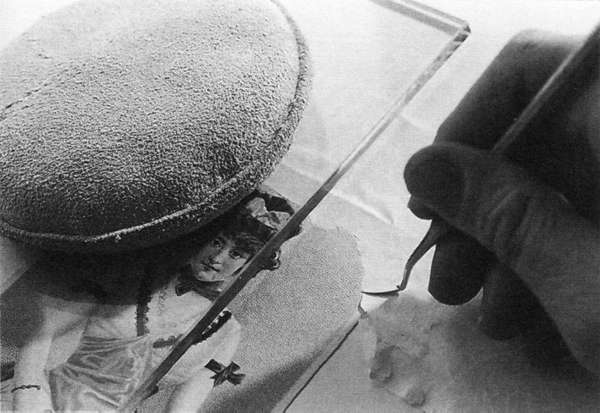
Fig. 18. Drying the insert under heavy weight with a sheet of glass over the coated surface helps to ensure a smooth transition between the insert and the original coated paper edge.
Water-soluble adhesives work well to mend and attach fills to coated papers. the presence of acrylic media on the Rhoplex-sized tissue does not prevent adequate adhesion to the base-paper layer of the insert with water-soluble adhesives. in our experience, methyl cellulose has performed very well as an adhesive throughout the entire process and has been found to be easiest to reverse without damage to the original. Using a fairly "dry" adhesive increases the initial tackiness and reduces the chance of forming tideline stains while mending. For large inserts it may be necessary to adhere the paper base and coating layers in segments to avoid excessive expansion of the insert while using aqueous adhesives. (see figure 9)
If Loss Edges of the Original Are Torn With Overlaps Present To Aid Attachment
Adhere the paper base insert with wheat starch paste or methyl cellulose to the original paper base and weight to dry.
Apply adhesive to the paper base and area of overlap with the original. Adhere the coated tissue insert. Weight to dry.
If Loss Edges of the Original Are Fractured and Overlaps Are Not Present
(also see PCC 26.4.2.B4 and 25.4.C)
The original paper base of Chromo papers often fractures instead of tearing, leaving no overlap for the attachment of the insert. (see figures 3, 5, 20, 24) in this case, inserts can either be secured with the application of Japanese paper strips to the verso or adhered by bridging the loss and the insert edges with paper splines as in the following description.
Fig. 10. Diagram: A split of 1-2 mm is deep enough to insert and hold a spline. the split should be made at a consistent horizontal level in the paper structure to assure that the layers of insert paper meet the original edges properly.
i. Using a very thin spatula, split the original base paper slightly towards the recto surface. A split of 1-2 millimeters is deep enough to insert and hold a spline. the split should be made consistently at the same horizontal level within the paper structure to assure that the layers of insert paper meet the original edges properly. the split in the original paper structure should be situated at the level where the two insert papers will eventually meet. (see figures 10 & 11)
Fig. 11. Diagram: the split in the original paper structure should be situated at the level where the two insert papers meet.
ii. Make the splines by sizing a very thin Japanese tissue (e.g. RK-1) with methyl cellulose and allow the tissue to dry against a piece of Mylar. the methyl cellulose sizing makes the tiny pieces of tissue easier to handle and adds an easily-reactivated adhesive.

Fig. 12. Splines were applied to the fractured corner regions to provide a surface for attachment of the insert papers. A spline was also used to adhere portions of the fractured left corner.
Fig. 13. Splines were necessary only in regions where no overlap of the original edge existed.
iii. Cut short pieces of the sized tissue (e.g. 3 x 4 mm) and insert the splines into the split. Avoid trying to insert splines which cover a long region of the loss edge, as their length may make them difficult to insert. Avoid creating a ridge of thickness at the join of the original coated paper and insert edges by using very thin spline tissue and a small amount of adhesive. Once the splines are inserted, use a small brush to apply a thin layer of methyl cellulose to attach the spline and readhere the layers of the original paper base. It is easiest to insert and attach one or two splines at a time. (see figures 12 & 13)

Fig. 14. Applying methyl cellulose to the verso of the spline tissue and the butted join of the original paper base.

Fig. 15. Adhering the toned paper base insert.
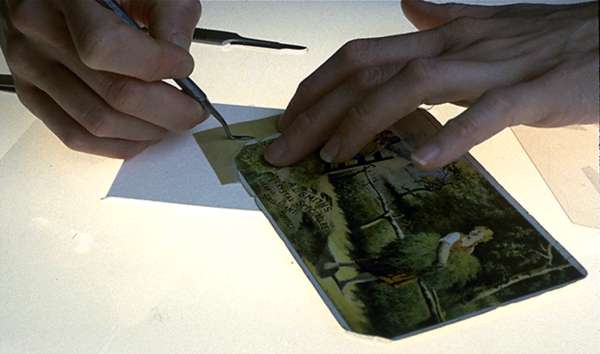
Fig. 16. A pointy, hoe-like dental tool helps to ensure good attachment of the insert to the spline tissue and the edge of the original paper base.
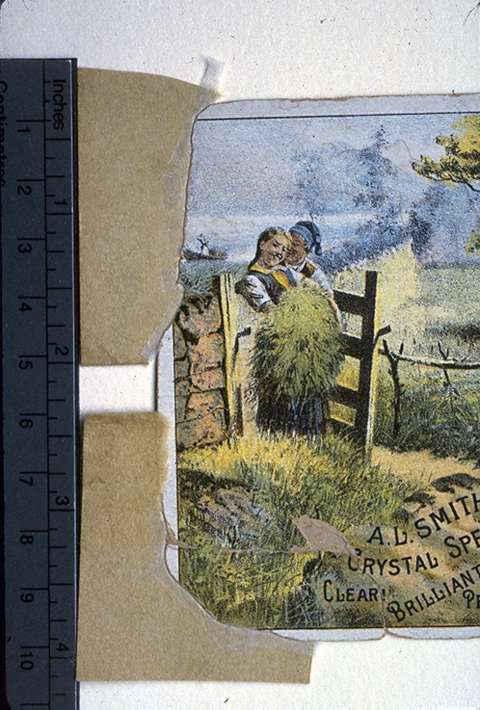
Fig. 17. Trade card with base paper inserts attached to the left corners.
Paste out the verso spline tissue extending from the fractured edge with methyl cellulose and apply a small amount of adhesive at the butted join between the loss and insert edges. Set down the base paper insert and tamp it into place. Weight to dry with frequent blotter changes. (see figures 14-17)
ii. Paste out the remaining recto spline tissue, the base paper layer and butted join between the loss and insert edges with a thin layer of methyl cellulose. Adhere the coated layer to the base paper and to the edges of the original coated paper. Tamp the tissue into place, especially along the edges. Drying the insert under heavy weight with Mylar or glass against the coated surface of the paper helps to ensure a smooth transition between the insert and original coated paper. (see figures 9 & 18)
Texturing Fills
(see PCC 26.3.6 and 30.4.6)

Fig. 19. Textured, coated papers, ~ 25X: left, 19th-century coated paper; right, acrylic coated paper textured with a bamboo skewer and used to fill losses in the original.
Chromo papers were sometimes textured after printing. A dry litho stone etched with a pattern would have been used to create a pattern on the surface of the print16. Once in place, the insert can be textured to mimic the appearance of an original patterned surface. Use a sharpened bamboo skewer to inscribe a pattern in the coating. With adequate pressure and a sharp skewer, the impression will be preserved in the coating layer. Avoid transferring the texture to the base paper by using a pulling, rather than a pressing action to inscribe the texture. (see figure 19)
Inpainting
Watercolor, acrylic emulsion or acrylic resin paints can be used to inpaint the insert where it seems appropriate to recreate areas of loss to the image. Chromolithographs are printed in several layers of colored ink. Acrylic emulsion paints may be useful for layering colors, though in most instances watercolor pigments are fully adequate. Due to their irreversibility on paper, these media are only appropriate for use on the insert and should not be applied to the original.
Reversal of Inserts
The use of methyl cellulose as the primary adhesive allows inserts to be reversed easily. Even splined inserts can be removed without difficulty by humidifying between Gore-tex and layers of wet blotter. With adequate humidification, the layers of insert paper can be peeled away from each other and the spline can be removed.
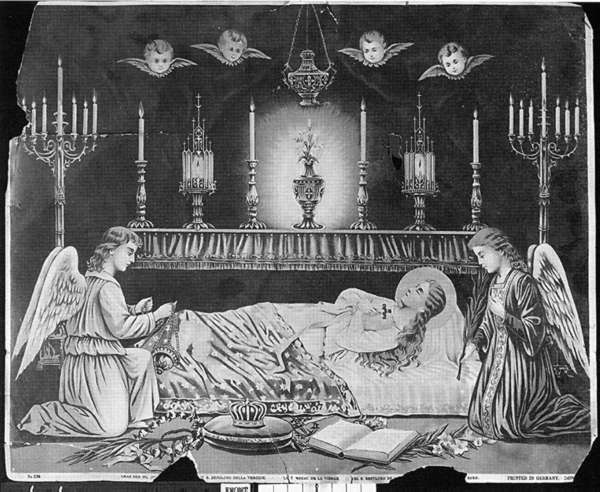
Fig. 20. Before treatment. Tomb of the Virgin, chromolithograph printed on coated paper
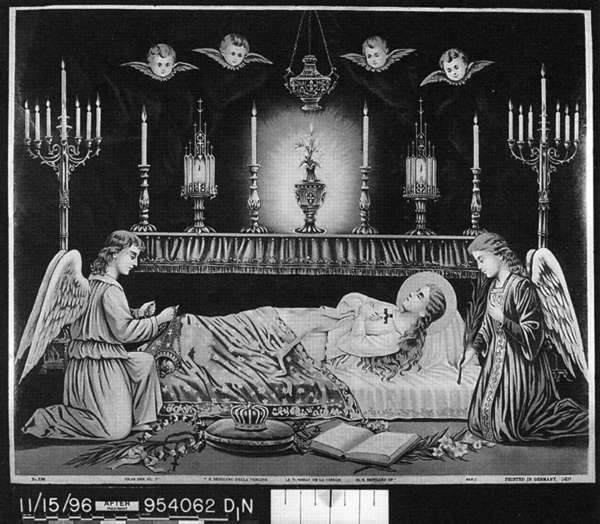
Fig. 21. After treatment. Tomb of the Virgin, chromolithograph printed on coated paper. Treatment included two-layer inserts.
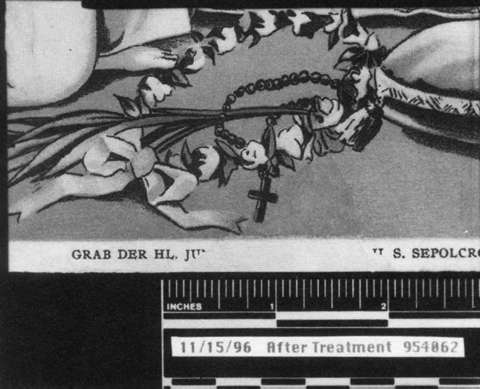
Fig. 22. After treatment. Tomb of the Virgin, chromolithograph printed on coated paper. Treatment included two-layer inserts.
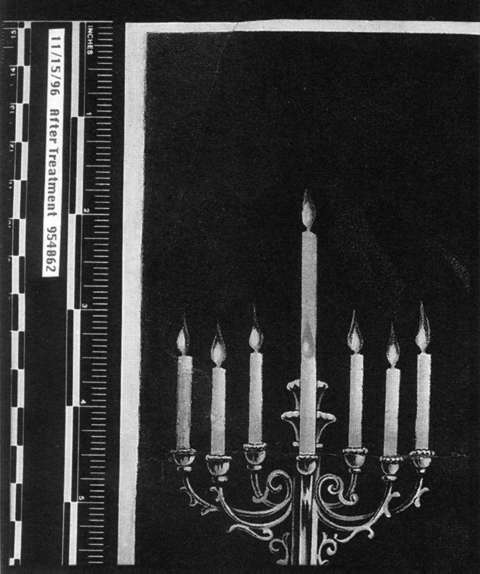
Fig. 23. After treatment. Tomb of the Virgin, chromolithograph printed on coated paper. Treatment included two-layer inserts.


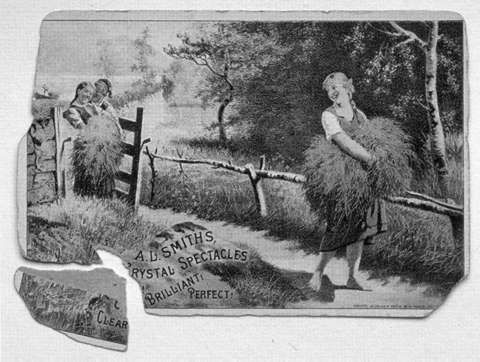
Fig. 28. Before and after treatment, trade card for A.L. Smith's Crystal Spectacles.
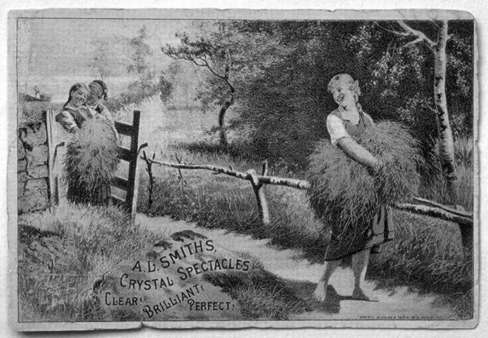
Fig. 29. After treatment, trade card for A.L. Smith's Crystal Spectacles. Treatment included two-layer inserts, attachment of inserts and fractured corner using splines.
Notes
1. the development of coated paper for fine printing eclipsed the use of French velin papers or India papers that had been used for high resolution printing and art reproduction until that time. C. Pieske. 1988. Bilder für Jedermann, München: Keysersche Verlagsbuchhandlung. 119.
2. P. Marzio. 1979. the Democratic Art, Boston: David Godine. 78.
3. E. Sutermeister. 1951. the Story of Papermaking, Boston: S.D. Warren. 170. 4. R. Mosher. 1952. the Technology of Coated and Processed Papers, New York: Chemical Publishing Co. R. Prosser. 1989. "Pigment Coated Papers", Modern Art: the Restoration and Techniques of Modern Paper and Paints, Proceedings of a conference jointly organized by UKIC and the Museum of London, May 22nd, 1989. 8-12. D. van der Reyden, et al. 1993. "Pigment -Coated Papers I: History and Technology", Preprints, 10th Triennial Meeting, ICOM, Washington, D.C. 22-27 August.
5. E.J. Labarre. 1952. Dictionary and Encyclopedia of Paper and Papermaking, London: Oxford. 48.
6. C. Pieske, . 1983. Das ABC des Luxuspapiers, Berlin: Dietrich Reimer Verlag. 294.
7. F. Hoyer. 1941. Einführung in die Papierkunde, Leipzig: Hiersemann. 160-1.
8. K-14, Paper Nao, 106g/m2, all kozo fibers, sodium carbonate cooking, dried against wooden panel, pH 6.6.
9. Paper Conservation Catalog. 1994. Book and Paper Group, Washington: American Institute for Conservation of Historic and Artistic Works.
10. Rhoplex AC-234 and Rhoplex AC-73, Rohm and Haas, acrylic dispersions (ethylacrylate, methylacrylate and methylacrylate copolymer), pH 6.5 (dry film), see PCC 46.3.3E.
11. RK-1, Paper Nao, 8 g/m2, kozo fibers, calcium hydroxide cooking, machine-made, dried against stainless steel, pH 7.3.
12. Acrylic emulsion paints: e.g. Winsor and Newton Artists' Acrylic Colors or Liquitex Artists' Acrylic Colors, color stability varies with the type of pigment, for additional information see the PCC 30.3.4F.
13. Liquitex Matte or Glossy Acrylic Medium, stability unknown. Discoloration formation of Liquitex acrylic media has at present only been linked to their application to unwashed canvas supports. See J. Hamm, et al. 1993. "The Discoloration of Acrylic Dispersion Media", in Saving the Twentieth Century: the Conservation of Modern Materials, Ottawa: Canadian Conservation Institute. 381-392.
14. Acryloid B-72, Rohm and Haas, acrylic resin, ethylmethacrylate methyl methacrylate, pH of 6.4 (dry film), see PCC 46.3.3D.
15. Mayer describes dispersal of dry pigments in distilled water. Use an appropriate solvent in place of water for pigment dispersal prior to mixing into a nonaqueous binder. R. Mayer. 1991 The Artists' Handbook of Materials and Techniques. 5th ed. New York: Viking Penguin. 334.
16. C. Pieske. 1988. Bilder für Jedermann, 119.
Mary StudtPaper Conservation Laboratory
Colonial Williamsburg Foundation
Amy Fernandez
Advanced Intern
National Park Service
Irene Brückle
Professor of Paper Conservation
State University College at Buffalo
Publication History
Received: Fall 1997
This paper was submitted independently by the author, and was not delivered at the Book and Paper specialty group session of the AIC Annual Meeting. It has not received peer-review