Joint Tacketing: A Method of Board Reattachment
by Robert Espinosa and Pamela BarriosIntroduction
One of the most common and vexatious conservation problems in all library collections is the steady stream of well-used books with broken or detached covers. In all books, the part of the binding that bends when the covers are opened is the principal point of wear and consequent failure, resulting in cracked or broken joints. Books with damaged joints are frequently restricted or withdrawn from use because the cover(s) may be lost and the text is not adequately protected. Because there are large numbers of books in circulating collections and rare collections that suffer from this problem, libraries face a growing backlog of unusable books.
The challenge for book conservators is to devise a repair method which can respond to the magnitude of the problem without sacrificing quality. The original joint materials, the sewing supports and covering leathers, are often in a deteriorated and fragile condition. To restore a functioning joint requires the replacement of one or both of these components with similar materials or materials which can simulate the function. Among the methods used to repair books with broken joints, some are quick and relatively simple to execute but do not produce long lasting results (inner paper hinges), while others produce good results but require sophisticated techniques which are time-consuming to execute (various re-backing techniques).
This is a report on a joint repair technique which is efficient to execute but produces a very strong re-attachment of the covers. It is applicable to both hollow-back and tight-back structures, but is not intended for case-bound books. This technique restores full movement to the joint without sacrificing the strength or aesthetics of the original binding. It is based on a method described and illustrated by Tony Cains in the publication on the Long Room Project at Trinity College, Dublin, and has been mentioned at several conferences by Mr. Cains, although it does not seem to be widely known or used[1]. Having now employed it with some modifications for hundreds of books with broken joints, both in rare and circulating collections, we believe it is important to publicize this technique and illustrate the procedure.
The method has been dubbed "board reattachment with joint tackets" because the covers are tacketed or tied directly onto the book at the joints. In effect the original binding method is reproduced by simulating new slips. These slips are tacketed to the shoulder of the textblock and laced through the boards. They are tied-off on the inner board in a simple square knot. This restores the original movement of the boards because the anchoring points are at the apex of the shoulder. The beauty of this repair lies in the strength of the board attachment compared to the modest investment of time and materials, and the ability to reinstate function with a minimum disruption to the original materials.
| 
|
| Figure 1. A circulating volume | Figure 2. A rare volume |
Technique
When the spine is easily exposed (hollow-back structures or loose covering material on tight-back structures), the spine is consolidated.
Place the textblock in a press.
Clean and shape the spine.
Line the spine with linen cut the exact width of the spine with paste or gelatin.
Allow the spine material to dry completely before removing the book from the press.
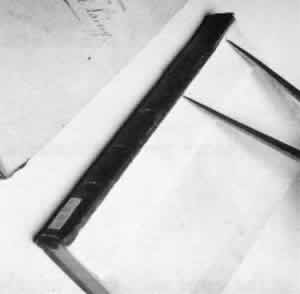
In the event that lifting the entire spine material is difficult or time consuming, small "door like" openings of material can be lifted in the location of the new tackets (Figure 3).

Figure 3
Make a cut into the leather about an eighth inch below each new tacket station and about a quarter inch long onto the spine from the shoulder of the book.
Make a second cut at a right angle to the first towards the head about a quarter inch long; lift the leather within the l-shape to expose the spine.
If the leather is very brittle, reinforce it before lifting with a Japanese tissue facing (Klucel G works well and the tissue is easily removable after the repair is completed).
If the spine material refuses to budge without extensive powdering and flaking drill the holes through the spine leather; the loop of new cord can be left exposed on the outside of the spine and dyed or colored with acrylic paints to match the leather on the book; frequently, this camouflage is tasteful and unobtrusive.
A Japanese paper hinge is tipped onto the shoulder (Figures 4 and 5).
The tissue should begin at the apex of the shoulder and extend toward the foredge. Small holes will be drilled at the shoulder through the tissue and the tissue will later be folded back to cover the new tackets.
| 
|
| Figure 4 | Figure 5 |
Small holes are drilled through the shoulder with a jewelers drill at appropriate locations, the number depending on the size of the volume (Figures 6 and 7).

| 
|
| Figure 6 | Figure 7 |
The positions for the holes for the new tackets should be approximately a half inch from the head and tail, but placed not to interfere with the kettle stitch. The other holes should be roughly equidistant from each other, but again not interfering with existing sewing or cords.
There is a large assortment of jeweler's drills which can be used to create the hole. We find those in the 1 mm range the most useful (#57 through #61).
Drill the holes through the textblock at the base of the shoulder and exit about one quarter to one half inch into the spine, depending on the depth of the shoulder.
A loop of heavy linen thread is pulled through the holes using an improvised wire needle threader with open ends. The loop is cinched to the shoulder leaving two tails which are used as the slips to lace the board on (Figures 8 and 9)
The linen thread used for the new tackets can vary in thickness depending on the size of the book, but 16/4 thread is a useful size. The l mm drill seems to provide a hole small enough so that the thread is wedged into position.
An improvised threader can be made by stripping the middle section of a 14" length of covered steel wire down to one or two strands. This section is fed through the holes. The unstripped covered wire at the two ends make handles to pull from.
Use the threader to pull the thread through the holes, leaving a loop at the shoulder. The open-ended threader can be removed from the loop.
Pull the tails of the cords through the loop, and tighten so that the knot sits on the apex of the shoulder.

Figure 8

Figure 9
The boards are drilled in corresponding locations with two diverging tunnels from the upper back edge of the boards through to the inside (Figures 10 and 11). In cases where a more aesthetic result is warranted, lifting the pastedown facilitates hiding these holes (Figure 11).
Mark the board for corresponding holes.
Place the board in a press, with the spine side up and the pastedown away from you
Drill the holes from the edge of the board just under the leather and exiting through the pastedowns about one quarter inch below the board edge.
Drill two holes for each tacket (the tackets have two tails), angled away from each other so that the exit holes are at least one quarter inch apart.

Figure 10

The two threads for each attachment station are laced through
Figure 11 their respective tunnels and tied off in a square knot (Figures 12 & 13).

Figure 12

Figure 13
Pull the threads through the board using the threader and tie them in a square knot; some of the board may be judiciously cut away, leaving a trough for the knot to be recessed into.
When tying the knots it is important to hold the boards at about a 120 degree angle to the textblock. Because the thread will stretch a little, the boards should not he totally flat on the textblock initially.
Putting down the inner Japanese paper hinge creates a more aesthetic repair, even on circulating books (Figures 14 and 15).

Figure 14
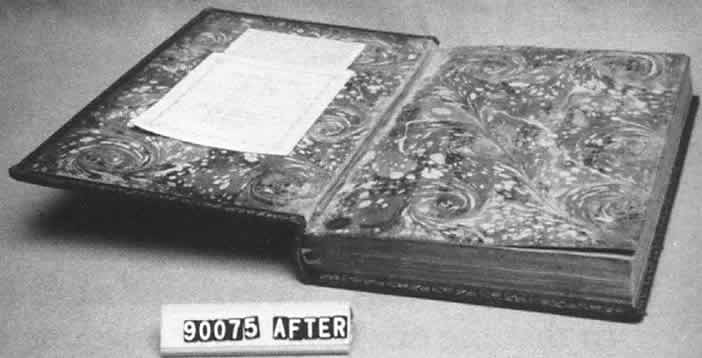
Figure 15
With more valuable books, the outer joint can be covered with a thin leather overlay (Figure 17). Since refinements which camouflage the repair are more time consuming, there are volumes which do not warrant this effort (Figure 16). The final outcome is a strong and functional repair, whether or not more aesthetic refinements are employed.

Figure 16

Figure 17
Robert EspinosaConservation Department Chair, Harold B. Lee Library
Pamela Barrios
Assistant Conservator, Harold B. Lee Library
Brigham Young University
Publication History
Received: Fall 1991
This paper was submitted independently by the author, and was not delivered at the Book and Paper specialty group session of the AIC Annual Meeting. It has not received peer-review